Sculpting Tools For Prosthetics
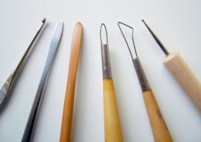 Sculpting tools are many and varied. I have bought – and made – a fair few too many over the years simply because I like them.
However, there are only really a few sculpting tools that you need despite all the choice available. Here I cover what you will actually want to simply start sculpting.
Tools are used to perform four basic tasks:
- To add stuff
- Take stuff away
- Move stuff
- Make marks in stuff
Some of this can be done with your fingers, but often you need something harder to bully the plastiline into the shape you want and get a wobbly-free surface. Most prosthetic sculpture is done using an oil-based clay known as plastiline rather than a water based clay (such as a potter would use).
Many of the tools used in sculpting prosthetics may be found in an arts & craft suplliers or maybe a potters supplier, but some are found only at sculpture supply stores. It may be that you need to shop around and many have websites.
The tools described here are the smaller versions for sculpting prosthetics, but they are usually available in larger-scaled sizes for bigger work.
____________________________________________________
Wooden tools
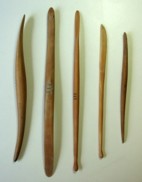
Usually have shaped ends to provide more scope for leaving marks in the material. The kind I prefer are simple boxwood tools with a flattened, rounded ends. Some have rounded, ball-type ends which are useful for interior hollows such as nostril and ear shapes. The flattened ends are handy for pushing wrinkles and lines into plastiline.
Wooden tools are easily re shaped and repaired using a sharp craft knife and wet or dry paper should you accidentally snap the tip off. It is a good idea to treat wooden tools with a preserving oil such as linseed oil, as the dry wood can stick to clays and stain easily. I will cover care and repair of tools in a future post soon.
____________________________________________________
Loop tools
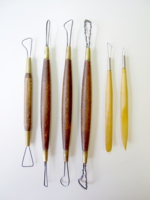
Loop tools are quite simply a loop of metal held in a handle, and there is great variety of what manner of loop to have in the handle. Usually they consist of a simple loop of round, hard wire such as piano wire. This does a great job of cutting out little scoops of material. However, this can be twisted to produce a more abrasive surface which can ‘rake’ the plastiline gradually.
A thin saw blade such as a fret saw makes a great little rake for larger areas, and bound bass guitar strings work well for finer stuff. (Click here to download the free tutorial 0n how to make these.)
____________________________________________________
Griffon hooks
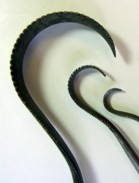
These little tools are great for carving imperfections out of plaster lifecasts as well as sculpting. The smaller versions are great for shaping and reducing, particularly for concave shapes which are harder to work otherwise.
____________________________________________________
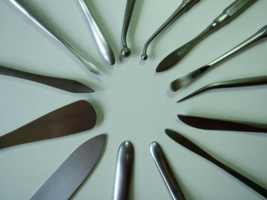
Steel tools – dental & wax
These little tools are great for making marks in the surface, such as pores and little dents. They are usually a little more expensive than most tools simply because they are stainless steel but are useful for working into plaster lifecasts as well as plastiline.
Wax tools are similar to the dental tools, except they are not usually stainless steel, so are susceptible to rust and tarnishing. They are usually heated over an oil lamp and used to work wax models for sculptures intended to be cast in bronze. The thinner bladed tools are great for thin lines and creases, and the pointed tools make excellent pore texture.
____________________________________________________
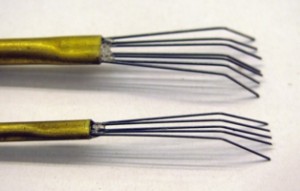
Surface rakes
These are usually home made but you can usually find the bits easily enough.
They are used to create a smooth, unified finish by gently dragging and scratching thin lines into the surface of the sculpt, just before you texture.
These are made from thin lengths of piano wire and then crimped into the end of some brass tubing as a handle. You can use a tuft of wire from a wire brush to do something similar, but I will cover making these in another post soon.
Most of these tools are not that expensive, only the stainless steel tools which are shiney and nice. (Hmmm – shiney!) These are more of a luxury item though, and you can certainly get by with just a small wooden tool, a small wire loop and either a bass guitar string tool or a little serrated tool such as a griffon hook to help refine.
| A few good suppliers that I have used include:
UK based suppliers USA based suppliers |
This is by no means a comprehensive list – there are too many all over the world for me to list here. If you want to check out more, Google ‘sculpture supplies‘, ‘clay sculpture supplies‘ and ‘pottery supplies‘.
If you are having a tough time finding a supplier or want more advice, please feel free to leave a comment below or email me and I will do what I can to help! If you know of a good supplier that I should include here, let me know and I will add it to the list.

Happy sculpting!
-Stuart
All material, images and text © Stuart Bray 2011

Pingback: Sculpting Tools For Prosthetics | - Cosmetic World
Thank you for sharing your collection of sculpting supply tools for prosthetic. This awesome and not any one can do that. Is is great! Please keep me posted! For your reference please visit this site: https://www(at)afasupplies(dot)com thank thank you.
Pingback: Making Tools | Learn Makeup Effects
hey stu nice work as always thanks for all your help and advice look forward to seein you one day cash flow permitting lol
Thank you Stuart! You’re the best!
Iris
Thank you, thank you very much for this information. This is the first time I read about sculping tools in a simple way.
Thanks for the great post!
Do you teach in the London School of Media Makeup? I really want to do the 3 month diploma!
Hi Rachel
I do indeed – I usually do three of the twelve weeks – casualty, prosthetic & baldcap weeks.
-Stuart
Awesome! I’m saving up for it at the moment…so hopefully see you there in like 10 years!! 🙂
Hi Stuart
Good as always 🙂 my first tools I had from dental practice 🙂 If they don’t need some instrument , they just simply throwing to bin 🙁 sometimes they just old and not good enough to be use as a sterile instruments by they perfect for sculpting 😉 and they
for free 🙂
I can’t wait for more of the series .
Best Regards
Dorota.
Hi Dorata
Of course – great idea. Making friends with a dental laboratory is a great idea. So long as they are clean, (the tools, not the people who work there – although that would be a bonus) those tools should be great for detail and creating textures.
-Stuart
😉
Ciao stuart..
vorrei sapere come posso fare per creare l’effetto degli occhi bianchi, se devo utilizzare delle speciali lenti bianche a contatto a copertura intera o c’è qualche altro sistema?
attendo una vostra risposta..
Cordialmente:
Bernardo Iuliano
Hi Bernardo
Using Balefish to translate (although translation sites always turn the text into Yoda-speech) I guess that you mean lenses to change eyes.
I personally do not handle anything that goes into eyes. I leave that to a specialist lens-tech such as Richard Glass at The Reel Eye Company.
You can of course buy lenses online and pop them in yourself, but there are naturally safety issues where performers eyes are concerned.
-Stuart
Stuart – this tool bit is wonderful! Very clear and concise. Love it. May I ‘borrow’ and credit you?
TODD!! I would be honored (deliberate US spelling just for you!).
Hi Stuart
Awesome! I’m so glad you are doing a series on sculpting! Can’t wait, been googling the whole week looking for something on sculpting and now youre doing it! Also, please think of doing a series on lessons on colouring and painting pieces, mixing paints,what you can use on what etc.
Thanks for the great articles
Vic
South Africa
Hi Vic
Will do – good idea. Thanks for checking my blog!
Stuart