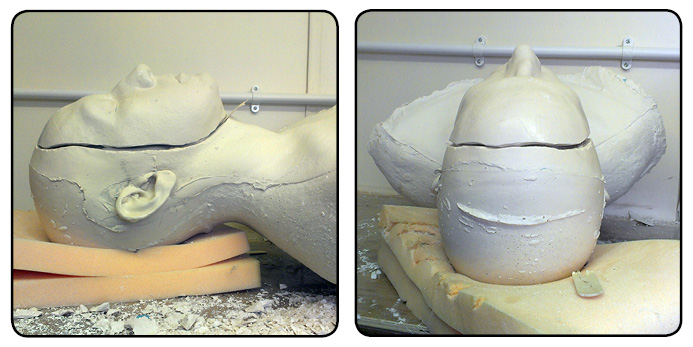
Fitting a new plaster face is easier than it sounds. Just needs a bit of patience.
I won’t bother you with details of the new life cast itself – it was just a cast of the face done with alginate, just as before. This time I was more careful when blocking the nostrils after removal.
This plaster was perfect, and I carefully removed and kept the alginate. I then trimmed the alginate edge with a sharp craft knife, and popped the plaster face back in again, marking the plaster along this neat trimmed edge using the knife again.
I then took the entire alginate and placed it onto the head cast with the distorted lip area, and once the alginate was sitting just right, I also marked the alginate edge on here with the knife too. With very little discrepancy, I can be pretty certain that both plaster faces are now marked in the same place all around the face.
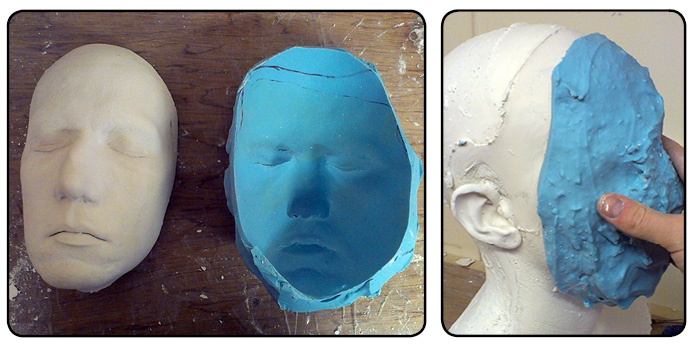
A plaster cast of the face was made, and the alginate carefully taken off in one piece. The outer edge of the alginate is trimmed neatly with a craft knife to give a definite edge where the cast stops. This is then transferred onto the plaster head with the distorted lip by placing the alginate on there.
Then it is time to use a hammer and chisel to take the face off the head cast, carefully following the marked line. This took about an hour, as plaster is quite soft for a chisel but you need to take care to not accidentally cut away part of the head you intend to keep.
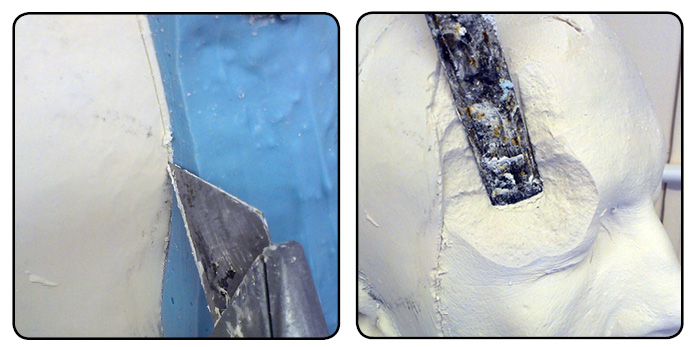
Using a craft knife, I mark the boundary where the alginate stops on both the face and the distorted face of the full head. Once this is made more positive with deeper scoring, I can start to chip the face off the head cast using a hammer and chisel. And goggles.
I use light strokes with the hammer at first to establish a neat edge, then got heavier as I got further away from it. It looks kind of scary, but is incredibly satisfying, and the pieces flake off easily under the might of a 16 ounce claw hammer. Huzzah!
For the sake of a better join, I carve neater areas out using various plaster–working tools I have, such as the rounded chisel (below) which cuts nice grooves easily. The inside of the new face was made thin and hollow, so it should fit over the lump of plaster I intend to leave in the middle here…no need to cut it flat all the way across. I want something to stick out so I can more easily join the new face on with plaster.
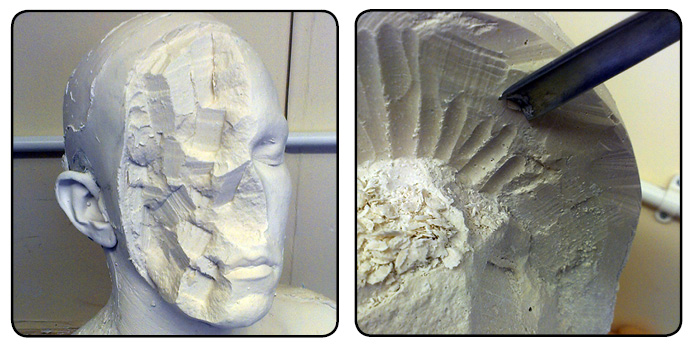
Careful chiselling and cutting back with plaster working tools create a neat edge for the face to butt up against for a reasonable close fit.
Using a knife to trim the new face back to the line, I carefully place the face on to check fit. There are a few places which need trimming back with the chisel on the head ‘stump’, but in a few minutes all is well and the face can sit in the correct place. The lines of the neck and face etc seem to align correctly.
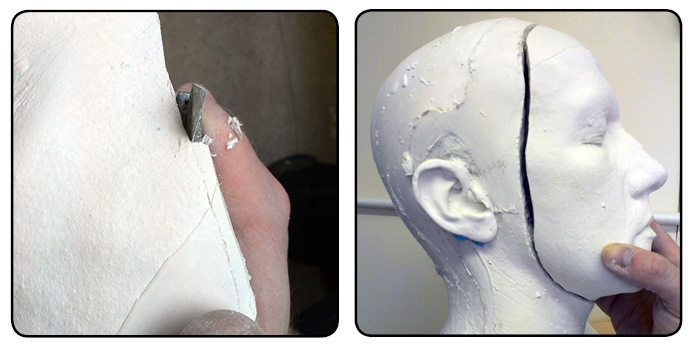
Trimming the new face edge back to the line is easily done with a strong craft knife. The face sits in the right place, and although there is some filling, it really aint a bad fit.
Just need to join these two halves now to keep it there. I soak the face and the head for a minute, to ensure the plaster is not too dry. As I am using plaster to attach this face, I don’t want the existing dry plaster to suck water from the batch I am about to add. It would weaken the mix and may cause the face to fall off during moulding later which I don’t want.
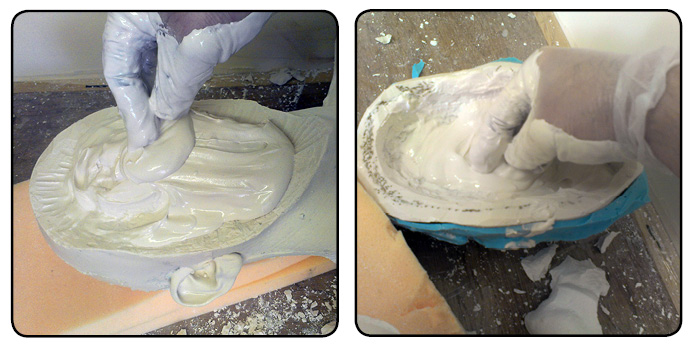
Plaster placed on the face 'stump' and inside the new face. That way I know there is plaster in contact with both surfaces for a better bond. Hopefully.
Then, I place plaster on the face ‘stump’ and inside the new face, and carefully position it in place, wiggling it into what looks like the right position from both sides and from above. Obviously, this is best done with the head lying on it’s back so gravity works with me here. I use wooden tongue sticks to pack out the face to sit in the right position until it has set up.
Once this plaster has hardened overnight, I pop the head upright and it does indeed stay firmly in place. I do try to pull it away and it’s having none of it, so I dance the jig of merry-mould making and get ready to fit this onto a baseboard. I will show that on the next post.
Happy life casting!
-Stuart

