16-rob-smith-master-of-blood-pt-2Rob Smith continues his chat with me about foam latex, blood and other FX related goodies.

Also, Todd and I talk about our favorite podcasts, and whether or not the word ‘mustard’ is actually an expression.

Some news: Todd and I will be at IMATS 2017, 13th-15th Jan 2017. How about that?
(Check it out at imats.net/2017-los-angeles/)

You can also get the podcast on iTunes, SoundCloud, iHeartRadio, Stitcher, PlayerFM, MyTuner….I mean, we’re all over that interwebs. Subscribe to us on you podcatcher app, and get every new episode.

Email us at the usual address, stuartandtodd@gmail.com

Posted in Uncategorized | Leave a comment

Blood ! Podcast #15!


It’s something gets thrown around a lot in film, TV and theatre. There’s bad blood, good blood, mudbloods, blood thicker than water and blood brothers. 

This episode we’re talking about blood, and our guest this time is Rob Smith, blood master as well as an all-around effects bod. He also runs a lot of foam, and makes exquisite soft foam appliances which you really need to feel to appreciate.

He makes his own pieces but runs a lot of foam for other people, and you’ll certainly have seen his work if you’ve been to the cinema in the last few years!

Blood needs to be a number of things:

  • The right colour
  • The right opacity
  • The right viscosity

It also needs to be:

  • Safe to use (skin, mouth and costume)
  • Easy to clean up

As a product, there are lots of different kinds of things which can be classified as blood. For example, blood as a real biological product does things – like clot, dry, separate, form scabs and flake once dry.
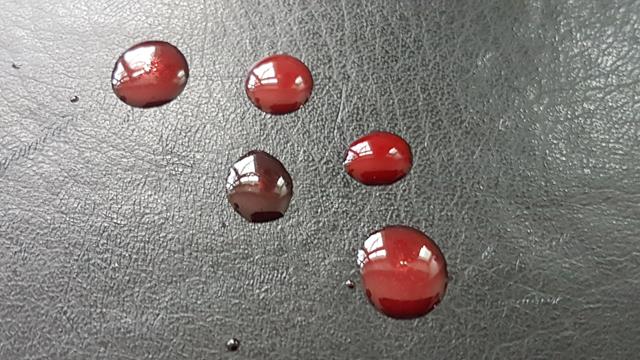
20161110_144850-copy

One of these blood drops is real!

An artificial blood won’t do that, so to create all these different possibilities, there are blood effects products like the standard liquid, flowable blood that comes directly out from an opening in the skin to ‘clotted’ blood, scab, wound fillers and pastes.

Often these are made from the same sugar or corn syrup base, thinned with water or thickened and then coloured with food grade pigments to an appropriate shade. However, as convenient and mouth safe as that may be, it attracts flies especially when shooting in warm climates.  Sugarless bloods, drying bloods which are alcohol based and even specialist bloods for use in eyes and mouth are available for use where appropriate.

All this means, of course, a large amount of product range, which we touch on a bit with Rob, who makes a lot of blood, but focusses mainly on the flowable blood which gets used in rigs to pump and splash around on set.


Blood Gags

I’ve done a fair few blood gags (a lot of necks, weirdly), that is makeup effects which use blood that gets pumped on cue, and thinning blood so it flows right under pressure means a fair bit of effort and testing to ensure it looks right.

The thing about a blood gag is figuring out what kind of tubing to use and where to put it – we could do a whole podcast just on the ins and outs of blood gags – but there’s all that stuff under the piece which needs to be right, and then the appliance over the top is just to hide that plumbing job underneath.

If blood is too thin and translucent then it doesn’t look right, and if it is too thick then it won’t move and spray correctly.  The fact it needs to travel under pressure, through various different tubes and connectors etc.  All that changes the way the blood flows, so knowing this and doing lots of tests to make sure you have a good idea about how that particular gag is going to work is important.


Interview with Rob Smith

blood-label-copyAnyhow, listen to some bloody wisdom from Rob Smith, which we recorded in his home.

It’s worth pointing out the guitar you’re going to hear is Rob, plucking away just for fun as he showed me his guitar collection hanging from the walls in the lounge.

Pretty cool stuff.

We chatted for a long while so I’ve split this up into two hour-long chats, and we shall release part 2 within the week.
img_9782

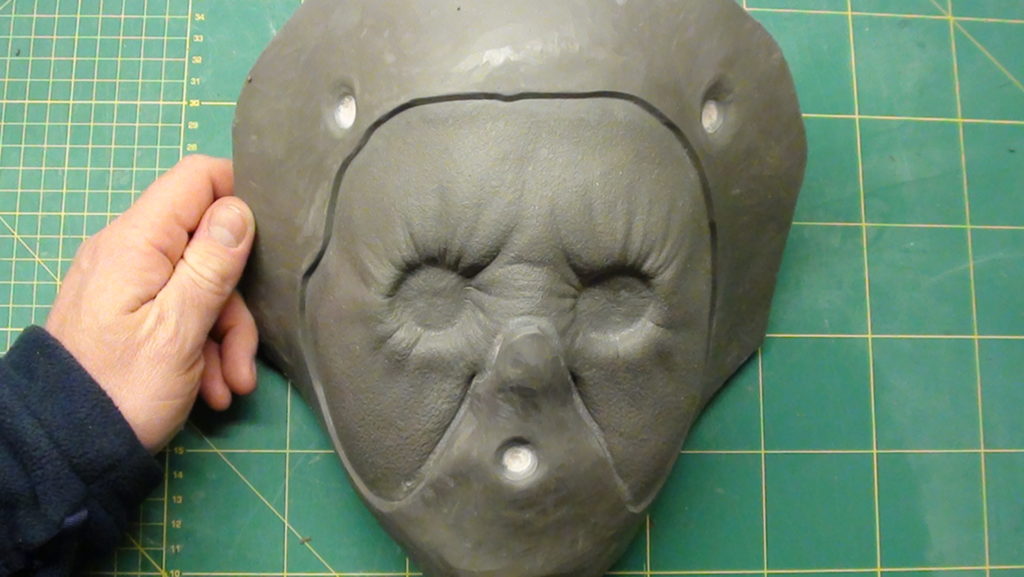
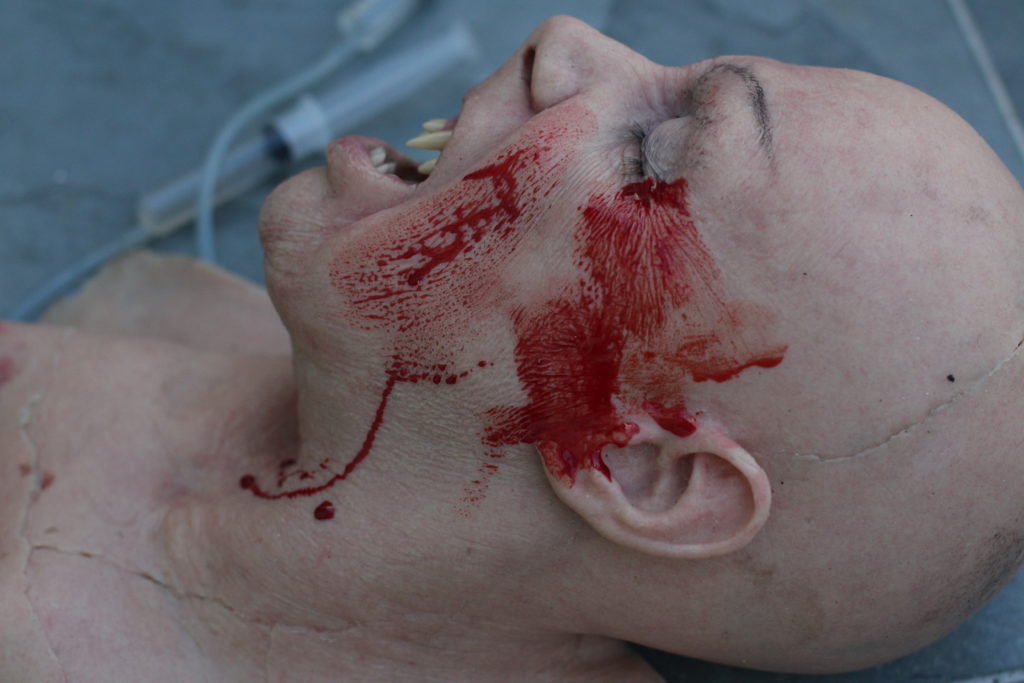
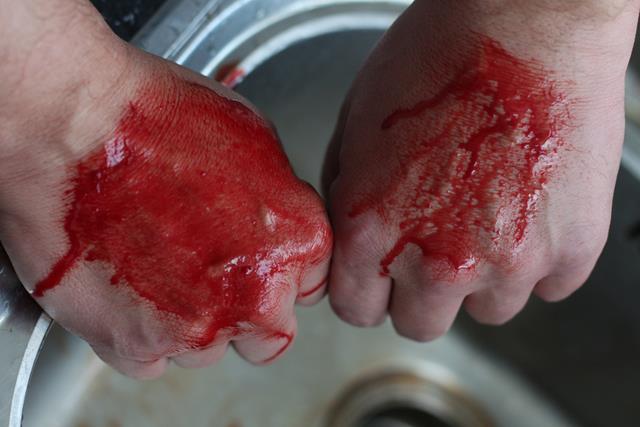
Rob makes a great blood for use on silicone appliances which flows and smears realistically and which doesn’t ‘bead’ up on oily surfaces which can happen with many water and syrup based blood. You can see which is which in this comparison!
img_9777-copy

Teaching & Learning Makeup FX

Being in Belfast this week teaching at Titanic Creative Management made me reflect on the various kinds of learning environments I see so I talk a bit about some of the issues I see in colleges, namely that the institutes often fail the tutors. They squeeze the goodwill and best efforts of many tutors and some don’t even appreciate the requirements of a course leaving tutors woefully unsupported.  I think many of the tutors do a good job despite their faculty rather than because of  it.

I have said before that makeup is often underestimated,  people may attend a makeup course because they themselves wear makeup so…how hard can it be,  right?

The majority of people I’ve met at colleges really do care about being there,  and some are outstanding. However, I’ve been to other places which felt like it was a crèche for big 20-year-old kids and you know that shit wouldn’t  truck if they were an apprentice.

I care about the craft side of things and I don’t want to see people wasting their time.  When college attendance is ruled by ‘do you have the money’ rather than ‘look, this is hard work…do you really want to do this?’

College makeup school tutors, I salute you.

There are people who just won’t turn up on time and who skip entire weeks, suddenly to return at the last minute as assessments rear their head. Then that poor tutor has to give up endless extra hours to mend that as best they can because the college took on someone that frankly doesn’t want to be there. If that was a freelance apprenticeship, I can just fire you for being shit.

If you’ve paid to be there, it shifts the power so the relationship between the learner and the teacher is transactional rather than one of mutual reliance. Read that original blog post here:  http://www.learnmakeupeffects.com/what-is-the-best-way-to-learn-makeup-effects/

There is of course nothing wrong to pay to learn, I myself pay to learn things and am glad I can do so. However, the people taking the money at colleges and universities are not directly responsible for dealing with the learners on a day to day basis. Private makeup schools, however, usually have a closer relationship with their attendees, and as such, I have seen a marked difference in attitude – they are there for a short time and really want to be there. I suppose also college is the first logical step after school, so many are attending fresh from a school education and are younger. I know I did!

This is what goes through my head when I get asked three times a week which college is best etc. or whether they should go private. It seems a college will provide an academic qualification, and that is the appeal to do that over a private course.

However, If a large portion of the course is endless theory which is not required on a set, you can become ‘qualified’ whilst being utterly useless. If you pump out thousands of students like that, that serves nobody except the facility which charged you a small fortune for the privilege.


Will Digital Kill The Practical?

Lots of people ask this question, and the changes are new relatively speaking so a thorough understanding of the future effect of it is not something any one person has a full explanation for.  The truth is it isn’t going away, it isn’t taking over everything and it isn’t something that you can’t take part in.

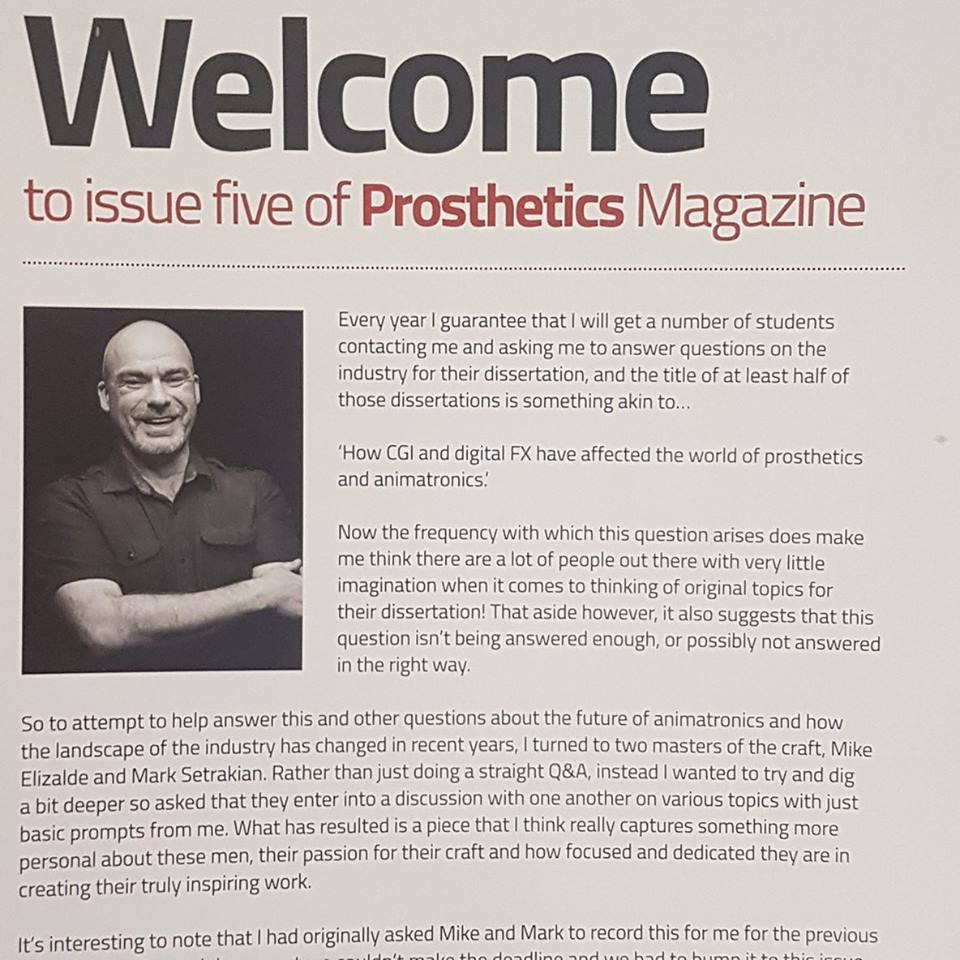
Lots of people are getting in touch and asking for survey responses, so it’s clearly a hot topic. It even made it to the editorial of the latest Prosthetics Magazine (well worth it by the way, I’d recommend it. Get yours here in print and digital: https://www.prostheticsmagazine.co.uk/ )
15151600_10155461995044112_2083832358_n

Transferable skills needed in both digital and practical work remain good basic abilities: good design, ability to render and understand anatomy, and using reference to constantly upgrade what you know. The computer doesn’t do it all for you – there is a skilled person behind the keyboard. You could be one of them.

There are a lot of areas which come under the digital umbrella, and the trick is to find a way in if you are interested. If you like sculpting then check out the digital sculpting programs and photo retouching is usually done in Photoshop. This is a paid for programme but you can still get CS2, an old version for free here: https://www.adobe.com/support/downloads/detail.jsp?ftpID=3466

Also check out the free image editing software from GIMP: https://www.gimp.org/


Digital Sculpting

Digital sculpting is changing a lot of things slowly, and programmes like Zbrush and Mudbox make it possible to apply the same editing qualities of a Word document to a sculpture. Clay is great and I recommend using it – you don’t need to choose just digital or just clay, I think using both is important. However, for no money at all, you can introduce yourself to the digital sculpting

To check out and download Sculptris: http://www.learnmakeupeffects.com/what-is-the-best-way-to-learn-makeup-effects/

The stripped down version of ZBrush is called Zbrush Core, so check that out here: http://store.pixologic.com/ZBrushCore/.

Keep on trucking! Remember you can get in touch through email on stuartandtodd@gmail.com, through our Facebook Page: https://www.facebook.com/stuartandtodd/ or comment on the blog post, http://www.learnmakeupeffects.com/rob_smith_pt1/

  • Stuart & Todd
Posted in Uncategorized | Leave a comment

Podcast #14 – Scanners & Schoonraads

14-scanning-schoonraads

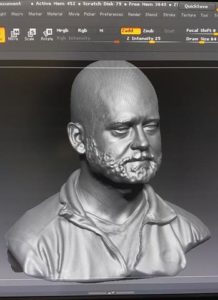
This podcast takes a little look at the influence of digital technology on the practical effects workflow.

Download it from Soundcloud, iTunes or play right here:

Bear in mind the problems we try to overcome – namely to create an illusion which appears real such as a decapitation, an injury taking place or some kind of transformation – these issues are the reason that we strive for new and better methods. That desire to create is the wind in the sails, and we have always used the best available to get that.

Digital has affected everything, every industry and we have changed along with it. Despite that, it’s a tool and one that many of the practical FX side view either with suspicion or glee. We wanted to chat about that and start a conversation about what it means and how we can work with it rather than against it. After all, I think that’s the ultimate fear, and I think it doesn’t need to be that way at all!

20161109_1434490_349x480

My head scan. Painless, but tragically accurate.

I talk with Steve Johnson briefly about his upcoming volume Rubberhead, Todd reveals his pixelated past and John and Tristan Schoonraad of Lifecast at Elstree studios chat about their 3D scanning work!

img_9746_640x427

Tristan Schoonraad creates art using 3D scans and plays with scale – miniature to massive with equal accuracy!

Email us stuartandtodd@gmail.com or drop us a comment on our Facebook page! Look us up under Battles With Bits Of Rubber!

-Stuart & Todd

Posted in Uncategorized | Leave a comment

Undercuts

post-adOne of the biggest tales among mould making folklore is the curse of undercuts visited upon unfortunate souls who failed to spot them.
I figured it would be a worthy subject to throw some spotlight on and look at what undercuts are, why they are a problem and what we can do about them.

What is an undercut?

Essentially, it is a shape which has surfaces not visible from a single angle. In itself, it isn’t necessarily a problem unless a rigid mould is being made of that undercut. Mould pieces are pulled away from their casts in a single direction, and if that undercut goes the opposite way to that direction, then you could be in trouble.

They can be slight or extreme, and most commonly in FX stuff it is down to the curvatures found in a shapes of the human body.

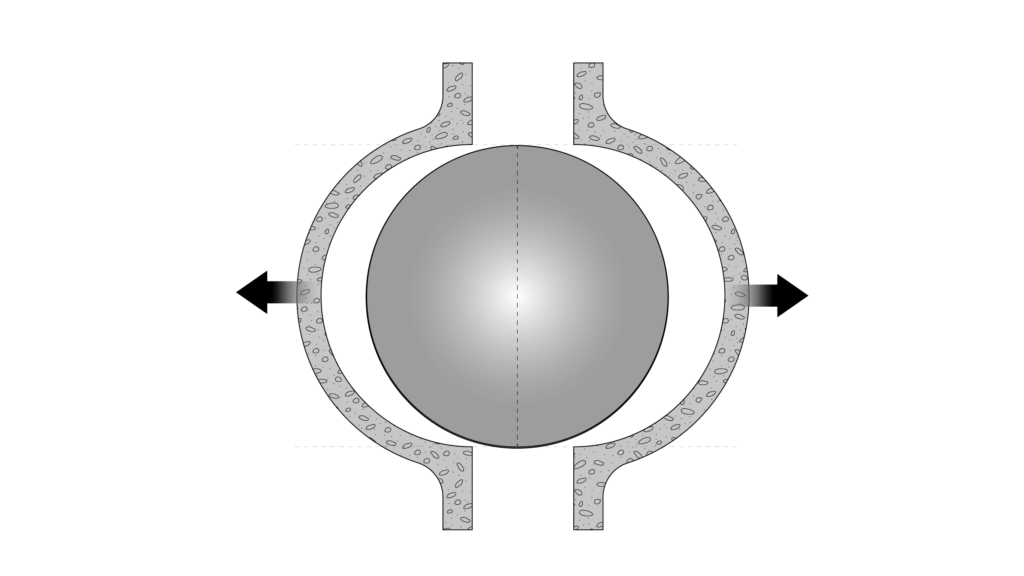
To demonstrate the principle, imagine for example making a plaster mould of a plaster sphere. In order to get the mould open and make the mould in as few pieces as possible, the mould would need to be in at least two halves, and those would have to be made to meet exactly in the centreline.

4-02

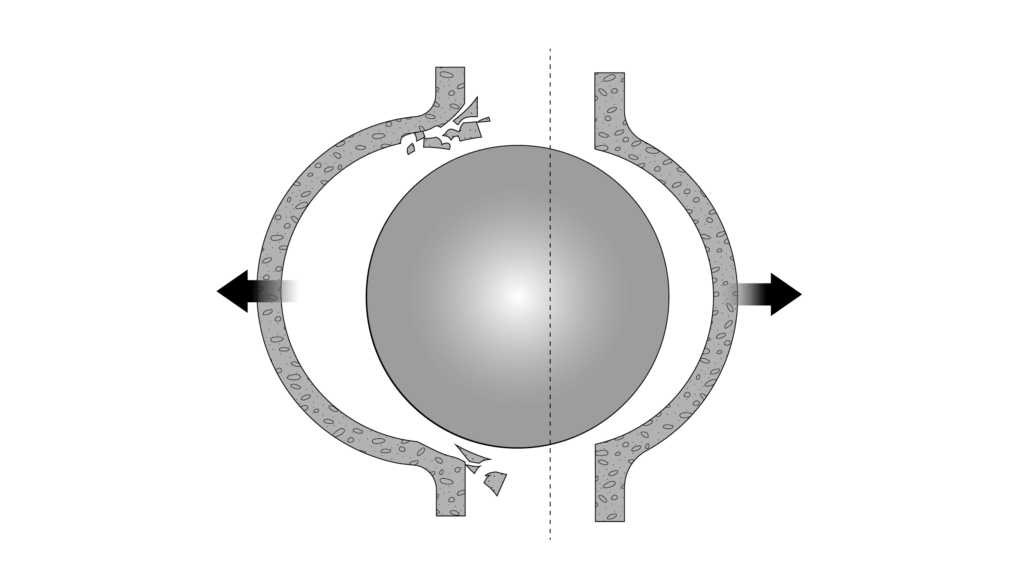
If one half was slightly larger than the other then one half of the mould would pop off whilst the other essentially was locked in, and either the mould or the sphere will need to break in order to separate them.

7-02

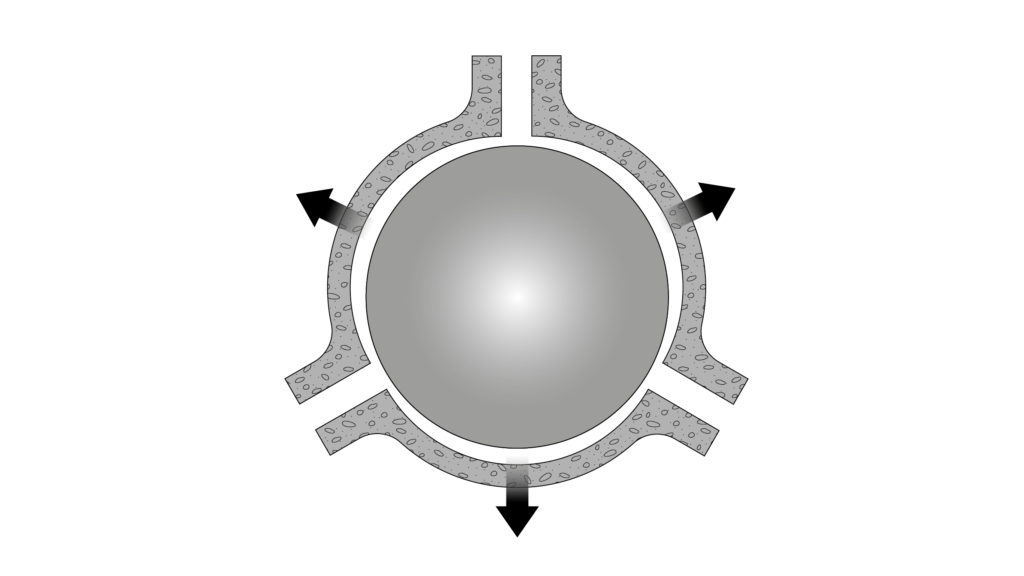
The alternative is make the mould in three or more pieces to make it much easier to open (more work and an extra seamline to fix) or to use a flexible material such as silicone which is able to flex and allow the pieces to separate more easily (extra expense and time). Either way, if there is an undercut then it needs addressing.

9-02

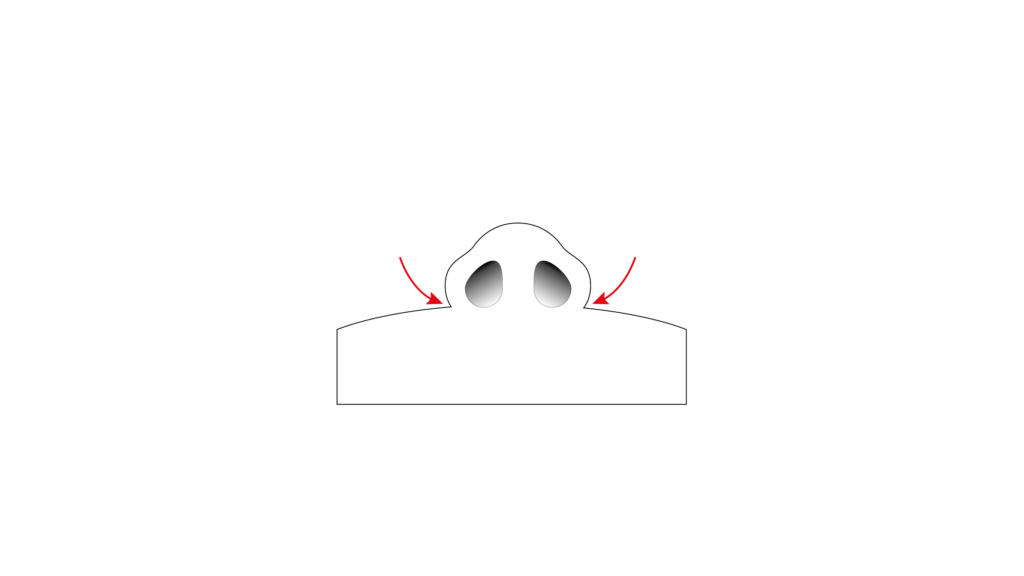
Common places for undercuts on a face can be on a nose, where the wings of nostrils flare out and then return to meet the cheeks and top lip. It’s possible a nose may have a more obtuse angle here and consequently present no undercut, but often this is not the case.

Even a slight undercut can cause rigid moulds to lock with something having to break in order to open the mould up, likely ruining the mould or pieces made from it. If the mould does finally open, then the broken areas will be seen in pieces cast from it.

15-02

Things than go ‘inwards’ on a positive such as a face cast will come ‘outwards’ on a mould of it, and these can be thin or fragile outcrops of material whose broken shapes will be visible in the appliances, usually meaning a do-over. Not a welcome prospect.

Anyone who has made a number of moulds will certainly have come across this phenomenon and hindsight is 20/20 so there are a number of strategies  exist to deal with them.

Solutions to the problem

Silicone

Naturally, the easiest is to make moulds of everything in silicone which can be soft enough to bend where rigid materials would break. This may seem like a logical answer and it may indeed solve some problems, but let’s not be so prescriptive about that.

img_20150402_175253

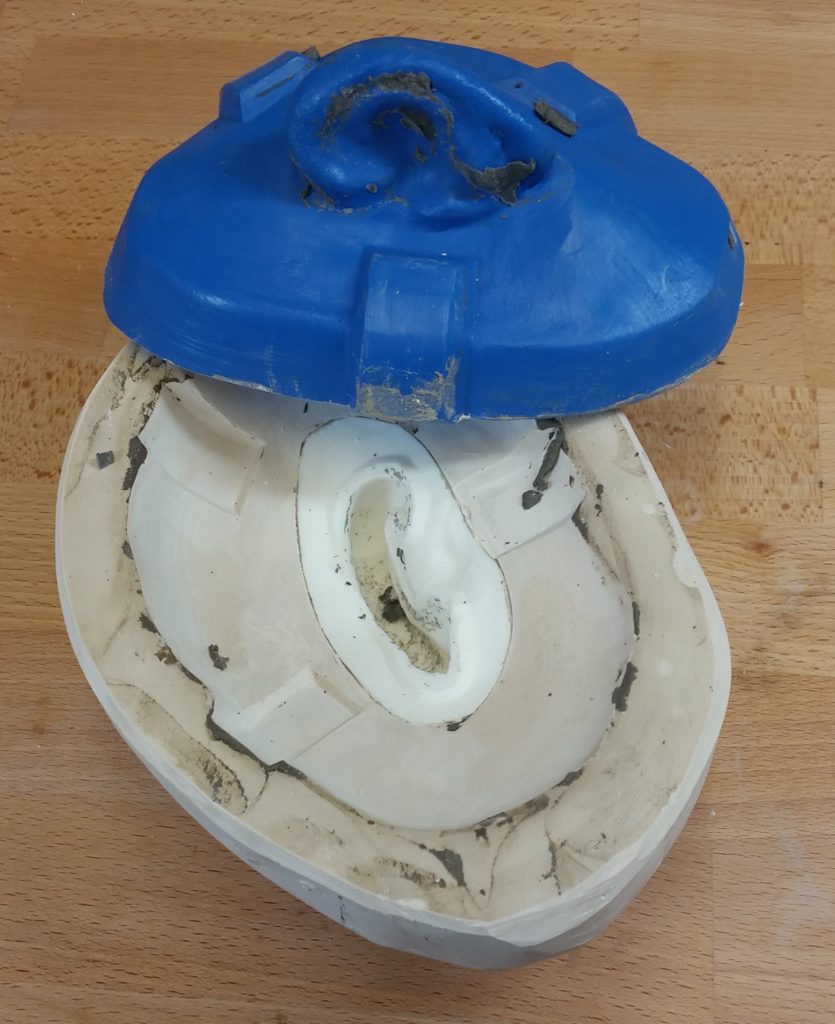
Ears are notoriously undercut with their many curves and indented negative shapes. Filling these in and remoulding them as simplified shapes helped make these ears pieces work well, especially with a silicone negative.

For one thing, silicone is expensive and often needs a supporting jacket to keep it in shape so it adds time, expense and possibly size to a mould – which if totally necessary is worthwhile. However, if something can be made quicker, cheaper, lighter and smaller without silicone then it isn’t a terrible idea to do so.

Possibly a silicone mould won’t work, as the piece in question may need to a rigid mould such as when casting latex pieces – plaster is used to cast latex because it is porous and absorbs the water in the latex – silicone moulds are waterproof and make casting latex pieces much trickier.

Also, it isn’t just about being able to open the moulds, it’s also about getting a mould to close without touching. The majority of silicone appliances need mould surfaces to be prepared with an encapsulant of some kind.

If parts of the mould smudge past each other on closing, you could damage that delicate surface and not know until you’ve gone through the process of running that appliance. Not until that material has cured and the mould opened will you know whether or not that mould is doomed to fail the same way every time.

Multi-piece moulds

Another is to make a mould in more than one piece to allow those pieces to be opened in different directions. This is often a tactic used, sometimes if there isn’t a major undercut because it simply makes it much easier to open the mould. The trade-off is that a seamline is inevitably created, (although a good mould will yield a thin seam which is of no major consequence).

It may be that a tight fitting or large mould requires a lot of pulling and prising to open, and these stresses on moulds can cause unwanted damage (especially if many casts are required from the mould), making a thin seam a fair price to pay for a much easier opening experience.

This is where good mould-making is a great asset in a work pipeline where multiple casts need extensive seaming. A good mould yields pieces which are easier to repair and so have a real dollar value in the long run.

Change the sculpt

Another is to sculpt in such a way so as to cover undercuts with the soft sculpting material. If making appliances then the pieces will likely be made in a soft material like a silicone gel or foam latex. Assuming the undercuts which are covered with sufficient thickness of plastiline cover the undercuts then the resulting appliances will also be soft enough to flex around any undercuts and there’ll likely be no problem.

Sometimes a sculpt is modified in order to address undercuts, and if increasing a thickness here or extending an edge there or cutting something back doesn’t compromise the design too much then it’s a perfectly sensible way of fixing that issue.

Also, any cutting edge or overflow clay which is laid down can fix the same issues – the thickness of the clay laid down can cover minor undercuts just the same as a sculpt. The principle remains the same – the mould doesn’t get to meet the cores surface at a point where an undercut would be created.

Modify the core

Finally, and possibly my favourite, is to fix the core before sculpting begins. This may involve taking a tool to scrape away the plaster on overhanging eyelids extended to the weight of casting material used during the original lifecast.

It may involve filling in nostrils with clay, flaring out necks or extending sections in order to provide a flat and smooth area to put keys, bolt holes, touchdowns, pry points or whatever else may be necessary to make a mould work well yet would otherwise be tucked around the back of  a shape and would make opening tricky.

dsc00037

Clay added to the plaster original creates a flared out area. Mould this to cast out duplicates with a flat area built in to place keys, overflow and pry areas later.

dsc00212

This is often a great way of taking the problem away early on (although admittedly at more time and expense as a mould is then usually required of this modified version) as the mould is then made purposefully from the outset to function at its most efficient.

Being able to get a piece out of a mould easily is a great feeling when THAT part of the process is at the tail end of a job when time is at its least available.

I’d rather over-engineer a core and make a piece fall out of the mould than rush through things and be praying every time it came to open the mould.

Usually, the solution is a mixture of these techniques, depending on what you have most of – time, money or nerve.

Have you had any howler undercuts in moulds? Have a cautionary tale?  Let us know and we can feature them in a post! Email us at stuartandtodd@gmail.com!

Happy Moulding!

-Stuart

Posted in Uncategorized | 5 Comments

Master Moulding – Part 2

You’ve got your original master plaster lifecast. Mould it, don’t drop it!

In the blog post from June, I took a look at prepping an original plaster life cast.  This post takes a look at the moulding part. We want to mould this plaster original so we can make more in different materials.

It’s often the case that many processes necessary in makeup effects and prosthetics are not immediately obvious when faced with the final makeup. The appliances on the skin are born out of various stages, and each one needs to be done right.

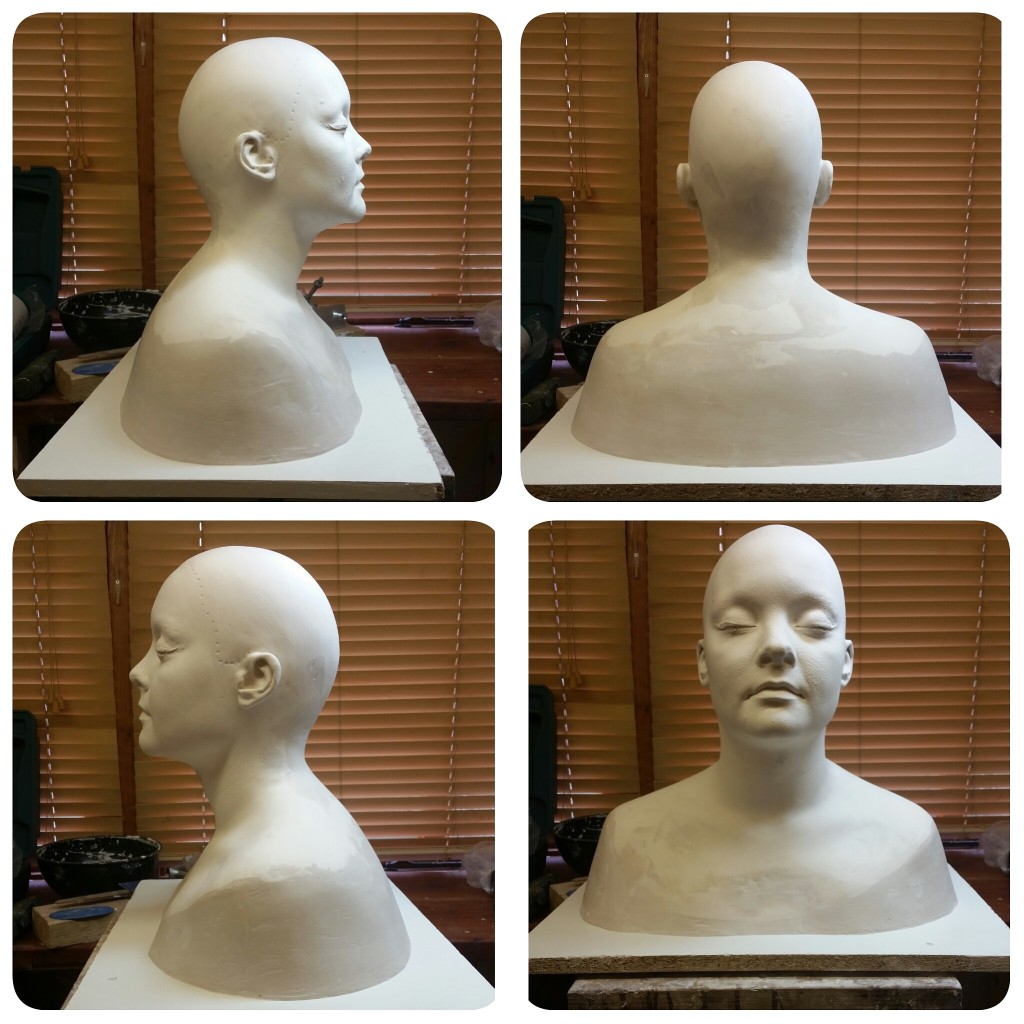
The head now fixed onto a baseboard and trimmed with every surface smoothed and perfected is ready for moulding. The usual way is to make a silicone mould with a rigid jacket, as silicone is typically the best material as not much sticks to it, so it’s ideal for making plaster and resin copies. However, silicone is also an expensive material, so on occasion, the back half of the mould is made from whatever rigid jacket material is used.

The back of the head is typically smoothed plaster, and there are usually few significant details on the back of the head and shoulders, so the silicone that would otherwise be used here is actually not serving any great purpose.

A series of videos and blog posts I did a while back documenting the process of making a fibreglass and jacket master mould of a full head and shoulders. I am working on a new mould using a slightly different method at the moment, so I shall feature this soon. However for now, please check out the video playlist (there are three videos) which also features workbooks that contain step by step information.

Part 1

Part 2

Part 3

In the UK, many master mould jackets are done using fibreglass and polyester resin. This makes a great lightweight rigid jacket which is very strong in thin sections, but it is also notorious for its persistent smell and messy working conditions. It can also be done using plaster (a strong stone such as Ultracal 30 in the US, Crystacal R or Herculite in the UK), a urethane such as Easyflo 120 mixed with Polyfibres or even an acrylic composite such as Jesmonite or AcrylicOne.

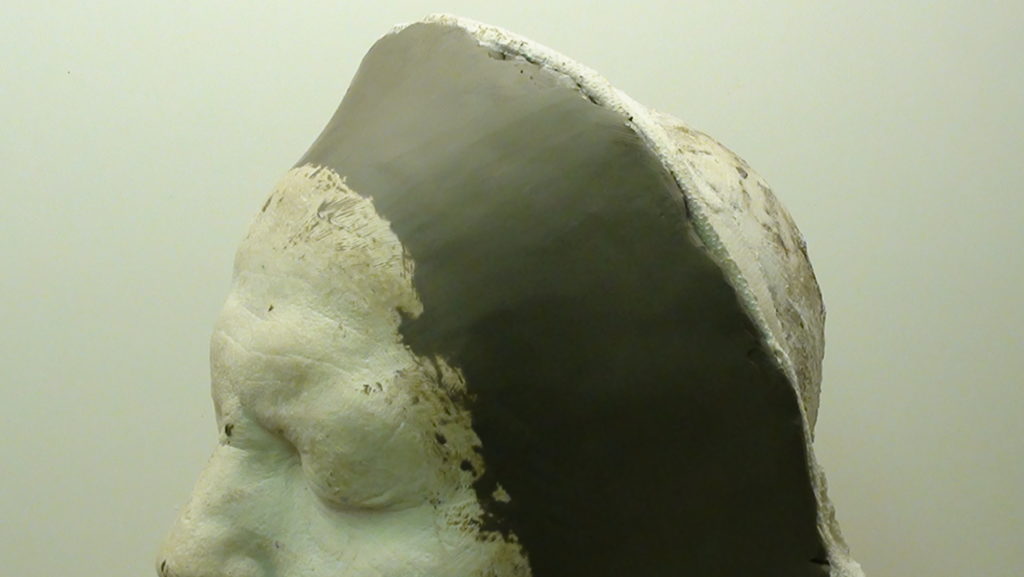
To get the best and nicest finish, usually the head is clad in a specified layer of clay (usually around 10 – 15mm thick) and all location keys are fitted on this original clay layer. Onto this is then layered the supporting jacket, usually in two or three sections to make demoulding  easy. It may seem a bit of extra work to make the jacket in more than two pieces, but depending on the shape and undercuts involved on the head, it may well stress the mould much less by being able to more easily pop the jacket off. Remember, you make the mould

Remember, you make the mould just one time, yet you may be called upon to cast many dozens of duplicates from it, so if any severe undercuts are observed it makes sense to be able to take apart the supporting jacket more easily to allow the silicone to be peeled off.

Once this material has set completely over this clay, the rigid jacket is then opened and the water based clay layer is removed. This may mean a good deal of scraping and digging to get every last bit out, but keeping this clay will enable us to estimate the volume of silicone which will then be used to fill it.

Check out the videos to see the process from start to finish. The detailed process is there in the video, but the downloadable workbooks are a valuable printable resource you can use to help follow along.

I’m in Glasgow at the moment, admiring the stone buildings that dominate the streets. I’m having a great time teaching a few classes here but the evenings will be decompression time, writing and podcast work. Stay tuned!

Stuart
stuartandtodd@gmail.com

Signature

Posted in Uncategorized | Leave a comment

Podcast #13 – Mitch at Brick In The Yard

13892312_10157532038500144_8219930485896811626_nBrick In The Yard isn’t the most obvious name to give to a successful FX material supplier.

There is a good reason for it though, as you will hear in this podcast.

Mitch Rogers is the evil genius behind Brick In The Yard (BITY), one of the largest suppliers of FX materials in Texas and from the store, they ship out all kinds of materials worldwide.

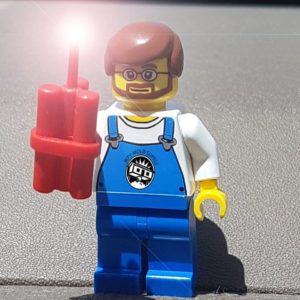
Mitch took some time to show me around the shop and hang out so we could talk Gorezone magazine, silicone babies, the craft of making moulds and the perils of homemade explosives.  And why they are not a good idea.

20160816_085749

The original ‘Baby Stinky’ puppet along with the ‘Stinky’ mask. Ad from Gorezone magazine.

Mitch has a great sense of humour, and the workshop is peppered with motivational posters and ironic stories, many of which stem from insane phone calls from – erm – dare we call them customers? (One demanded Mitch know that “This is create!!!” and that mental quote became a T-Shirt).

20160728_094628

One of many motivational posters you will see at BITY.

That’s how Mitch deals with insane phone calls. He either turns them into T-Shirts or posters, or (if you are a telemarketer with a moral compass as twisted as a barbed wire pretzel) maybe even on YouTube on Mitch’s prank call channel.

After all, if they have ruthless sales angles, Mitch (or more often his alter-ego Leroy Thompson) will take that call and wring as much out of it as he can. More often than not it reveals the despicable lengths they will go to make a sale.

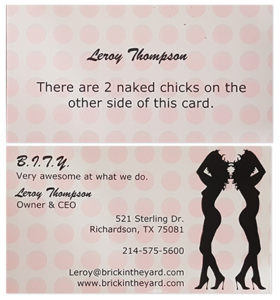
Leroy Thompson even has his own buisines cards. I stress, these are business cards for a fictional alter ego specifically created to deal with telemarketers.

Leroy Thompson even has his own business cards. I stress, these are business cards for a fictional alter ego specifically created to deal with telemarketers.

Leroy has a hand painte sign signifying his office domain. In here he may be found getting a little bump off the crustal meth.

Leroy has a hand painted sign signifying his office domain. In here he may be found getting a little bump off the crystal meth.

Anyhow, enjoy this almost two-hour chat we had at BITY! Listen or download direct from here or check us out on iTunes, Soundcloud, Google Play Music…just Google Battles With Bits Of Rubber. We’re out there to be found.

As always, email us at stuartandtodd@gmail.com

Remember – don’t play with fireworks!

Stuart& Todd!

Download strip

Posted in Uncategorized | 2 Comments

Foam Latex with Rob Burman

Rob wants you to work hard and be good!Rob Burman is a damned nice fella and kindly took some time to share some of his wisdom, and we are all grateful he did. Thanks, Rob!
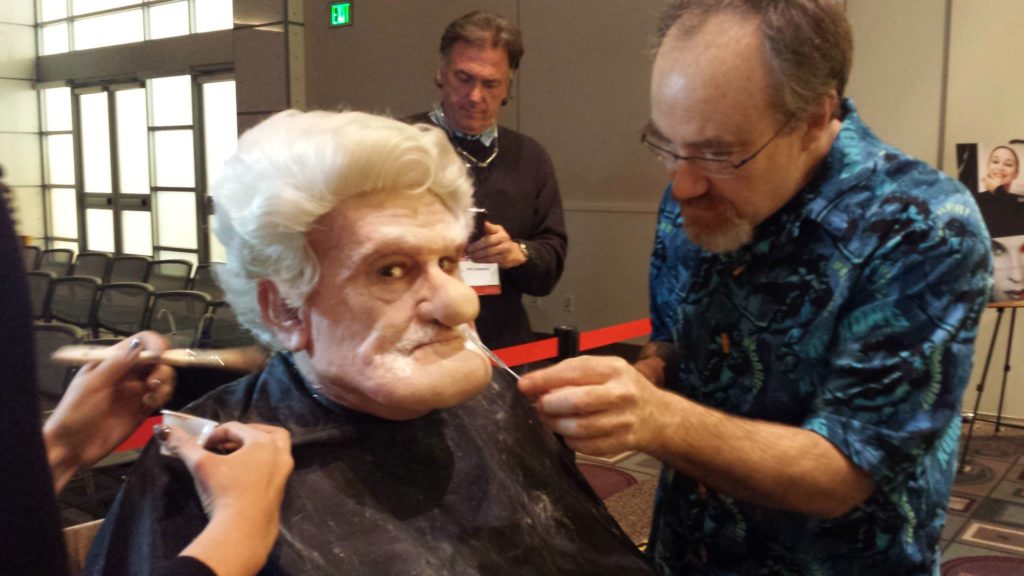
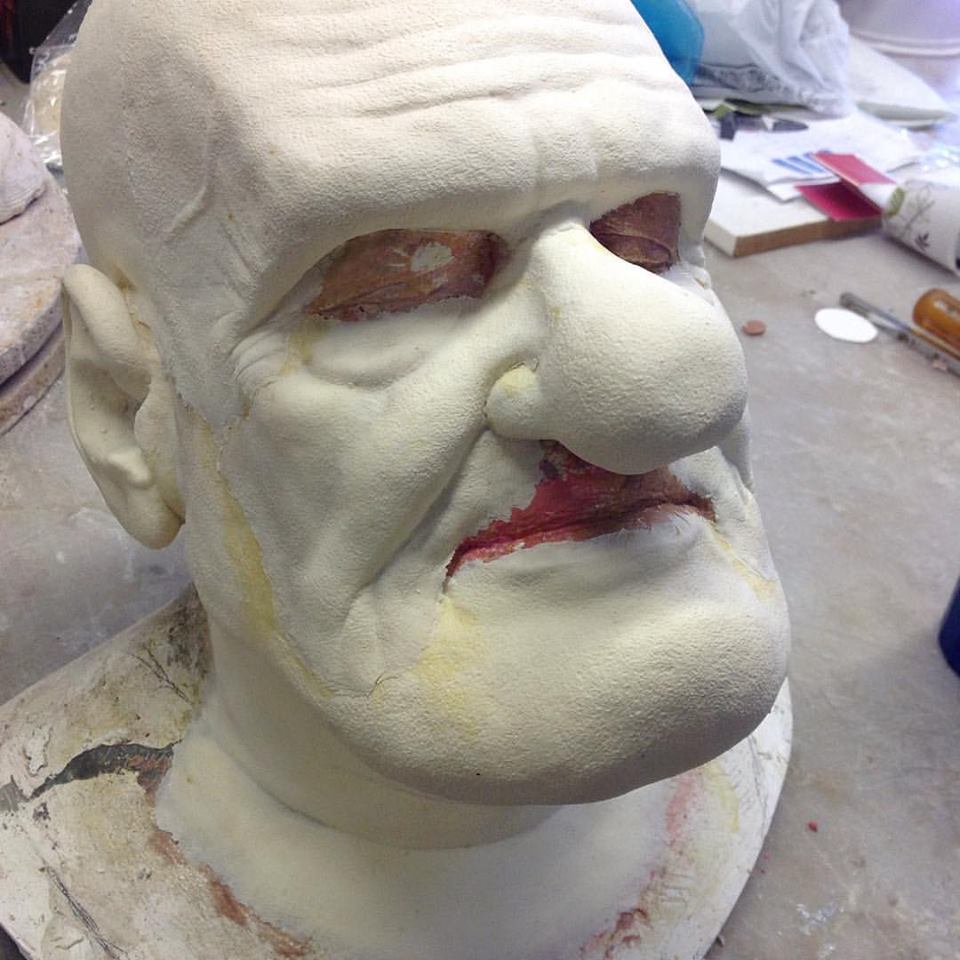
If you don’t know the name ‘Burman‘ then you must be pretty new to the FX world, because frankly the name is as synonymous with makeup and practical effects as The Rolling Stones is to music.

Rob is a third generation Burman, and the name is found in the credits of some of the most well-known horror and Sci-Fi movies ever shot. Being from the Burman legacy doesn’t get you a free ride though – this guy has forgotten more than many will know and has a hefty list of credits to prove it.

I mean, he worked on The Thing for crying out loud…

…and T2

…and Tremors

…if this doesn’t mean anything to you, then we can’t be friends. Just sayin’….

Even more, he regularly teaches as a guest tutor, demonstrates at trade shows like IMATs where he regularly blows everyone away with his larger-than-life characters (check out the ‘Carl’ makeup based on the Pixar movie ‘UP’) and has some excellent lessons on the Stan Winston School for Character Arts.

10911378_10152621949303837_5900795193574953632_o

Known as a great sculptor and teacher, he also has extensive experience with foam latex, which is what we focus mostly on in our podcast. Silicone has been the poster boy material for prosthetics for a while now, and it is an excellent material for prosthetics.

12994453_10154135915832248_2601559098756070365_n

However, foam is not such a squeaky wheel, and as such doesn’t get the oil. It never went away, and because of the skill and equipment involved in it’s manufacture, many makeup schools don’t cover it nearly as much as they should.


Rob has taught the manufacture and use of foam latex extensively, and his new laboratory workshops are certainly worth checking out if you are serious about FX! Check it out at Rob Burman’s Laboratory!

logoAlso, if you need pieces (but aren’t in a position to make them’ then check out Rubberwear, an extensive catalogue of ready-made appliances.

cooltext132964916368147


Rob is always busy working on something, so we were incredibly fortunate to have Todd grab him for an interview where he drops wisdom bombs like they were going out of style. Seriously, grab a coffee, download and listen to this guy because it’s worth every minute! Listen or download for free below!

As always, we like it when people say nice things about us, so if you enjoy the podcast then please share it with a friend, like us on Facebook and if you can, leave a short review on iTunes. Doesn’t need to be a lengthy paragraph, just a few words to show your support, let us know who is listening and it tells iTunes that we have an active community.

Multiple podcast Directories app

We are also on Souncloud, Google Play Music, Stitcher and iHeartRadio to name but a few – you can listen online or download to listen on a drive to work or walking the dog. Or whatever animal you may need to walk around the block.

Also you can email us directly on stuartandtodd@gmail.com!

Thanks for stopping by!
Stuart & Todd

Posted in Uncategorized | 1 Comment

Painting With Thomas Surprenant

13647002_10154530957964994_566632251_oThe last time we talked about making foam latex, the craft and materials involved in actually producing the foam. This time around, we figured it would be a good call to look at painting and art finishing.
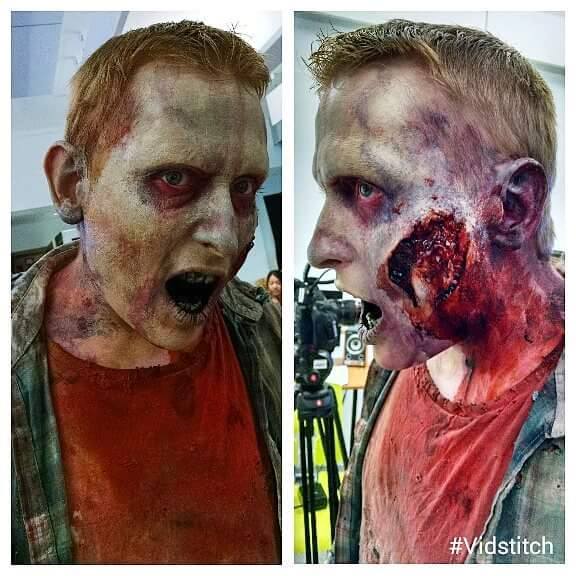
Now, there’s a lot of ‘how to’ info out there, but not a lot of ‘what to’ or ‘why to’. We wanted to dig a little deeper into thinking about painting and we have a guest today who really does do that.

Painting foam latex is different from painting skin or translucent appliances like silicone or gelatine, as naturally you have to create the appearance of translucency on something which is opaque. There is also the amount of light that is reflected with opaque paint jobs, the blending onto skin which is translucent etc… it’s not easy unless you know how, and you won’t know how until you get thinking the right way about it.


Listen and download below here or from soundcloud , iTunes or iHeartRadio!


Thomas Surprenant is long serving makeup artist with a hefty list of credits, from Deep Space 9, Donnie Darko, The Grinch, X-Men: The Last Stand….not only is he a working makeup artist but he also has developed his line of prosthetic paints and brushes which are  well regarded by the industry.

You know when Rick Baker calls you up to order some that you’re doing something right!

13900659_10154530793339994_1680025817_n

Dean Garner wearing some of his pieces applied and painted by Thomas for a demonstration in Birmingham.

A common theme with painters is an adventurous attitude, and not simply using a standard method. Naturally, you need to arm yourself with knowledge and practised skill to be amazing – but seeing as the time is going to pass anyway, it seems like a noble endeavour, wouldn’t you say?

11247538_1159573704059947_341336225_n

11392944_10153525305774994_1309694430456900217_n

As you’ll hear, his exposure to painting skills and a pragmatic approach combined with creativity produce amazing results, but more importantly than that you’ll come to see the depth of understanding required. It makes it attainable, and allows you to see what it is you need to be doing in order to get there yourself.

13874676_10154530953994994_1548714413_n

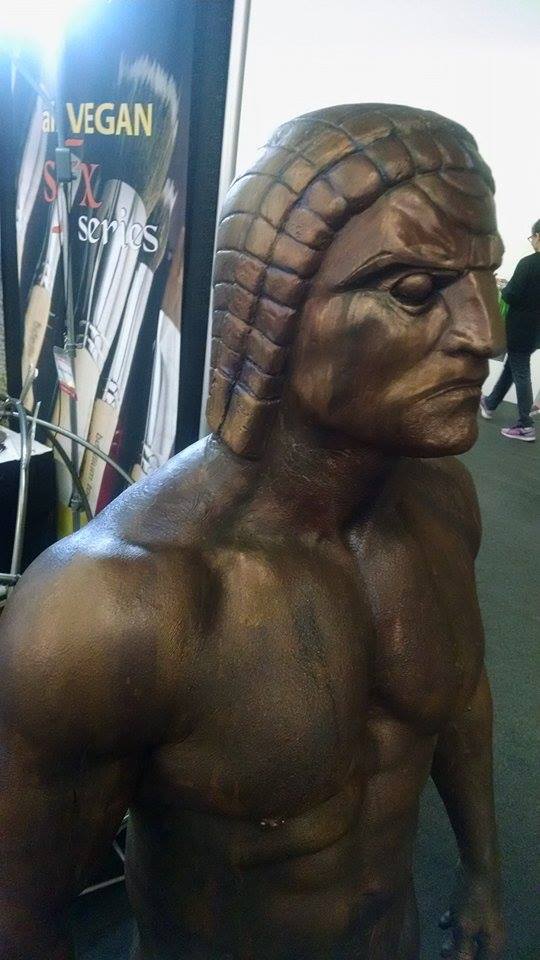
He is often demonstrating and teaching at trade shows and makeup schools and he has an excellent background growing up around the right way of thinking with regards to painting. A lot of his demos will reveal his painting background, such as recreating Harryhausen’s ‘Talos’ from Jason and the Argonauts as makeup or the Rockefeller ‘Atlas’ statue recreated again as a makeup.

We think you’ll enjoy this as much as we did. It was an education!

13874601_10154530959314994_1105252717_n


Thomas lists a fair few artists as inspiration, and although there are inevitably sinful omissions (we’d appreciate it if you think of some to add them as comments or email us to let us know!), this is a good starting point to grow an awareness of skilled artists whose work has helped set the bar.


It helps us out if you leave a review in iTunes if you use it, or tell a friend about us. If you have an FX buddy who hasn’t heard us yet then let them know, we’d appreciate it.

Untitled-2Also this podcast is now available on iHeartRadio, so look us up on there under ‘Battles With Bits Of Rubber’ or click on the link, and also our Facebook page. You can listen to us there and leave comments too!

Till next time!

Stuart & Todd

Posted in Uncategorized | 9 Comments

Foam Latex – It’s Smelly But Good!

Podcast #10 – Foam Latex: It’s Smelly But Good!

Foam Latex was the main material appliances and pretty much anything skin-like was made of for long time. It is only relatively recently that silicone has taken it’s place, and with good reason.

There are a lot of benefits to silicone as an appliance material, and because of these reasons it may be that if you’re new to makeup effects, you may not have yet laid hands on foam pieces..

It may be that you’ll never want or need to run foam latex yourself, but will apply a premade piece and we will look at that in another podcast, as this area deserves some thorough discussion. However, if you are keen to know more about foam latex then this podcast is for you.  Check out some astoundingly good ready made pieces from Roland Blancaflor’s RBFX studio.

Anyhow, check out and download our latest podcast on this from soundcloud or iTunes:


My first ever job was as a foam runner, and I spent three months mixing and running foam latex in the ‘Animated Extras’ foam room in Shepperton Studios in the summer of 1994. It was a smelly and messy job, but it taught me a lot about materials, moulds and how it all fits into the pipeline.

I cut my teeth on making and applying the opaque material, and when we started using silicone instead for the majority of pieces, it was a revelation to start with a translucent material.

Painting foam latex requires a different approach, as the piece needs to be the correct colour but the real challenge is to create the appearance of translucency.  Thomas Surprenant knows a thing or two about painting foam latex too – he has an excellent range of PAX paints for painting latex and foam latex pieces. Check them out here.  We’ll delve more into this later!

To help you along with this, check out these free resources you can download:

Download Todds notes.
Download Stuarts notes.


In product news, it’s well worth checking out the new cap plastic beads from Neills Materials. Check them out here.

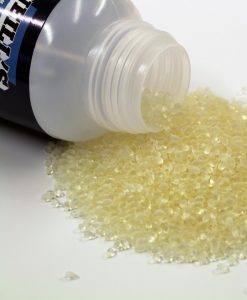
Neills-Materials-Key-Cap-Beads-01-247x300Essentially, cap plastic was always sold as a liquid and this made it a ‘hazardous’ item as far as air freight was concerned should the container leak. It was never an issue for us in the UK where we had things sent by road, but air freight made it a different issue.
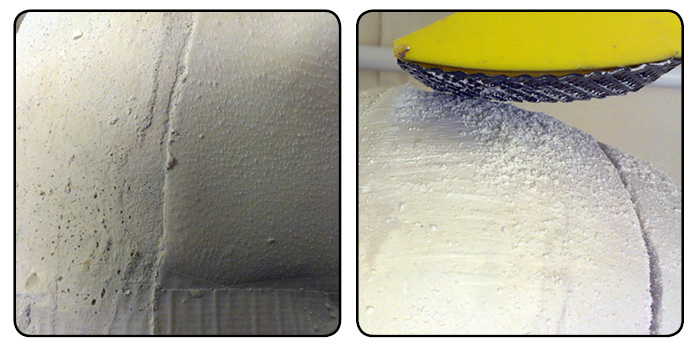
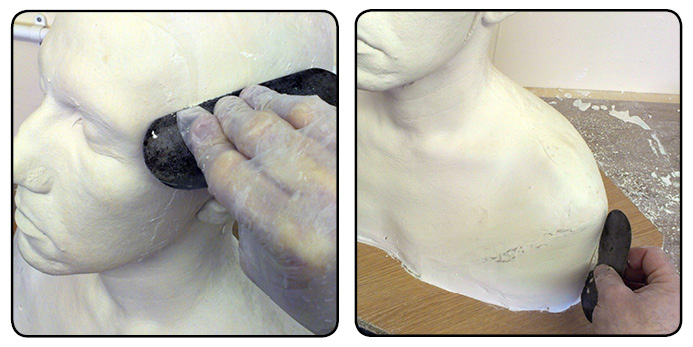
However, by selling the raw plastic bead with no solvents, you can now more easily get the beads shipped to you are then melt them in acetone you obtain more locally to make up your own cap plastic.

Also check out the new adhesives, PRO-KEY acrylic adhesive and SIL-KEY silicone adhesive with thinners. I’ve used these myself and tried them out on a few makeups and can vouch for their quality!


If you enjoy this and want to help support us, please consider these three easy (and free) gestures which would help us a lot:

1. Subscribe to us on iTunes or your favorite podcast app (for example Sound Cloud).

2. Leave a review on iTunes – it doesn’t need to be a lengthy paragraph….just a few words to say if you enjoy it is fine! It just lets iTunes know the audience are engaged, and tells would be subscribers what real people actually think of us. This kind soul did:

iTunes review - thanks Aceb85

3. Tell someone else about the podcast! Sharing is caring.

Thanks for listening!

Stuart & Todd
stuartandtodd@gmail.com

Posted in Uncategorized | 2 Comments

Master Moulding

Mater Mould IconWhat Is Master Moulding &
Why Would I Do It?

After you’ve taken a lifecast of a performer, you have a solid copy of their face.

This is presumably an accurate copy which has recorded the surface of their anatomy as true as is possible.  Are we to then leap straight to the joyous distraction of making your modifications – making the nose bigger, changing the chin, adding a wound or a scar, or completely remodelling their face to change them entirely?

Woah!  Hang on to those horses, sparky!

It is worth taking a moment to recall this original cast you took of the performer is a precious object – it is the only one you have and presumably it was gained at great cost.  Drop it and we’ve had it!

Each lifecast is a performance of sorts, and to have successfully arranged the appointment, secured the performer for the date, taken reference images and then successfully gone through the entire process without any howling errors, you’ve spent time and money on materials, workshop space and staff, and for your troubles you now have a plaster head staring back at you.

The solid plaster head cast out from the alginate or silicone was ideally a soft one to allow for the shaving down of unwanted artefacts collected during the casting process (such as air bubbles in the eyebrows, shapes of wrapped hair under the bald cap or seam lines) all of which will need fixing carefully so that the head is as clean, smooth and perfect as budget allows.

At the time of lifecasting a head you are primarily concerned with the performers comfort, maintaining clear breathing and usually focussing on the face – the part where errors would be most noticeable.  Wishing to do all this as swiftly as possible, you will inevitably collect some air bubbles or have a less than perfect area somewhere on the head.

With careful shaving with a succession of tools from coarse to fine, where once was bumpy back of head caused by bald cap wrinkles now sits a smoothed shape, accurate to the performers real dimensions – as measured by the tailors tape employed at the time of casting. To have the head sit square and level, you may need to chock up the shoulders and carefully replace areas with plaster or clay to extend right down to the flat and smooth board on which it sits.

So having achieved such success, you’re not going to unleash sculpting tools and possible damage on this unique and precious snowflake, are you?  I mean…the sculpting tools you use will certainly score the surface permanently. The powdery finish of soft plaster may cause wax based plastiline clay to simply fall off. What if you drop this head, or need to sculpt three different noses on the same character?

Nope – just like an original negative from a roll of film, you don’t work directly on this precious master original. Now you have this perfect head shape, it is time to make a master mould (usually in silicone) to allow copies to be made.

Now we can produce multiple versions in a harder plaster for sculpts to be floated/separated off at a later date or make lightweight versions for attaching finished appliances to for painting or shipping (air freight is rather expensive, you know!). Three people can sculpt different appliances on the same nose simultaneously. A copy can be sent to the performer as a gift, and we could even test makeups by applying to a copy of the head without the cost of booking the performer to thrash out paint schemes and best approach.

Oh, the possibilities!

Master moulding is an often essential process, and one of those ‘hidden’ processes which doesn’t get the attention it deserves. Much of the actual work in making these things is not a spectator sport. It rarely tickles the fancy of the behind-the-scenes film crews who are looking for a visually striking event to shoot.

However, just like the unseen hand-washing of a surgeon, the laborious preflight checks of a commercial air-pilot or a scuba diver learning their depth charts…those seemingly boring and uninteresting-to-a-witness activities are the backbone of said endeavour.

It’s an expensive thing to request a performer return to your workshop because you’ve ballsed something up, so it’s generally considered good form to avoid doing so. To this end, here is a step by step look at the process of preparing to make a master mould.

Check your reference images.
The human face is anything but symmetrical, and this may be more apparent in some faces than others. It may be one eye is obviously higher than the other, or than they are set so one is slightly more forward. It is for these reasons that it’s a good idea to take reference images from front, three quarters and side a well as from the rear and above. You want to be sure that if one ear is an inch higher than the other on the cast, it may just be so in real life…

Shave down any air bubbles, bumps and seams carefully.
The trick is to shave down only the artefacts such as bubbles etc. without actually damaging the surrounding texture or form of the cast. Chipping the worst of the plaster excess carefully away and then using abrasive tools such as rifflers or files to smooth out the plaster is the best way. Even abrasive papers such as ‘wet or dry paper’ can be used to finish off tool marks (I like 80, 120 and 180 grit).

Head cast32

Very large areas to be removed may need to be chipped away using a hammer and chisel, again take great care to avoid damaging the forms you wish to retain.

Fill any unwanted dips, holes or recesses.
There may be some obvious small air bubbles in the plaster which need filling, and many others may only appear once the surface is shaved or sanded down lightly. If carving away thick chunks of plaster, such as when removing a bulge from a ponytail of hair under the baldcap, it is possible you can go through the thickness of a hollow plaster.

Should this happen, repairs can be made by first patching from inside with scrim (a wide weaved fabric, also known as ‘jute’ or ‘burlap’) and plaster, allowing it to set, blocking the hole and preventing the next mix from falling through. More plaster can then be mixed to fill this hole.

Whenever repairing plaster with more plaster, it is advisable to soak the plaster head in water for a few minutes first. Dried plaster is highly absorbent and will readily steal the moisture from the fresh plaster added to it. Wetting the plaster just beforehand will reduce this effect and make repairs easier to do.

Head cast313

For small holes, a watery mix of plaster can be wiped into the surface using a damp sponge and wiped over with a plastic kidney or scraper (sometimnes known as a ‘busk’). As the plaster begins to set, continue wiping it down with the plastic kidney or scraper, and you should end up with a smooth surface.

Don’t try to repair every single hole in a single batch if you are not experienced in repairing plaster – accept that you’ll need to do it in a few hits allowing each to set before adding another.

To see a phenomenal lifecast balls-up which I had to fix by recasting the face, check out this post from a while back.

Prepare a board large enough.
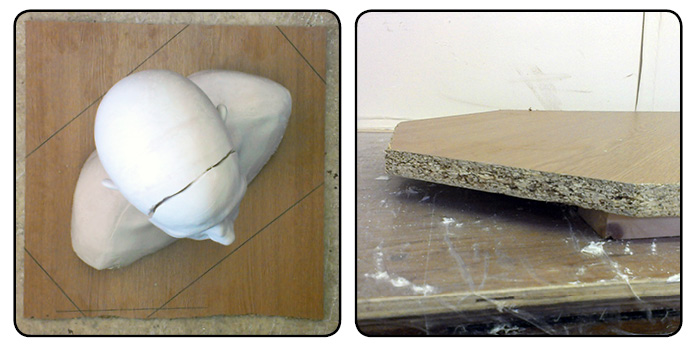
The ‘footprint’ of the cast is the shape it occupies as the plaster sits on a bench. A large cast of a head and shoulders will have a big footprint, but the board it sits on needs to be at least approx. 50mm/2″ larger than cast to allow for the mould which will be built on top of all this.  Think of it as choosing to wear stretch-pants at an all-you-can-eat-buffet.  Account now for the extra space you will need later!Head cast36

The board must ideally be non-absorbent, either melamine faced furniture board or plywood which has been sealed and waxed to stop anything from sticking to it. Another tip is to fix a couple of wooden strips underneath the baseboard so when the whole mould is finished and much heavier, you can easily get your fingers underneath to lift it.

Level and square up the head and shoulders so they sit straight.
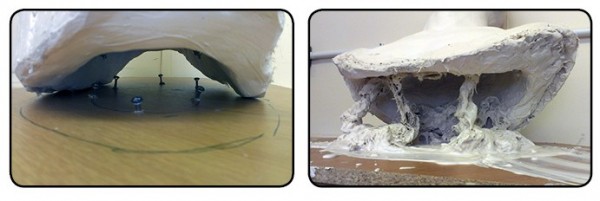
It is important to make sure the head and shoulders are sitting straight and level so the head appears natural. Usually a head and shoulders cast will extend further around the front and sides than the back, and the resulting cast will naturally sit at a peculiar angle.  To counter this, the head can be held upright on blocks, wedged to sit at the corrected position which you would judge by sight. Head cast38

Then, plaster and scrim can be used to fix the head in that position. By placing screws into the base board and the underside of the plaster cast with a short amount sticking out proud, you will have strong mechanical means of joining the two together. Once this initial plaster and scrim has set, the wooden blocks and wedges can be removed and the plaster can be dressed and smoothed out as before.

Have the plaster smoothed from the edge of the cast and straight down to the flat board. This will remove as many undercuts as possible and provide a smooth, easy-to-release-from surface.

Seal/release the surface.
The plaster, having been smoothed and repaired is now ready to mould. We certainly don’t want anything else sticking to it so the best thing to do is to apply a thin layer of release such as wax to help things. Being slightly absorbent, the plaster may simply soak up liquid wax release.

If this is the case, a thin sealer may be applied first, such as a layer of shellac varnish (aka ‘button polish’) or clear car lacquer spray. Then, once this has dried the release can be applied. The key word is to apply a THIN layer, so as to avoid filling in the details that the original cast has captured.

IMG_20150203_142542

Okay, so now your plaster head is pitch-perfect and ready, you can make a mould of it, which will be the subject of the next blog post!

As ever, comments below, on Facebook or emailed help make the blog better! stuartandtodd@gmail.com

Signature

Posted in Uncategorized | 5 Comments