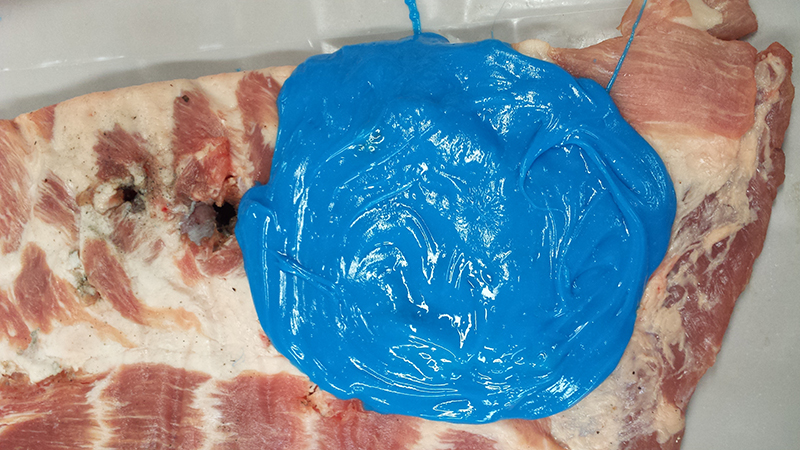
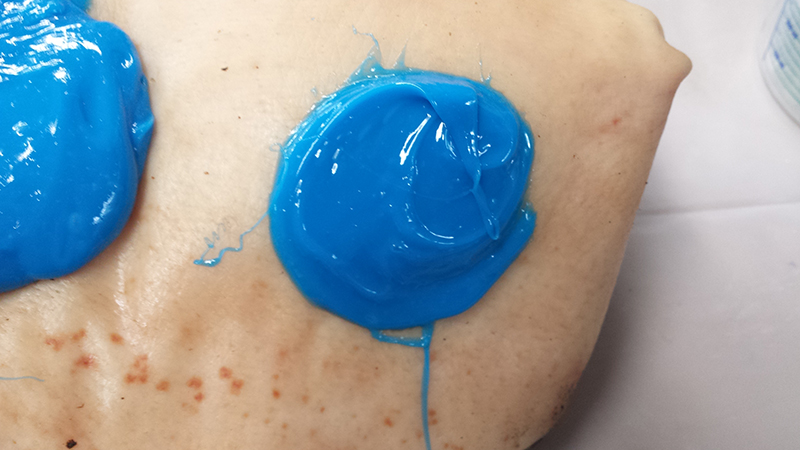
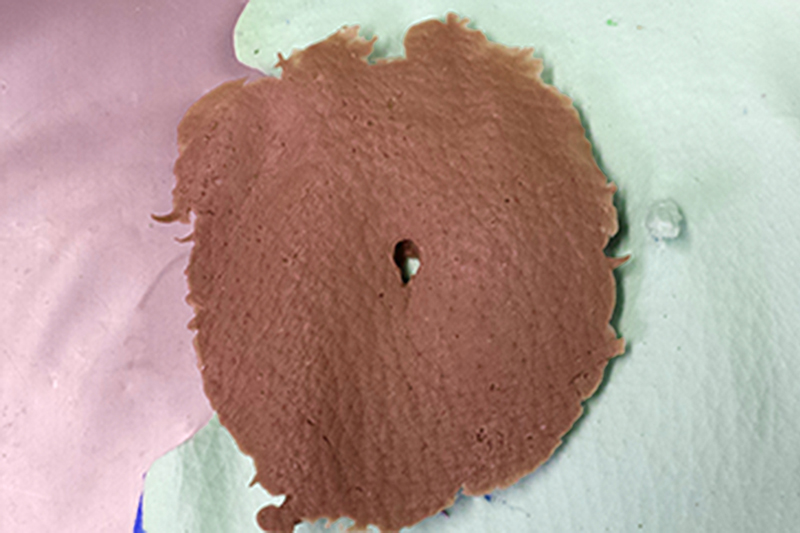
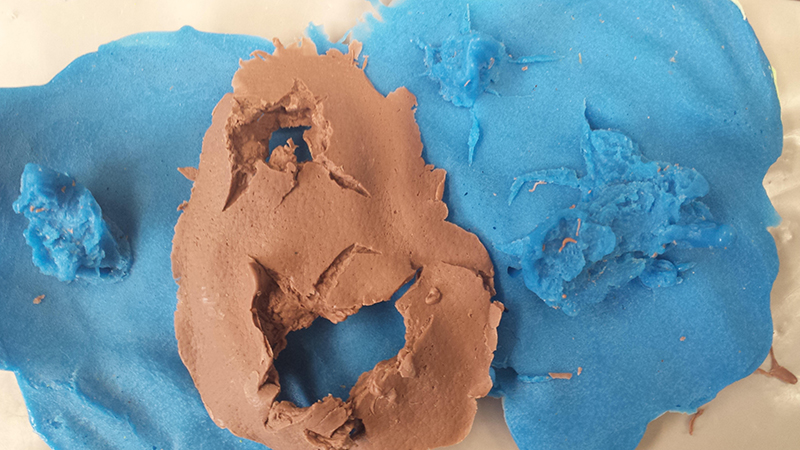
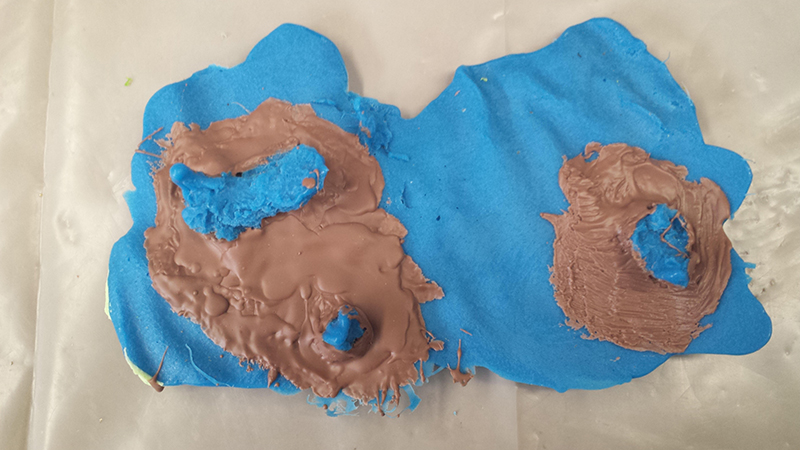
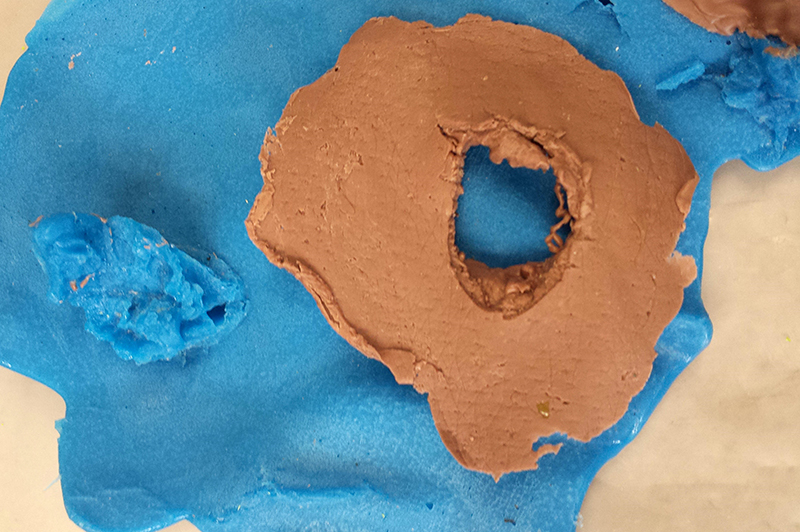
5 Mistakes To Avoid When Running Silicone Pieces In Flat Moulds

BITY LogoFlat moulds are very handy, and can be used to make even rather sophisticated makeups.

However, each time you cast out an appliance it is a performance, and of course things can go awry.

Here are five of the main mistakes often made when making pieces with flat moulds and how to address them!  Scroll down to check out the video Mitch and I made at Brick In The Yard to illustrate these easy to avoid issues!

#1. Not releasing the moulds properly.
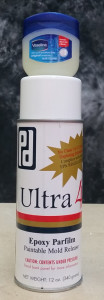
release agents

Vaseline, cheap and cheerful and readily available. Ultra 4, a good Epoxy Parfilm isn’t cheap but t is excellent!

Silicone is renown for it’s release properties – it’s one of the reasons its a great material to make moulds out of.  However, it it can grip cap plastic well enough to ruin a piece during removal.

If cap plastic sticks a little to the mould, it can cause the silicone gel of the appliance to come away from the cap plastic, and this is known as delamination.  It can be repaired if it happens in a small patch, but it’s naturally better to avoid this completely by ensuring the mould is correctly released before the cap plastic is applied.

Silicone is a material which is thirsty for oils.  It is certainly waterproof (show close up of mould in water and beading up) but oils and some solvents can be absorbed into the surface of the silicone mould – solvents including those of the cap plastic.  It is possible to paint your cap plastic onto a bare mould and have it stick either completely or just slightly enough to damage the edges of the delicate appliance.

The way to help stop this from happening is to smother the mould in a thick layer of Vaseline and leave it for an hour or two.  Let the thirsty mould absorb and drink in as much of the oily Vaseline as it wants.  Then, you can wipe out the excess which is filling in all that precious detail, and either apply a thin layer of Vaseline (or any petroleum jelly -I’m not brand-fanatic!) rubbed well in, or spray it with a mould release such as an Epoxy Parfilm.

This is especially true of new moulds which have not yet had any release applied to them.

The point is, if the mould has been allowed to suck up all that oily Vaseline, it won’t suck the release you apply or the thinned cap plastic.  The result is the appliance should more easily come out from the mould, meaning less stress on that precious, fine cap plastic barrier.

#2. Not Applying The Cap Plastic Barrier Correctly.

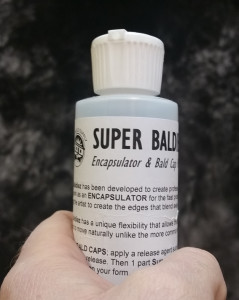
Super Baldies Cap Plastic

Super Baldies, the magical barrier which works amazingly well for appliances.

Appliances obviously need a thin edge to successfully blend into the surrounding skin, but it is possible to apply it too thinly which can result in a barrier which has holes in it. 

This could mean it can tear when removing the piece from the mould, and make it difficult to apply if the flashing is no longer attached.

If airbrushing, make sure the cap plastic is thin enough to successfully go through the airbrush without clogging or cob-webbing, but also not so thin that there isn’t enough cap plastic actually being left behind on each pass.  The more thinned the cap plastic is, the more layers you will need to apply in order to achieve a desirable thickness.

It is important to spray your cap plastic right to the edge of the mould, so that you can pick up the edge and lift it with a pin to see the thickness remaining.
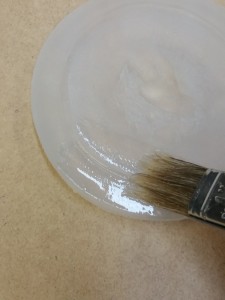
20141230_154524Remember the solvents will evaporate – it is the cap plastic which remains.

By lifting the edge with a pin on a few different places around the mould, you can monitor the actual thickness of the barrier.  If it isn’t thick enough, you can add more and by checking at the edge of the mould, you won’t damage the appliance itself.

If you get the barrier too thick and apply too many layers, then the final appliance will leave a noticeable thick edge on the skin and make it hard to blend. If you do have a barrier which is too thick, it’s better to pull out the barrier and start over, making sure to step back this time. You can add more layers if it’s too thin, but you can’t take them away again!

How thick is too thick?

It’s hard to define it because the thickness’s involved are too small to measure, but once you have a cap plastic barrier which has tiny pinholes visible when stretched out on the pin, it’s time to add another layer and that should do it.

I usually thin cap plastic with 5 parts solvent when airbrushing, and 3 parts when applying with a standard brush.

It is hard to say just how many layers you apply, as more solvent-heavy mix means you will need more passes to accumulate the plastic thickness. Remember, the solvents evaporate away –  only the small percentage of that mix which is cap plastic will remain!  It may appear like a heavy slick applied, but most of that will evaporate away!

Some people panic and whip the airbrush across the mould really quickly, leaving a light coat each time. Others are slower or use more pressure when spraying, and consequently leave more cap plastic as a result.  The trick is to do what you do, and regularly check the result at the edge of the mould to see what you have left. That way, you will get a feel for how many layers YOU need to apply, based on how you work.

Airbrushed barriers are thinner, more consistent and evaporate quicker but naturally require you to have access to an airbrush and compressor.  If you have a wide makeup brush (or even a chip-brush at a push) to use instead, this will be fine as an alternative.

It won’t be as neat, but it will work!

#3. Not Scraping The Mould Properly.

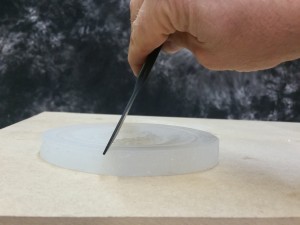
Once the cap plastic is applied, you pour in your silicone gel and you need to scrape the moulds quickly and cleanly to make sure edges are thin.  Make sure you use a scraper  which is wider than the mould so you can do the manoeuvre in one, swift movement.  You can use plastic or steel scrapers – it really doesn’t matter which.
20141230_154908

Scraping at a good angle will help ensure the silicone is scraped properly. Too low an angle means that the blade of the scraper flexes too much. If the scraper is held at 45° or more, then you are likely to get a cleaner edge.

It may take a few attempts, but if you press firmly when you wipe the scraper, you should completely wipe clean the silicone from the cutting edge.

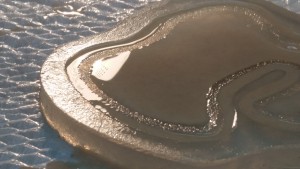
If you place a light source such as a desk lamp on the opposite side from your viewpoint, you can see the light reflecting off the shiny surface of the silicone.  This will make it much easier to see if the cutting edge of the appliance is totally clear of silicone.  You will know it is clean when you can see the edge of the mould as a bone-dry ridge, surrounded either side by shiny silicone. If it isn’t bone dry, then you need to scrape it again or use cotton tipped swabs to wipe it.

20141230_130447 (1)

The bone-dry cutting edge of the appliance is a sign that the appliance should have good edges.

Using cotton swabs will take a little longer than scraping it correctly, so if you have many moulds to run at once, it really helps to get your scraping technique down!

Wiping the edges of twenty moulds at once with cotton swabs may mean the silicone starts setting up before you get to the last mould and that stress isn’t fun.

If you do have lots of moulds to run or the weather is warm where you are, consider running fewer moulds at a time so you have enough time to adequately scrape them. You can also chill the components or use a retarder to slow the cure!

Obviously make sure you pour and scrape on a flat and level work surface, and allow some space between each mould.  If you are using he same scraper for multiple moulds then be sure to keep some paper towel handy to help clean the scraper and deal with any spills or drips that can easily happen when you are working fast.

#4. Not Allowing The Cap Plastic Enough Time To Evaporate Before Removing Appliance.
20141230_155111

Patience, Jedi! Allowing time for the cap plastic to mature and firm up is an important consideration.

This is a big one, and can make a huge difference to the quality of your appliances.  Essentially, it takes a while for cap plastic to reach it’s full strength, and rushing the demould can stretch out the cap plastic too much.

The solvents used in cap plastic, either alcohol or acetone, do appear to evaporate quite quickly. However, small amounts can remain for some time and this can mean the cap plastic remains weak until it has completely flashed off.  It’s a good idea to leave the cap plastic to dry up for an hour or more before filling with silicone if possible, and leaving the mould for a few hours or preferably overnight before actually removing the piece from the mould.

If you do leave it long enough to mature like this, you will find you can get pieces out of a well released mould with much thinner edges than you thought, making it possible to have pieces which blend into the skin much better.

#5. Storing Appliances Badly Before Use.

20141230_155156

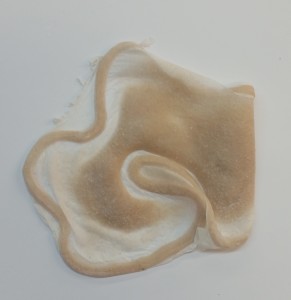
A appliance stored badly can fold and flap about, damaging it permanently.

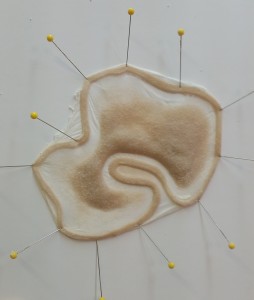
The best way to keep appliances safe until they are ready to use is to pin them to foam core board through the flashing.  This way they are kept flat and secure, allowing them to be transported more easily.

By trimming the foam core to a size which fits neatly into a box, you stack layers of pieces in this way, protecting the lower layer from the one above it with layers of tissue paper or paper towel.

If appliances flap around and get folded over or crushed, they can take on creases and become damaged permanently. By pinning them onto a board carefully, you can be sure that the piece is kept flat and won’t move around during transit.

20141230_155326

Pin that bad boy down, and it will stay nice and flat no matter how bumpy the ride!

I like those beaded pins you can get, although T-Pins (the kind used for holding wigs to wig blocks) are also pretty good. They don’t need to be especially long pins either – 25mm/1 inch would be plenty long enough.

When pinning them, make sure the pins go in at an acute angle rather than 90°.  That way, they appliance won’t slide off the board, and the pins will stay in the foam core better rather than poking through the other side. If that happens, you can damage the piece underneath, or even yourself. Ouch!

If foam core isn’t easy for you to get hold of, then sections cut from a cardboard box will do the job okay.  Essentially, it just needs to be flat and thick enough to retain the pins. The ‘Really Useful Box’ company make various sizes of plastic storage boxes.  These kinds of boxes are ideal for stacking layers of foam core laden with appliances for ready access later.

Check out the BITY YouTube channel for a ton of cool videos. Those guys keep it fresh!

Drop me an email or comment below. I’d love to hear from you! My direct email is stuartbray@yahoo.com

-Stuart


Posted in Uncategorized | 2 Comments

Shooting Guns At Meat (Or How Todd Spent Last Weekend)

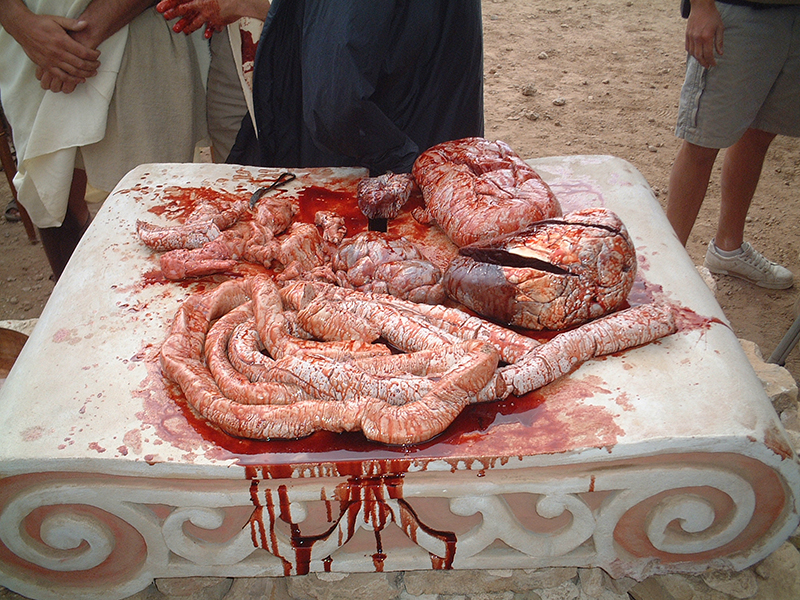
The first time I’d seen real innards moulded and used for an effect was in Alexander the Great (2004).

(Scroll down – this one has a podcast)

We needed to make some bull guts for a scene in which a seer would use the innards of a slayed beast to predict the outcome of a battle (as you do in the absence of solid intelligence of your enemy, drones and remote missile launch capabilities).

(Stuarts note: I had made a lot of guts for Saving Private Ryan and Shaun of the Dead, but these were not moulded from real guts!).

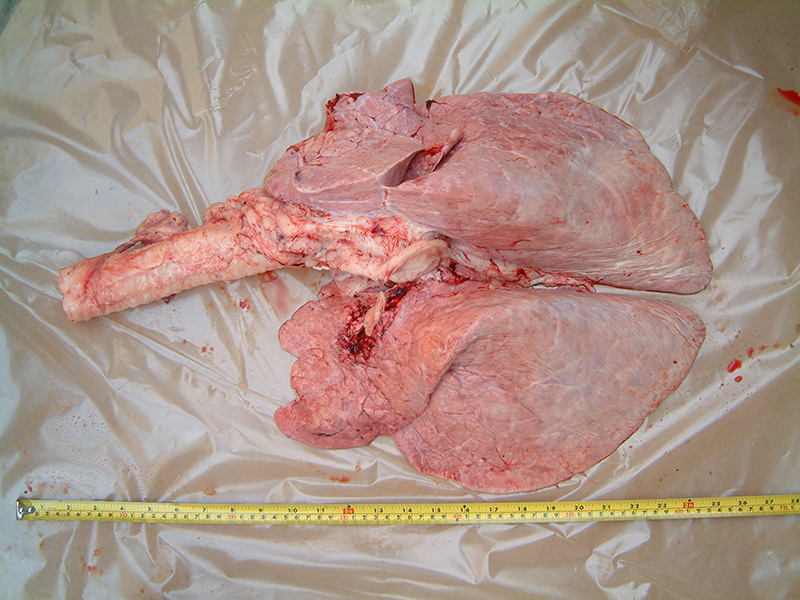
It was mentioned that they wanted to use real guts for the scene, as it was thought fake ones would look fake (Ahem! Challenge accepted!) Of course health and safety issues rang up, among just the eeeew! of it all. So we decided instead to make some. A brave soul went and fetched some freshly removed innards from an abattoir and before moulding, I decided to take some pics.

DSCF0044

They were enormous – much bigger than I realised. We had lungs, a liver, a heart and a kidney. I was going to sculpt the intestines as I figured their lengthy, floppy and gelatinous nature would not be easy to mould. I used the real guts as reference to inform how these would look – there are always gloopy bits of non-descript tissue hanging off stuff and I had enough pictures of intestines to keep me going.

I have also done similar things using something called ‘fat-back’- from butchers which is basically a 12″ square of pig skin with half an inch of fat still attached (pork rinds, anyone?). It was handy to smash it, stab it, hit it with hammers, burn it and just generally abuse it to recreate the surface trauma that skin can receive.

It could then be moulded so we could study what the surface actually looked like. Also the idea occurred to me if you can, for example, burn the skin surface with a blowtorch and then mould the result, you would be able to observe the three dimensional surface only without the distraction of colour!

Often when you look at pictures of real wounds, they are smothered with bruising and blood which can make it difficult to discern what is shape and what is colour. Doing this, there can be no doubt as to what the surface topography was without the distraction of colour or blood, dirt and other elements.

It’s interesting to me, as you realise how much you embellishment you can add when sculpting wounds. It’s really easy to go over the top in the name of dramatic effect when in fact, the surface indications of real damage is often understated.

I don’t have images of these experiments, so Todd and I thought we should do something similar for your delectation. Moulding real things instead of sculpting is nothing new – but we figured as the final post of the ‘sculpting’ trilogy it would be fun to focus on harvesting real textures to create some gore.

I did a post last year on creating textures and moulding them to make cool new surfaces and textures based on the talk I did at IMATS London last year – see it here: http://www.learnmakeupeffects.com/london-imats-2013/

Only this time, we figured it would be interesting to focus on the effects of firearms.

Gunshot trauma varies with the myriad of variables possible, from type of gun, type of round, range, whether the round passed through wall, glass or ricochets before hitting the body….there are so many possible outcomes.

If you need to create the effects of a gunshot wound then reading up on the weapon and circumstance will help. For the most part however, there are many similarities. Obviously the skin is broken by the round passing through it, and penetrative trauma of some degree occurs.

The round may or may not exit the body, there may or may not be stippling of powder residue, the edges of the wound can be burnt, the skin may split….etc.

Well, by shooting up a load of large pieces of meat with skin intact, we study the effects up close and see how it looks from all angles, including the back to examine the effects first-hand without any human injury involved.

If you’ve already listened to our Podcast on this subject, now you can see the images that I… we… hope will help it all make more sense.

Also, check out the video of some of the shots, you get an idea of just how much power is emitted and just how quickly:

Let me start off by saying, “I F#*KING LOVE SCIENCE!”  And I’ll tell you why after a brief preamble.  Stuart and I have been talking recently (we talk quite a lot, actually, when we’re not both up to our eyeballs in one thing or another) about textures.  Not skin textures, which we do actually talk about, but tissue textures.  Veins, muscle, tendons, bone, fascia, fat… you know, cool stuff.

Not a lot of people know that my career path started out originally down a surgical medicine track, so I still have somewhat of a vested interest in the sciency side of makeup effects, and tissue is a big subject to cover.  If you’re going to be creating tissue and tissue damage, etc. as part of a makeup, you want to get it right, right?

There are four groups of tissue in the human body:

  1. Epithelial
  2. Nervous
  3. Connective, and
  4. Muscle

There are two kinds of epithelial tissue (epithelial tissue protects your body from moisture loss, bacteria, or bacterial infection, and internal injury):

  1. One kind covers or lines almost all of your internal and external body surfaces, such as the outermost layer of your skin and other organs, and the internal surface lining of your digestive tract, and your lymph system.
  2. The other kind secretes hormones or other stuff like stomach acid, sweat, saliva, and milk.

Nervous tissue forms your nervous system (duh), which orchestrates all movements and activities of your body.  Parts you may be familiar with are your brain, your spinal cord, and the nerves that branch off of those two important parts.  Nervous tissue is made up of two kinds of nerve cells:

  1. Neurons, which are the basic structural component of your nervous system, and
  2. Neuroglia, also called glial cells, which provide support, such as insulating or anchoring neurons to blood vessels.

Connective tissue is the glue that provides structure and support to your body, and there are two kinds of connective tissue:

  1. Fibrous connective tissue is found tendons, ligaments, cartilage and bone, and is the more rigid of the two types.
  2. Loose connective tissue also holds structures together, but is more flexible, and holds the outer layer of your skin to the underlying muscle tissue.  This stuff is also in fat, lymph glands and your red bone marrow. Yum!

The fourth group of tissue is muscle.  It differs from the other tissue types in that it contracts; muscle tissue is available in three styles: Cardiac, Smooth, and Skeletal.  Those muscle tissues are made up of fibers that contain many myofibrils, which are the actual parts of the fibers that do the contracting.

  • Cardiac muscle is obviously found in the heart.
  • Smooth muscle lines the walls of blood vessels and certain organs, such as your digestive (stomach, intestines) and your urogenital (naughty bits) tracts.
  • Skeletal muscle is attached to bones (by fibrous connective tissue) and allows movements of your body by bending at joints (which are cushioned and protected by fibrous connective tissue!)

All that being said, what Stu and I want to do is show you this stuff for real so you will have good reference material to work from, as well as to show you ways to create your tissue sculpts by actually using REAL TISSUE!

IMG_1865

I am now considered to be a very strange fellow at several butcher shops around the city where I live.  Go with your strengths, I say…

IMG_1868

Note : I think this looks like Alien Labia. Just sayin’…..

The first stage of the Real Tissue Project was to hit up my local grocer for some meat I would never willingly put in my mouth.  Such as beef heart….

IMG_1866…a big ‘ol hunk of beef bone with some muscle, veins and fat attached (for making soup)…

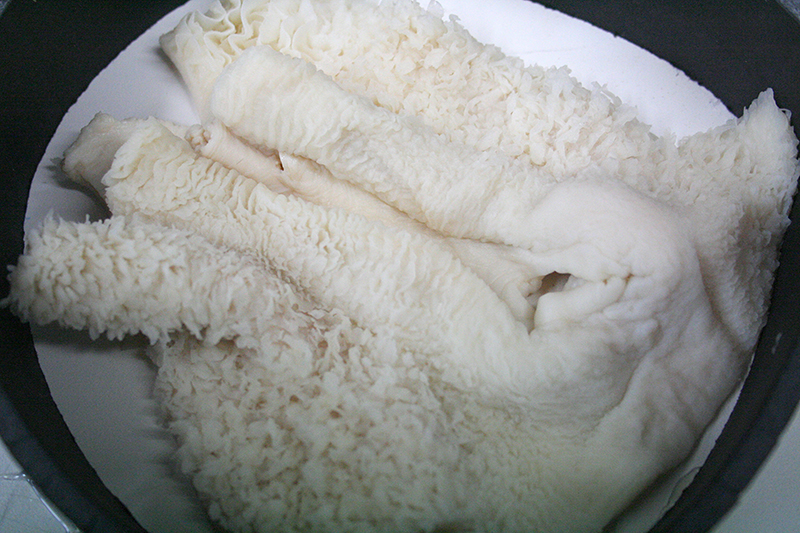
IMG_1857…and a heaping portion of beef honeycomb tripe.

(*Bloikk*)

If you don’t know what tripe is, it is made from one of the three chambers of a cow’s stomach: the rumen (blanket/flat/smooth tripe), the reticulum (honeycomb and pocket tripe), and the omasum (book/bible/leaf tripe).  If you do know what tripe is and actually eat it, you need help (JK).

IMG_1874

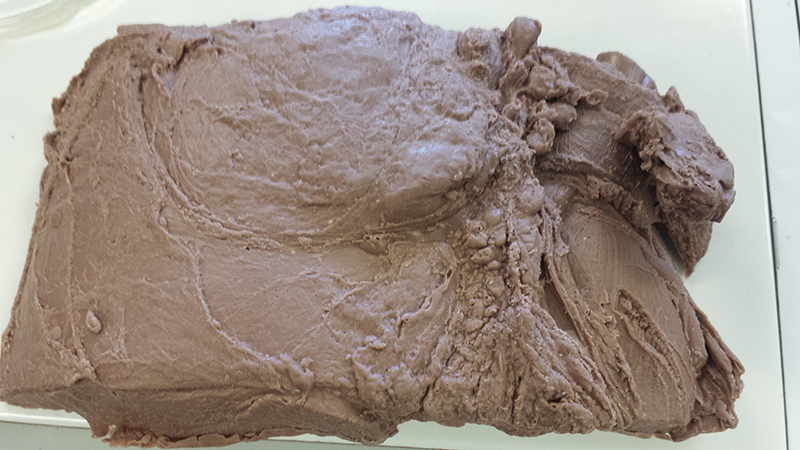
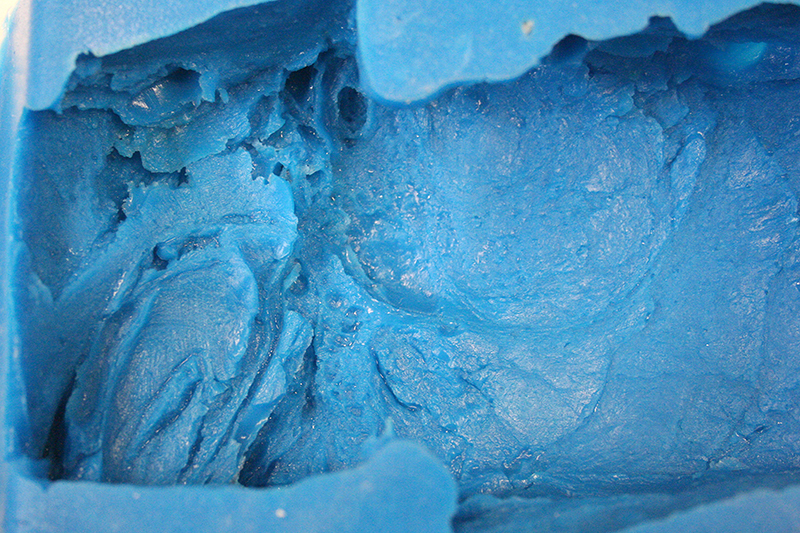
Stu and I decided that it wouldn’t be enough to just show you good, high resolution photos of these various tissues.  No.  We need to mold it so we can do clay pours and incorporate the actual textures into a wound sculpture.

Now the obvious comment would be, “Why not use the images as reference and just sculpt the tissue?”  The obvious answer is, “Well, you can.”  But Stu and I figured there’s nothing wrong with having authenticity on our side, and what’s more authentic than clay tissue molded from real tissue?  Answer:  Using the real tissue.

Here are some of the fake guts that Stuart was talking about at the top of the blog.  Real ones would have gotten pretty ripe as the day went on…

bull guts 3

However, for our purposes, clay pours using Monster Clay into silicone molds made from real tissue is what I did, and I’m pretty pleased with the results:

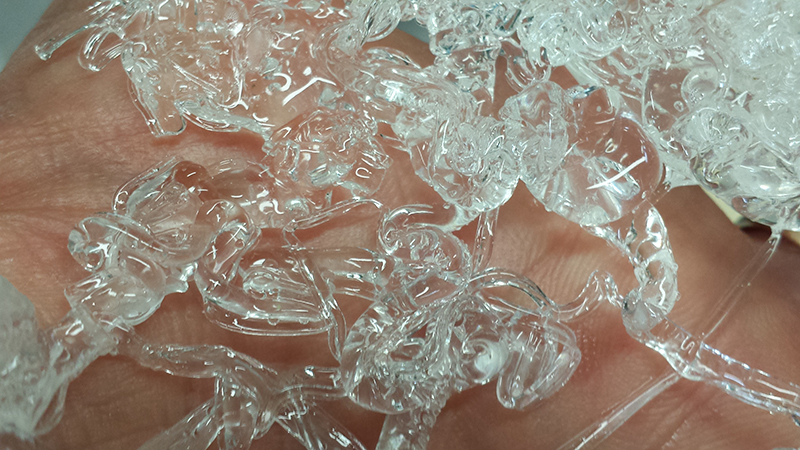
20140529_132817IMG_1869However, there are a couple of other methods that can yield pretty good results too.  One is pouring hot melt vinyl into cold water (this vinyl is clear so not really as visible) – I confess my results were less than remarkable as you can see here…

Hot Melt Vinyl

but I did have good results with soft polyfoam; this is Smooth-On Flex Foam 6 that I tinted to look like innerds.  As the foam began to expand, I took a craft stick and just began swirling it around and when the foam began to set up, it began to take on a very random tissue-y look that I think will make an outstanding mold to work with.

20140615_145724

20140615_151057

So anyway, our task became acquiring portions of meat that we could abuse that would react similarly to human tissue damage that would/could occur in combat… without spending a lot of money.  All in the name of science.    The first lesson learned was that this was not going to be cheap if we wanted to do it right, and what’s the point if you’re not going to do it right?

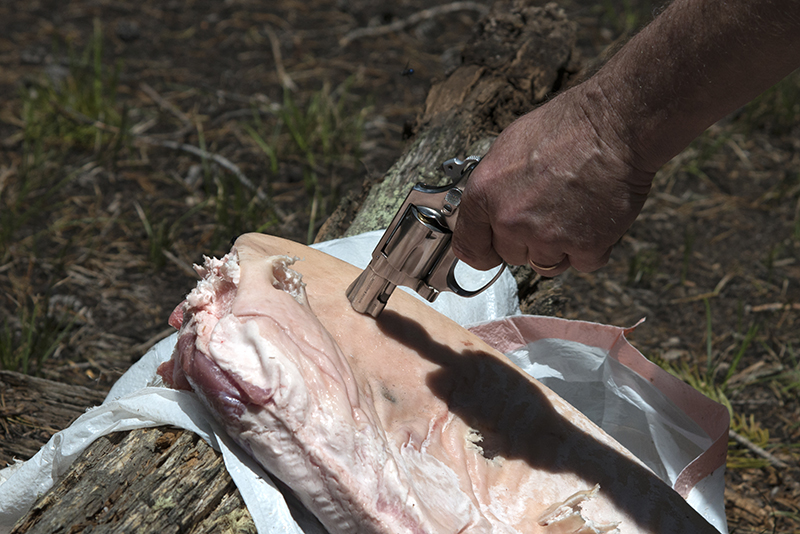
In the name of science… and makeup effects… we got our hands on two slabs of pork belly (bacon) with the skin still attached (about 18” x 24” x 3”), and a slab of fatback (fatback is a cut of meat that consists of the layer of adipose tissue or subcutaneous fat under the skin of the back) and a slab of ribs about the same size.  We all cried a little knowing we weren’t going to be able to cook any of it later…

This project was going to be conducted under strict rules of engagement, seeing as we were going to be firing live rounds into the meat from varying distances and with different caliber weapons by combat veterans of Iraq and Afghanistan.

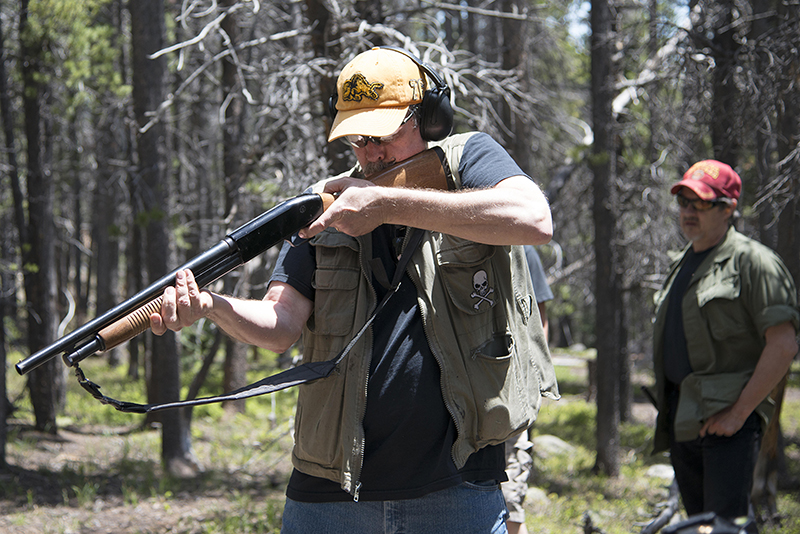
We would be firing .38 hollow point and full metal jacket, 5.56mm, .223, 9mm, and a 12 gauge shotgun (with 00 buckshot and a rifled slug), and a 20 gauge.

The second lesson learned was THIS WAS FUN!

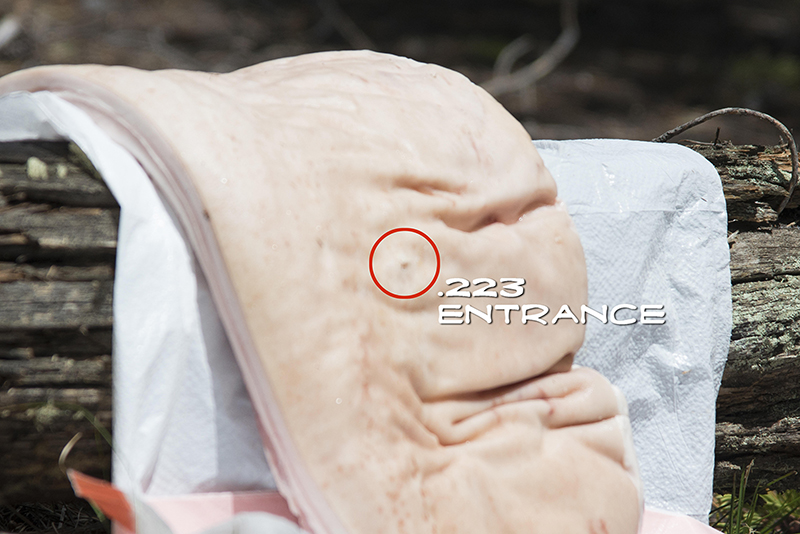
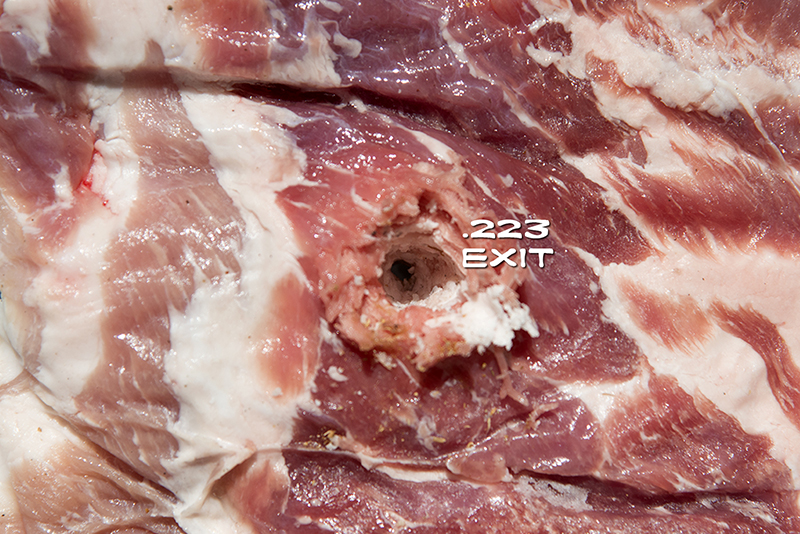
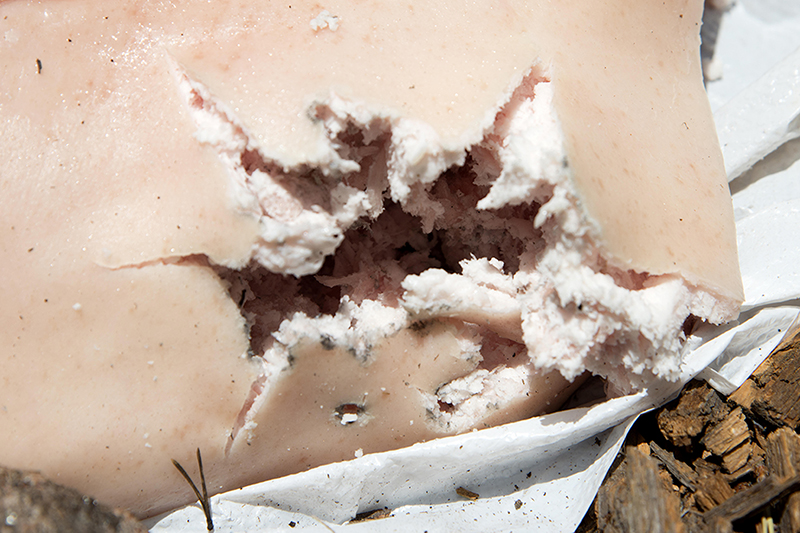
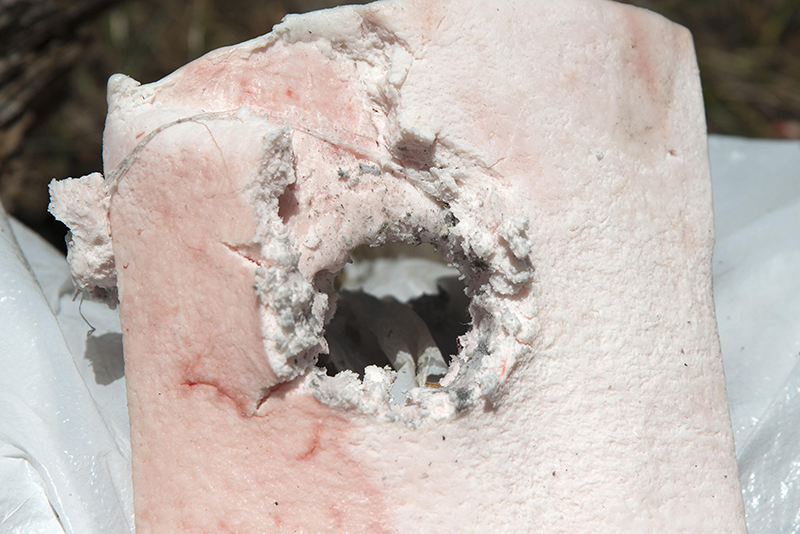
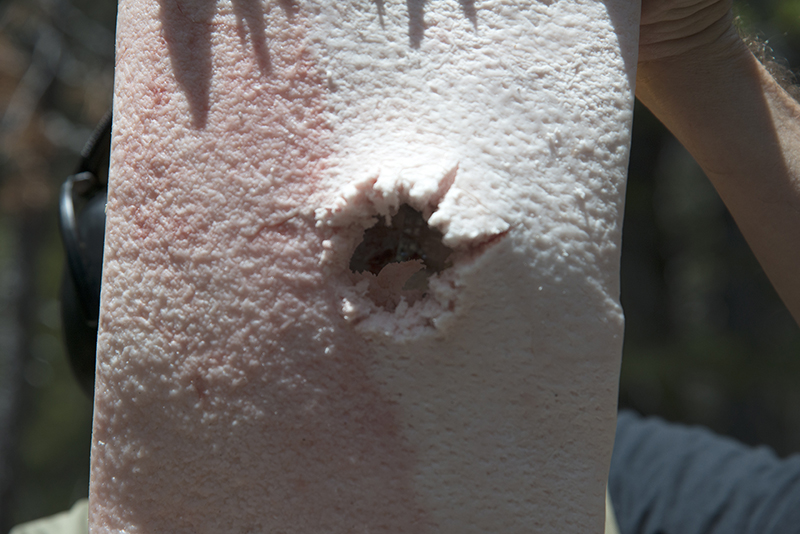
First up was a Vietnam era Colt AR15 firing a .223 full metal jacket round. Yowza!

223 Entrance

223 Exit

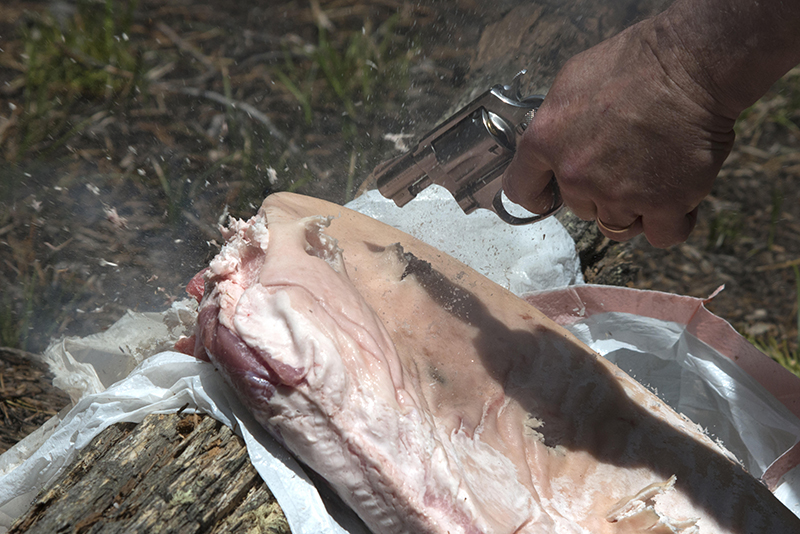
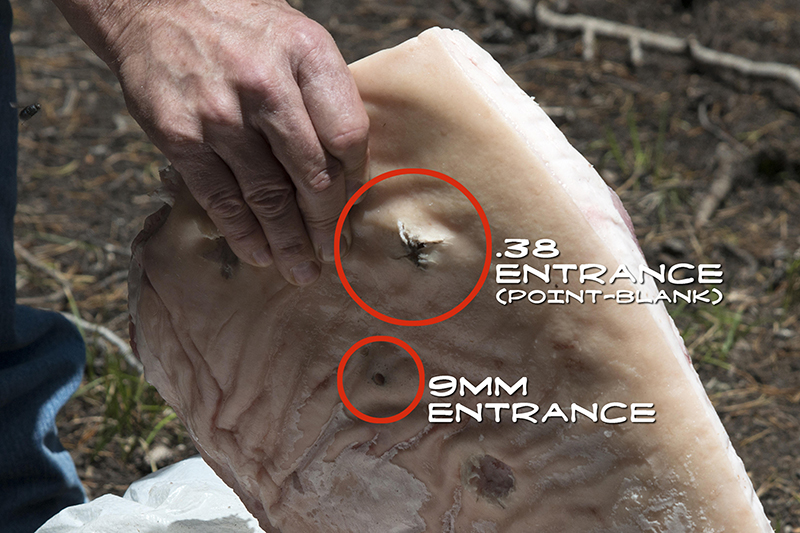
We fired rounds from a 9mm Glock with similar results, but a slightly larger entrance hole; what we wanted to see was a skin-contact point-blank shot from a .38 hollow point to show how the skin tends to split like a blunt force trauma avulsion.  It did. Erk.

_.38 PB Firing 02


_.38 PB Firing 03

_.38 PB Entrance 02

This went on for a while with the various calibers and pieces of pork.  Here’s what a 12 gauge shotgun with 00 buckshot and a rifled slug will do from about 15 feet.

Todd 12 Gauge


12 gauge miss

I missed a little…

Here’s the same 12 gauge with standard buckshot from the same distance.

12 gauge buck

That is a large hole.  This is a 20 gauge sawed-off from 15 feet.  Don’t ask me where it came from…

Shotgun 01

It makes a lot of noise, too.  It was raining bacon.  Literally.  Mmm… bacon…

Next up, getting the forensic evidence back to the shop for molding.  We took care to try and preserve the original shapes of the wounds, but we were transporting from a considerable distance, and even though we had a huge cooler filled with dry ice, there was going to be some disturbance of the evidence.  I think we managed to save most of the original integrity of our mayhem.

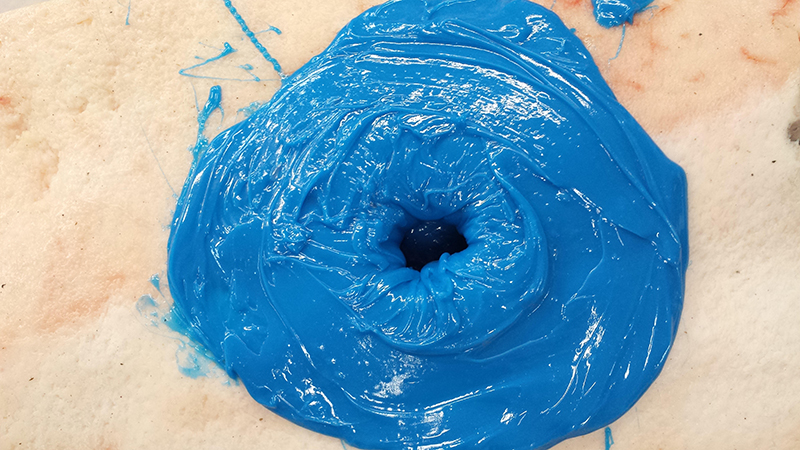
We had a lot of gaping holes to choose from, and wound up molding quite a few entrances and exits.

20140608_114707


20140608_114732


20140608_114812

I’m pretty sure this is a .223 entrance hole.

223 mold

Yup.

20140611_120429

These are a couple shotgun entrance wounds; a 12 gauge (bottom) and a 20 gauge (top).

20140611_120527

This is the point-blank .38 entrance.

20140611_120207

Thanks to my stellar record keeping, I have no idea what these guys are… but they’re nasty, and very cool!  Pretty certain this is one of the shotguns.

20140611_120845

I believe this one below is the 20 gauge.

20140611_120254

I hope you get the idea.

We now have way more molds and photos than Stu and I can possibly show you here, but we hope you can see the value of actually having molds of a real gunshot wound that can then be cast and modified to suit your particular prosthetic needs.  In these wounds are all four types of tissue – Epithelial, Nervous, Connective, and Muscle.  And now you have a much better grasp (we hope) on what various firearms can do to it.

PLEASE do not attempt this on your own without proper training and/or supervision!  Perhaps Stu and I can incorporate these molds into our offerings to you if you are interested.  Until next time!

We’re Stuart and Todd, a couple of FX guys.

We love to hear your comments and suggestions – if you like what we did then please share. Retweet the Meat, so to speak.

Email us direct on stuartandtodd@gmail.com


Posted in Uncategorized | 3 Comments

Of moose antlers and long tongues.

Kevin with HornsThe last post looked at the claws, horns and nose from a BBC TV comedy show.

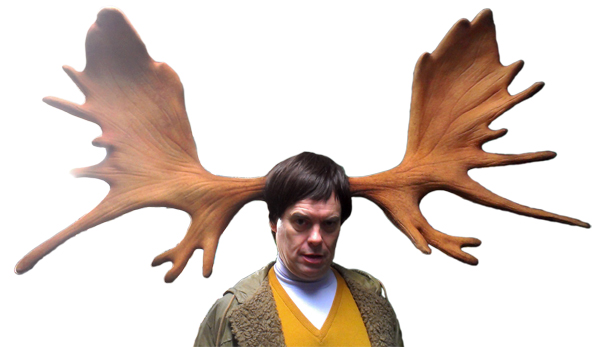
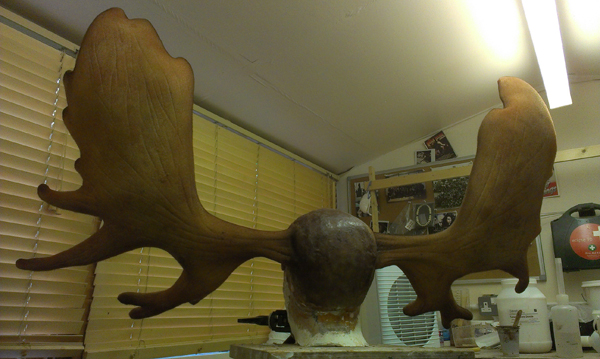
This post will look at the last couple of gags from BBC TV’s It’s Kevin, with Kevin Eldon.– the oversized moose antlers from a sketch ‘The Incredible Moose Human‘ – a superhero who grows moose antlers when enraged by injustice.

There was a set of horns/antlers made and then production wanted to increase them even more.  Eventually they were about 4 feet wide (48″ or 1.2 m wide) and he was to wear them whilst walking through a china and glassware store, shelves precisely level with the antler for maximum effect when how strode down the aisles.

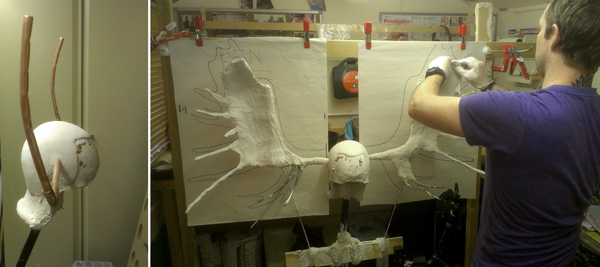
We started with a cast of Kevin’s head, which was supplied by Waldo so no need for a new lifecast to be done.  I fitted out a plaster copy with some copper tube, wrestled from my old plumbing kit.  A wee bit of bending and soldering, and I was able to hook up a basic ‘U’ shape handlebar that would make up the majority of the armature.

We can’t have it bend halfway through the sculpt or mould!  A strong armature is essential.  The head form is sitting on that steel armature used previously for the claw!

Antlers Armature

Some may think trusting this lofty responsibility to the fickle mistress that is copper is in itself a gamble.  Granted, that was a risk, but I trusted myself to the magnificence of tubular support.  Next up, we built a rough shape of the main extending ‘fingers’ of the moose antlers using a scaled-up outline based on the design from production.

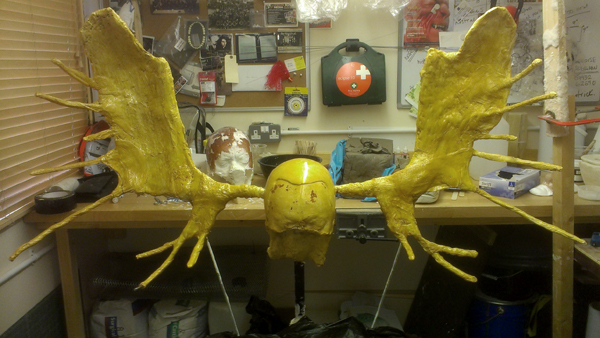
This was fleshed out with chicken wire and then coated with plaster bandage to create a lightweight shell.  We went crazy with shellac, making it shiny and water resistant so the thin layer of clay we would skim on top would not dry out too quickly.

Shellaced antlers armature

Nice, shiny and yellow. Both the antler armature and some M&M’s have these qualities.

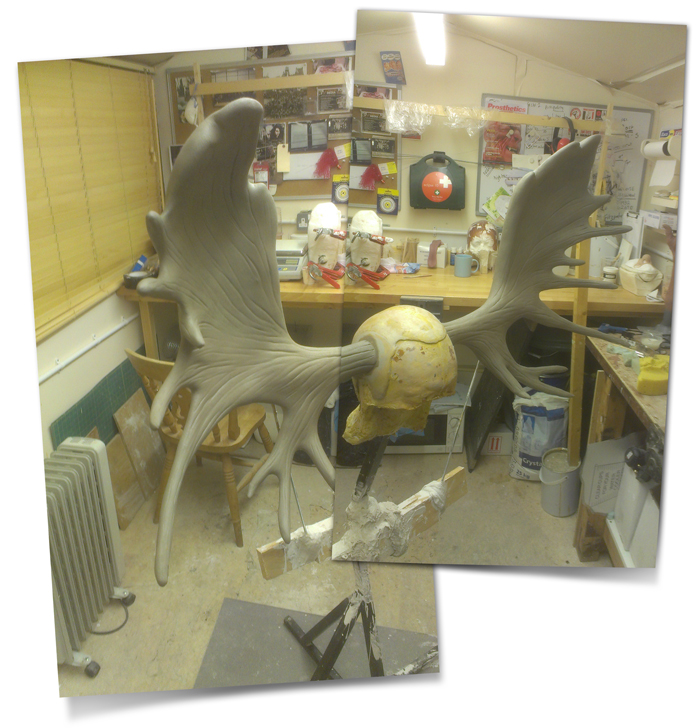
I could have used plastiline instead of clay, but its so much quicker to use clay for something like this.  Plus, I knew we had a fair amount of moulding to do after so I though anything that would speed up this part would be good.  Which is kind of a shame, as this sculpting is often considered the fun part (unless you are a third mould-maker like me) and therefore not the part you’d want to cut corners on.

However, the mould is not something that can be done badly or hurried – it has to function and behave itself so the lions-share of time is usually never the sculpting part! It’s all the other stuff.Antlers Sculpt MontageThey needed sculpting them ‘in situ’ on the head, as the fibreglass scull cap was the centre of the whole thing.  It had to be symmetrical visually, strong enough to stay attached and balanced once worn so as not to favour leaning to one side.

Once the sculpt was approved then we made steps to mould it.  First instance was to keep it from drying during the moulding part, so we sprayed the whole thing with a clear car spray lacquer.

To mould was fairly simple – we painted on several coats of silicone all over.  The plan was to make it a two part mould by covering the whole thing in silicone (about 1/2″ (12mm) all over).  I decided to make the silicone stay in the fibreglass halves, as I didn’t want the huge silicone moulds flopping about like wet sheets.

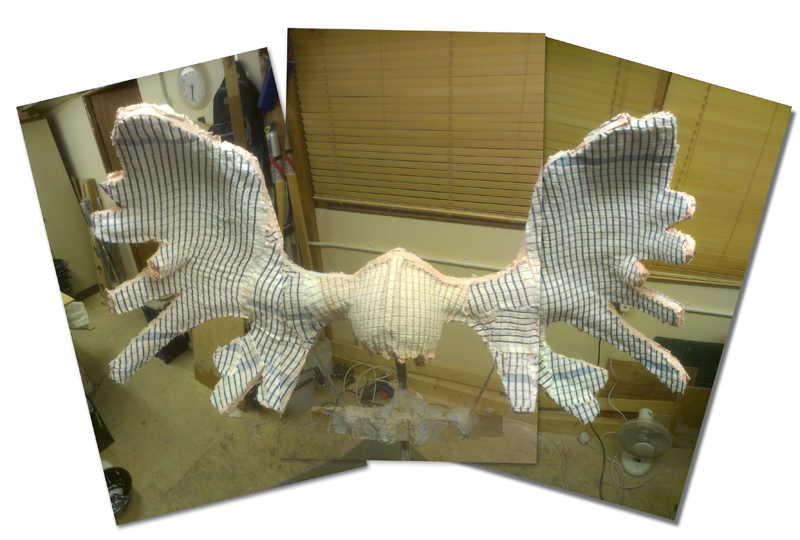
To do this, we gave the whole mould a final coat of silicone, then pressed dish-towels into the surface, so the fibres on the back bonded to the mould whilst the upper surface was exposed and would bond to the gelcoat we would add later.

Dish towel covered mould

This mould was sliced around the halfway line all the way around the outside edge of the mould.  This allowed the silicone to open up once the jacket of fibreglass was added, and also the cut provided a handy slot in which to slide plastic shim.  This allowed up to glass both halves at once – a lot of work as it was quite a large surface area but a few hours of toil later and we ourselves a mould of some virtue!

Antlers GelcoatOnce opened and cleaned out I had a buddy of mine help out with the fibreglassing.  While we got on with other bits, Edmund Woodward (an incredibly skilled sculptor and mouldmaker) made the one and only set of antlers from the silicone mould.

We went for as thin a gelcoat as possible, and backed it up with a single layer of fibreglass mat.  The gelcoat is this delightful ‘camel sunset’, ‘Melted Caramac’ or ‘Werthers Unoriginal’.  Take your pick – I just know it was a good base colour for the intended paint job whether you like it or not.

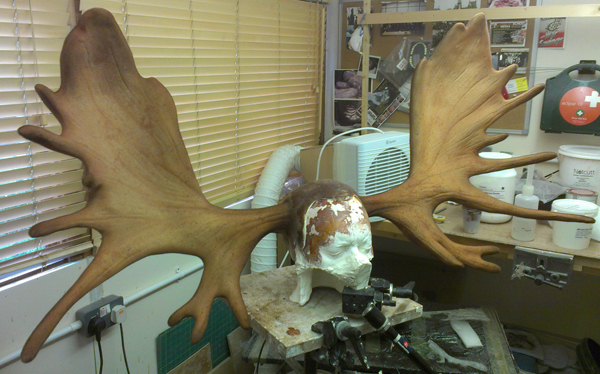
Once the fibreglass set was out, cleaned up and seams sanded smooth, I slap some paint on it.  I use a mix or Tria inks with acetone as a thinner (they stay well on fibreglass) and acrylic inks thinned with 99% alcohol.

The tips are darkened, and there was some spattering with thin washes to give it a natural breakup.  Using pics of real antlers as reference, I mist, spatter and flick colours until we are there.

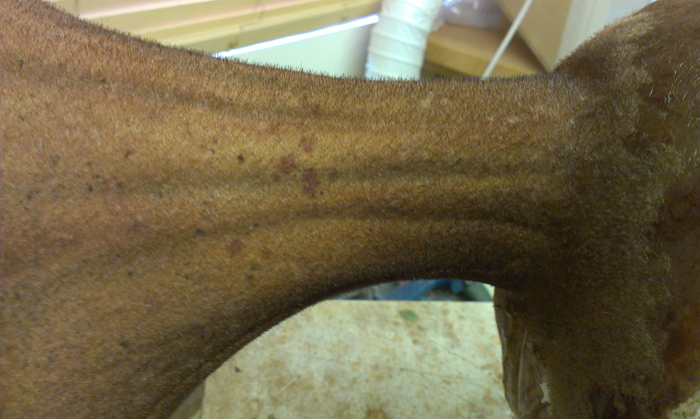
Finished Antlers FrontOne thing with moose antlers is they are kind hairy, with a fuzzy coating of fine hair.  To get this, we flocked the whole thing using brown and beige nylon flock and a flocking gun.  I needed to get a glue which would hold the flock in place throughout it’s many shots, manhandling and touching.

Finished Antlers Back

Flocked antlers, fine , short nylon hairs about 1-2 mm long .

Flocked antlers, fine , short nylon hairs about 1-2 mm long .

Once the makeup department had fitted the wig to match Kevin character, we had a set of antlers ready to go. Check them out.

Finsihed Antlers Haired


Maybe you remember my blog posts on making a couple of tongues a while back. 

Well, the reason I decided to make that post featuring tongues was the result of previously making the one pictured below.  In the show, Kevin s character was a 1980’s doctor who displays a range of over the top reactions to an attractive nurse, ranging from steam coming out of his ears, Sid James-esque groans and a wolf-like unrolling tongue.

Kevin Tongue SequenceThe tongue length was essentially limited to what could comfortably fit within the mouth when rolled up.  Imagine a belt coiled up – there really isn’t too much length which can be easily accommodated within the mouth without gagging, unless one has – erm – trained oneself to overcome such discomforts.

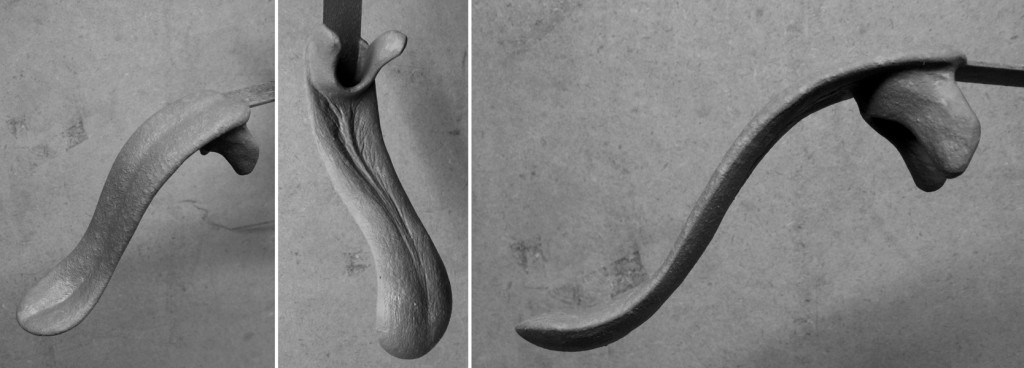
So, we decided on a size and I set about sculpting the tongue.  The first step was to make a secure armature to support the thin sculpture, and I used some steel strip which could be bent to supply a pleasing curve.  I was quite keen to avoid a simple ‘flat’ tongue as I thought that would look cheap and unrealistic.

Tongue Sculpt

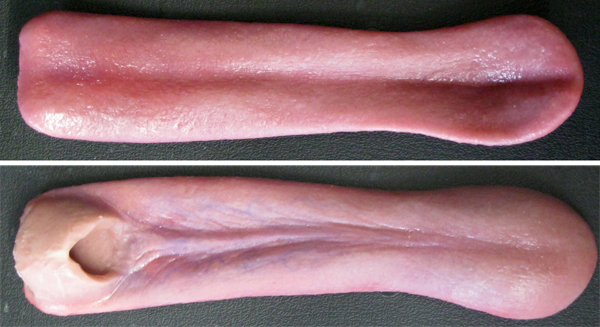
The tongue does look rather unusual viewed from underneath. The protruding lobes at the top end were originally there to help retain the tongue in the mouth by sliding between the real performers tongue and his cheek. In the end, I instead glued them together to form a loop through which the tongue could fit.

(I know what it looks like. Trust me, I see it too.)

The protruding lobes at the top end were originally there to help retain the tongue in the mouth by sliding between the real performers tongue and his cheek.  In the end, I instead glued them together to form a loop through which the tongue could fit. By pressing the real tongue against his lower teeth, the fake tongue is held securely in place during the gag with no visible means of retention or glues being used.

There is not much in the way of oral adhesives – a denture fixative maybe but this still would not have held the wobbling appendage with it’s extra weight.  Plus, denture fixative is pretty grim stuff to have to fetch out of your mouth.

Tongue mould 1

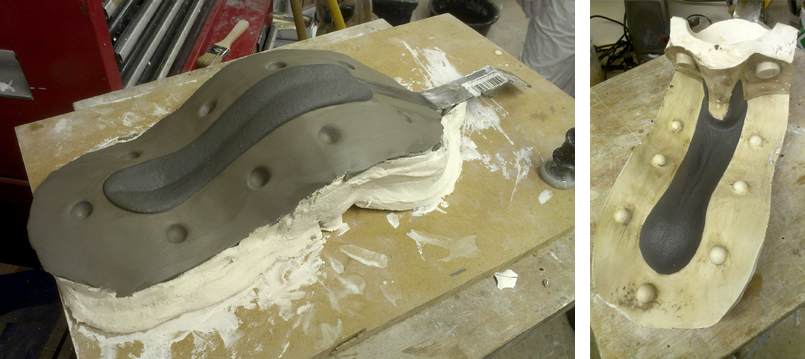
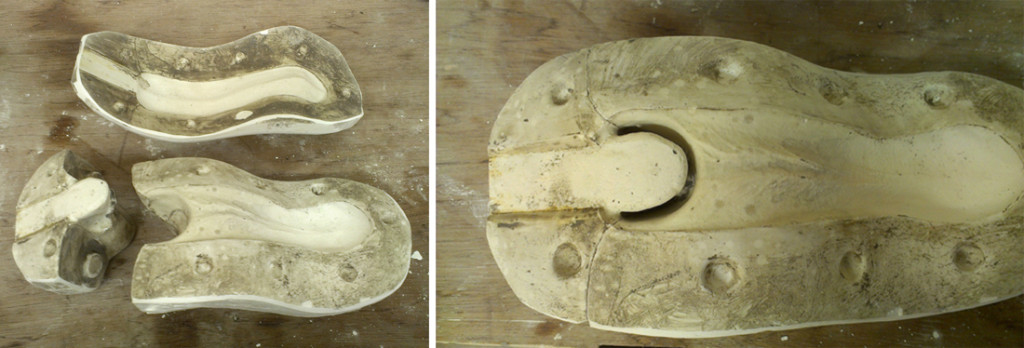
Once the sculpt was finished, it needed moulding. I wanted to make a simple plaster mould, which would happily yield the few casts we needed without breaking the bank.  A clay wall was carefully applied around the halfway line of the tongue sculpt, with indented keys pressed into it at regular intervals.

The top of the tongue mould was made in one piece, whereas the underside needed to be in two pieces, to better allow the tongue ‘lobes’ which protrude from the underside at the back, to come out of the mould.

Tongue mould 2You can hopefully see from the pics above how the two pieces that made up the lower half go together.  The resulting seams were minimal and easily trimmed clean with scissors and needed no filling or repair.

See, good mould-making is the sensible option for a happier world.

After some tests with an unpainted cast, it was obvious that the lobes idea wasn’t cutting the mustard.  The tongue would often fall out, not being retained properly.  Tricky business, as I haven’t had to make on of these before.  Still, logically you have few options when attaching something in the mouth simply and safely.

I decided to stick the bottom edge of the two hanging lobes togther to make a tube, into which the real tongue could slide.  The tongue was painted with platsil gel tinted with pigments, and given a clear coat of platsil gel 10 as a final shine.

Tongue final

The final tongue from the sketch. Really looks quite unpleasant, really.

A few takes and the shot is done!  Huzzah!

Kevin did a great job with it, and it was a pretty punishing schedule.  The man does work hard, that’s for sure.

Would you do me a favour and drop me a comment below?  I really enjoy hearing what you have to say – plus I don’t really know if anybody is reading this unless you say so.

Until next time!

Stuart


Posted in Uncategorized | 11 Comments

Of Claws & Crests. And a nose.

Poor neglected blog.

It’s been an incredibly busy year so far…it’s not often my year starts when there is still turkey leftovers in the fridge from Christmas, but this year just won’t quit.

Todd and I have been chatting about ideas for posts based on emailed question we’ve had so it’s still going on. He is up to his neck in Shrek (not literally….that would be pretty unpleasant) but as we speak the finish line is in sight for him so we will be grabbing those mics pretty soon and getting to it.

In the meantime, I thought I thought I would show some behind scenes stuff from a TV show I did a while back with some help of David brown, an excellent FX guy who I have known for a few years now.

David is one of those talents who has skill, technical ability and a fantastic work ethic with huge amounts of determination and a realistic assessment of situations. It made my life a lot easier having him around. Thanks, David!

The Job

Things are not all as they would seem aboard The Beagle.

It was a comedy sketch show called ‘It’s Kevin’ which I got through the excellent FX guy Waldo Mason, who has a string of credits and a stunning portfolio to make your eyes water.

The work was for makeup designer, the lovely Sarah Jane Hills was makeup designer on some of the most well-known UK comedy shows such as Peep Show and The Inbetweeners.

One such sketch involved Kevin Eldon as Charles Darwin talking to a fellow comrade who undergoes a series of evolutionary changes within the sketch.

Nose Sculpt

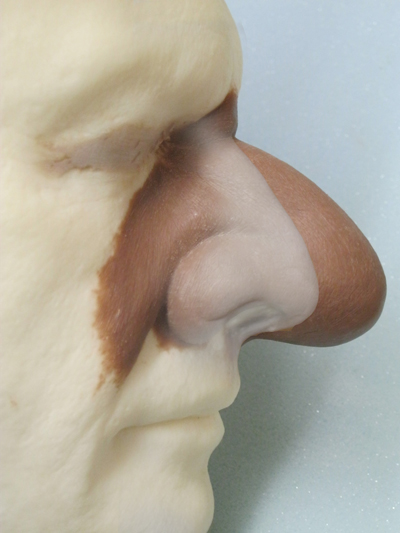
One thing that really helps a nose appliance is to finish the inside of the nostril area neatly, rounding it so it appears to go into the nose, and not appear too flat.

The first gag was a simple prosthetic nose – distinctly larger than the actors own but not so large as to appear impossible. The chap in question, comedian and performer Simon Munnery, had a pretty small nose to begin with which is always a treat from a prosthetic perspective. You can always add but you can’t subtract.

Nose montage for comparison

By superimposing the real nose beneath, it is clearer how much is added. It can help avoid ‘Mission Creep’ as production get excited about making something bigger without realising just how much is already added.

To make sure production was happy with the size, I emailed pics of the sculpt off, and realised that it would help to superimpose an image of Simon’s own nose over the sculpted one to make it more obvious what we had added.

Sometimes when clay covers the original features, it’s difficult to imagine what the original looked like, especially if you are showing a client unfamiliar with the original cast or performer. This way it was easier to show the final result and how much extra was added to get there.

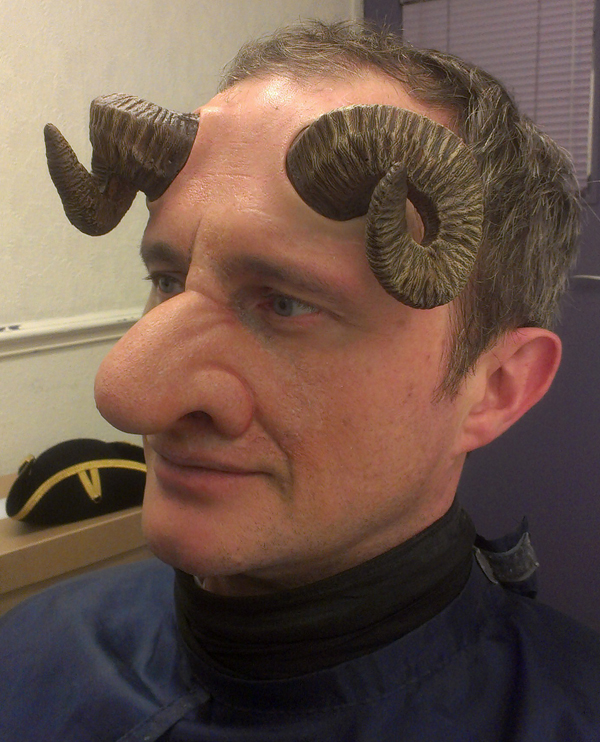
For the gag in question, Simon had to undergo several stages of transformation, meaning return trips to the makeup chair in between shots. Once the nose was on and shot, the next stage was a pair of ram’s horns to sprout from the forehead.

Conventional horn makeup often consists of straight horns as these are easier shapes to mould and cast. Rams horns by comparison are curled and lay flatter to the head making them much trickier shapes to mould and cast out.

The first stage was to fit the copy of the life cast with armature wire in the right place, and to twist each horn to the right shape, making them symmetrical. Let me tell you, that took a while…you think you are ok then suddenly, move the face to a different angle and the whole thing looks wrong.

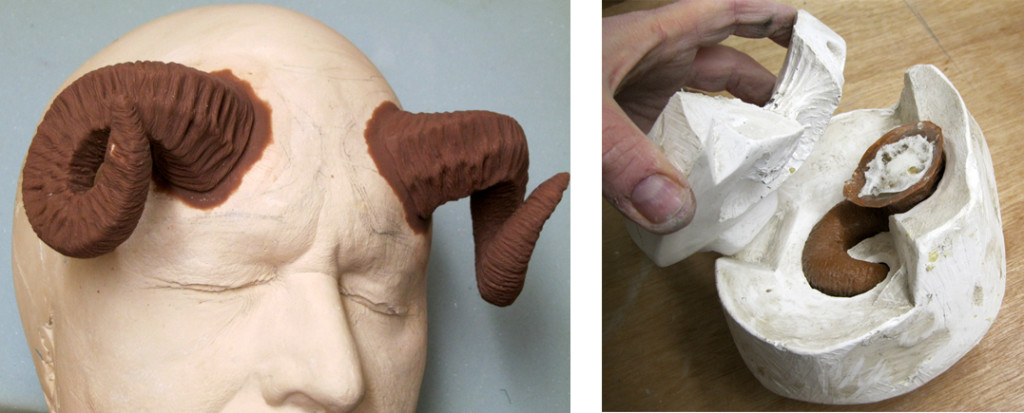
Once that was done I wrapped a thin coat of plaster bandage around the wire to give something for the sculpt to grip onto. Looking at reference images of real ram’s horns, we decided on the best shape and David sculpted both horns in about a day – pretty quick considering the awkward shapes and details involved.

Horns Sculpt & Mould

David Brown sculpted these ram horns, and I loved them! Look like tricky fellas to mould, don’t they?

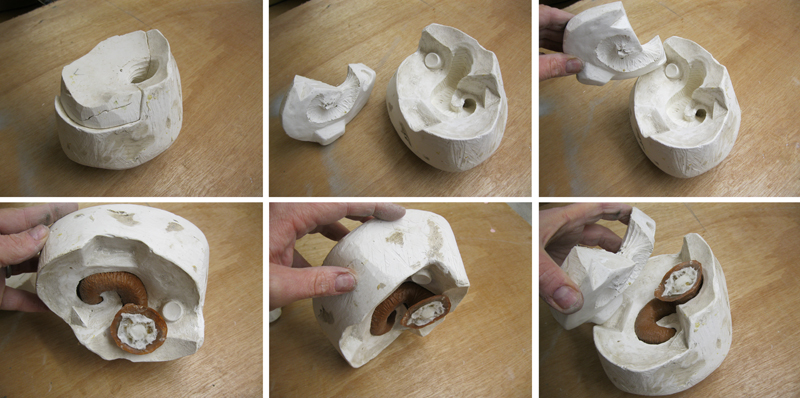
Moulding the horns whilst on the forehead meant making the mould in two sections, a seam line following along the main curve of the horn as much as possible whilst allowing the second piece to pop out – avoiding undercuts is essential when moulding using a rigid material such as plaster. Hopefully you can see from the images how the mould worked.

Sequence of images showing how rams horn mould worked

This sequence of photos will hopefully explain the way the mould worked.

The horns needed to be lightweight so I swilled the moulds with latex tinted with acrylic paint to a desired base colour, and then when this dried I filled them with two-part expanding urethane foam. This helped the horn keep its shape and remain lightweight.

The base of the horn was not going to be good enough to lose in the skin, and I wanted the horns to appear as if they had grown out from under the skin.

Admiral Horns Applied

The addition of two small ‘O’ shaped appliances hid the base of the latex horn nicely.

We made two small flat moulded ‘O’ shaped pieces which could be slid over the latex horn which was glued securely in place first. This then provided the flawless blending edge we required, and the horns really did look like they had pierced the skin and grown through.

The horns were prepainted with acrylic paints, using mainly drybrushing to bring out the high points in a paler colour. Simple, but very effective.

Claw Blimey
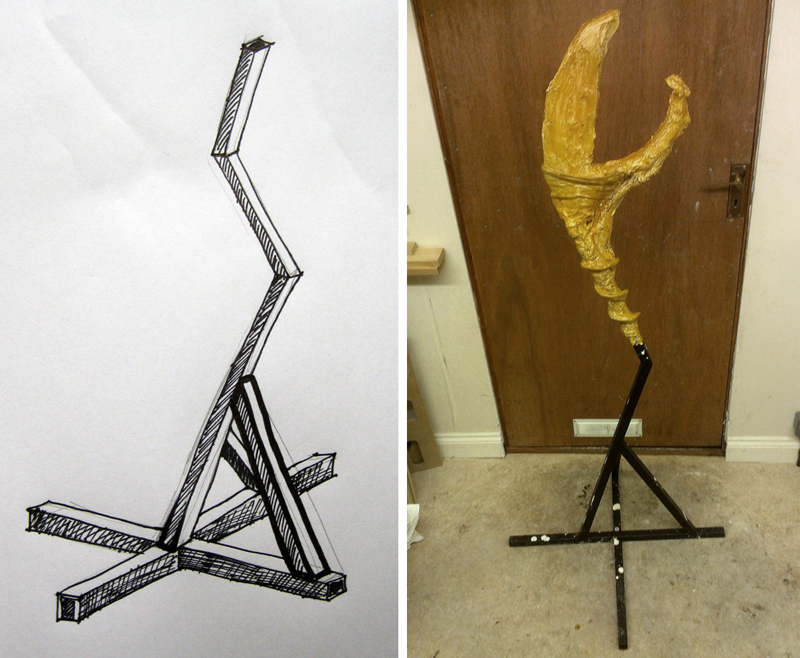
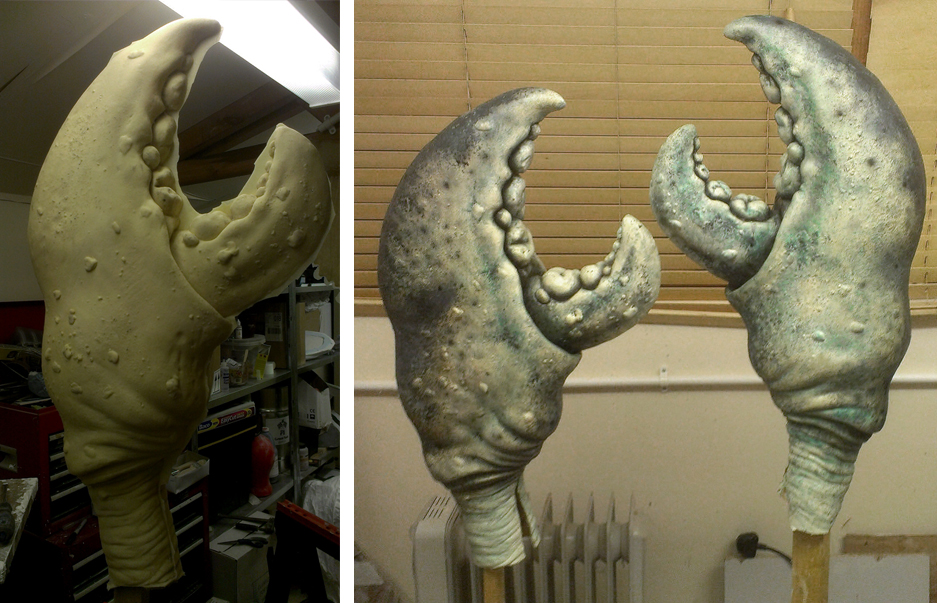
The giant crab claws were a lot of fun to make, and started out as a clay sculpt. Water based clay, just smooth buff-grey clay is great for quick sculpts of large shapes.  It’s pretty cheap too!  As they were pretty big, I had a large steel armature made to ensure that the weight of the clay sculpt and the plaster mould would be supported throughout.

Crab Claw - Armature

Steel armature! I had a welder make this up to my design, and it worked a treat.

The armature was bulked out with chicken wire and plaster bandage, and then covered with shellac, also known as ‘button polish. This distinctly yellow-orange lacquer is used to stop the moisture from the clay from soaking into the plaster and helps the sculpt to stay in place.

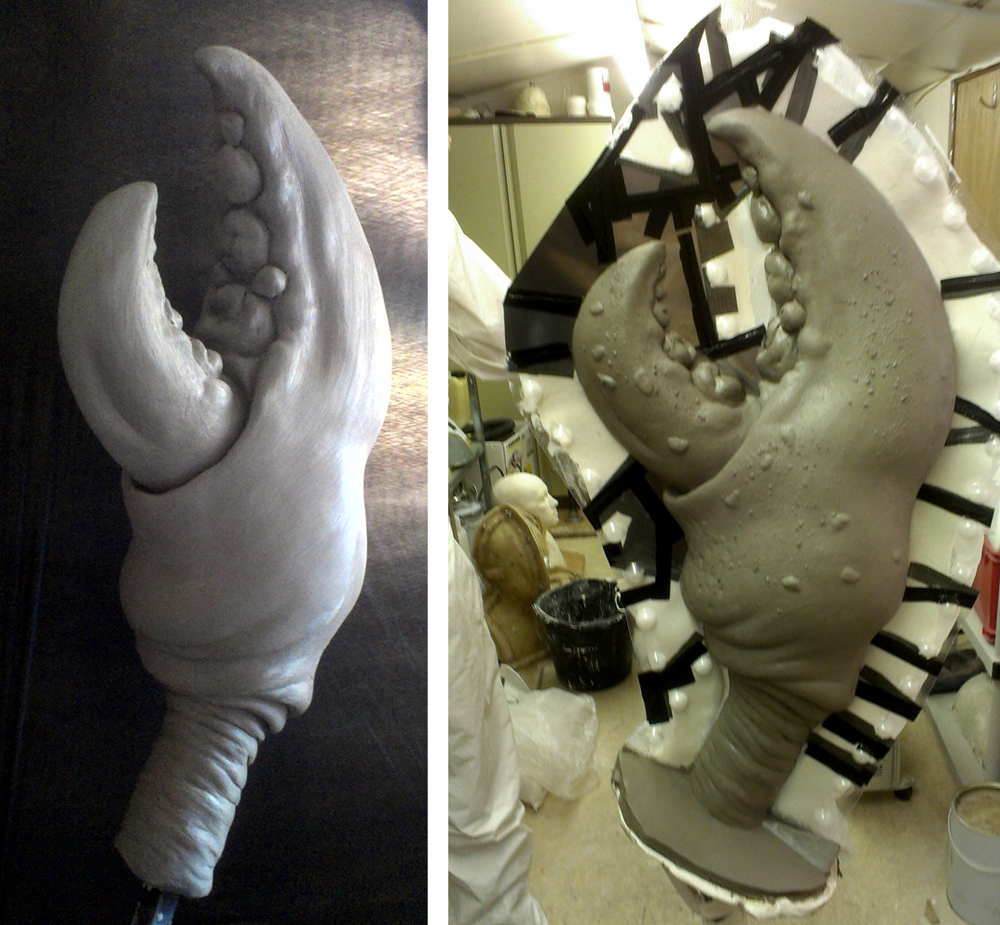
We bulked out the rough form quickly and sent off pics for approval to check we were heading the right way before committing to any detail. Once we get the go ahead, we add in the secondary forms and details, finishing with crusty barnacle-type crusts in places.

To do this, I collected up small bits of dried clay which had dropped beneath the sculpt during work, and sprayed the sculpt all over with water. Then, taking the dried pieces of clay by the handful, we aimed carefully and threw them at the sticky clay surface, securing them with another quick spray.

Crab Claw - Block Out

Crusty barnacles quickly made by lobbing dried out clay at the sculpt! Works a treat. Notice how I made the base of the mould flat so the wrist area was nice and flat in the mould. That way it’s just neater. I like neater.

This gives a natural looking placement of rough outcrops in random places, just like sea bound water critters with hard shells. We sculpted just the one claw, as the shape could be made symmetrical enough without compromising the shape to do for both left and right hands.

Once the clay was finished with, we allowed it to dry overnight to firm up, and then used plastic shim strips to create a wall for moulding in two halves. I don’t usually use shim for moulds, but as this was going to be a plaster/latex job with heavy textured paint finish I decided it would speed up the process without taking away from the finished result.

The shim is basically a thin vacuform sheet with inbuilt location keys made of hemispheres, so the two sides can be made at the same time and still locate correctly, saving time!

The plaster mould was made deliberately as thin as possible, using several layers of plaster and burlap scrim to give the mould strength. It was about 3/4″ (18mm) thick with strong edges to ensure the areas which would be clamped and levered against were sufficiently durable. The overall thinner walls of the mould itself meant that it was as light as it could be and would dry out quicker too.

The mould was left overnight to fully harden, and then the two halves were separated, cleaned out and left to dry over the weekend.

After the weekend of drying time, the mould was clamped together and plaster bandage was used all around the edge to ensure no latex would leak out from the seam. A 25 litre drum of latex (thickened by adding a latex thickener chemical to it) was procured for the job, and about 2/3 of this went into the claw to fill it to the top. I left the mould full of latex for about 6 hours, during which time a thickness of latex accumulates on the inside of the mould. Because plaster is hygroscopic, it wicks the water out from the latex leaving a skin behind.

As the plaster itself becomes more water logged, its ability to suck out moisture is reduced so there is a balance to be struck between thickness of plaster, thickness of final latex item and drying times.

We then emptied the latex back into the drum, and leave the mould upside down for a day to drain and dry off. This way, no thick pools of latex will remain in the tips of the claw, which would possibly not dry in time for the show.

After another day of drying with a fan left blowing into the hollow claw, the interior is powdered with talc and the mould opened, taking the hollow latex claw out. It is about 3mm thick all over and still damp even though it is dry enough to hold its shape.

Crab Claw - Latex Unpainted

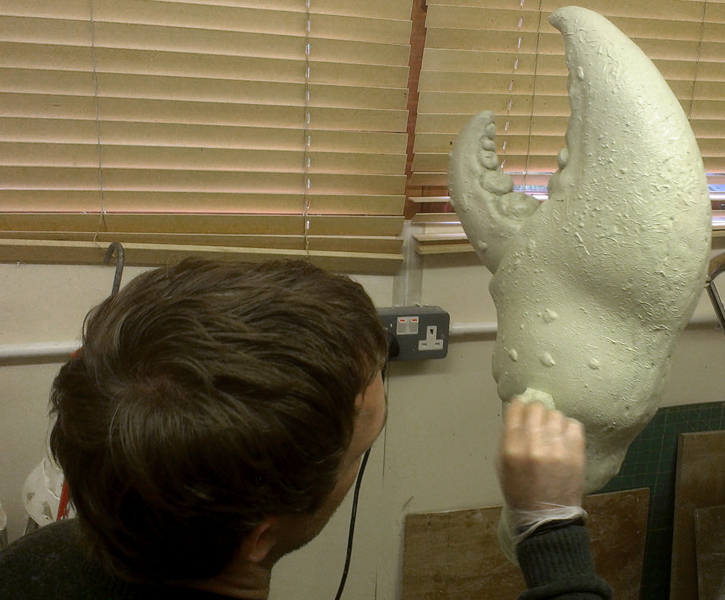
The raw latex, left, unpainted and unseamed straight from the mould. Seam was actually pretty sweet! Seaming was basically trimming carefully with curved scissors. The painting was done with PAX base, and washes stippled on with brushes and a sponge, some airbrushing with acrylic inks and a bit of drybrushing.

Even though three drying days have been involved, there is still a lot of moisture to come out of it, so it is left hanging up whilst the second claw is cast out just like the first. Overall, there was approximately a week involved in casting and drying out the two claws before we were able to seam and paint them. All this was accounted for in the scheduling, so despite this there was ample time to do it all.

Each latex claw was then replaced back into the mould and the inside swilled with a two-part expanding soft(ish) foam to stop the latex claws from looking like hollow bags when they were banged together and used in the performance.

David then went to work painting these claws with a pale sandy coloured PAX paint base, and we applied layers of mottled greeny-blues and browns, mirroring the rough pattern to create a distinctly left and right claw appearance even though the same claw sculpt was used for both sides.

Crab Claw - Base Pax

A pale PAX base allowed us to ge much darker in places with washes and mottling and use the base itself as the highlight. The teeth-like nodules on the claws really popped by airbrushing dark greens and black around the base, so strting pale and going dark was the way to go.

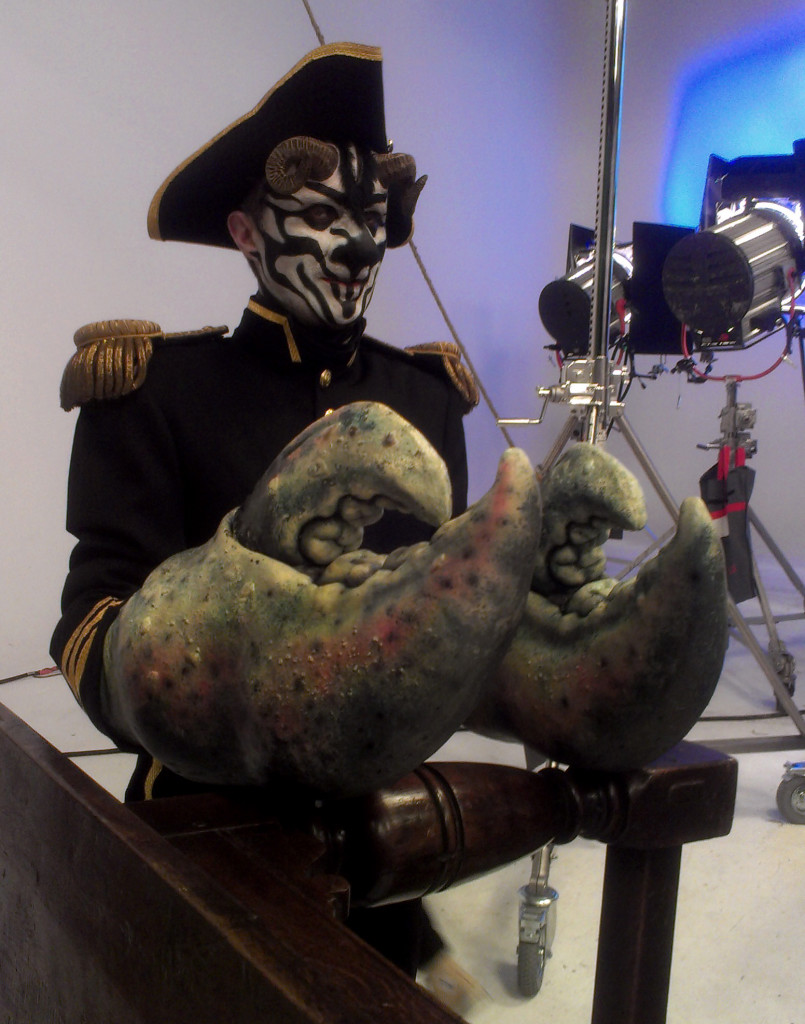
The thumb slid into the smaller appendage of the claw to allow them to open and close, and once the paint job was approved, we bagged these up and moved onto the last few items.

Simon Munnery on set and between takes. The guy was an absolute trooper.

Simon Munnery on set and between takes. The guy was an absolute trooper.

On the day of the shoot, the costume was adapted to take the increased size of the claw around the wrist, and it never ceases to amaze me just how quick and clever costume departments are when it comes to adapting things to solve problems.

Justin Selway, one of the designers was a trooper helping me with the claws fitting, and both he and Sam Perry came up with all kinds of neat tricks to slice, dice and stitch the costume to fit.

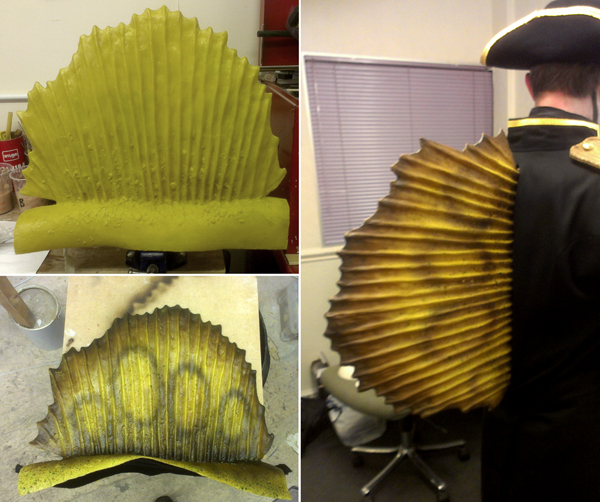
The crest was pretty straightforward to make - the real trick was in making the harness which supported it and then modifying the overcoat to allow it to appear out the back without damaging a beautifully made costume.

The crest was pretty straightforward to make – the real trick was in making the harness which supported it and then modifying the overcoat to allow it to appear out the back without damaging a beautifully made costume. I love it when you get to work with talented people from different departments. You get such great insights and realise just how much everybody knows about what they do, and that never really gets appreciated unless you see the problem solving in action.

David also made a rig for a crest, like the ridged plate shooting up from the spine of a lizard, which needed to come out from the back and go through the costume. Having something stay in the right place and be secure all day during performance ends up calling on all manner of skills outside of just the initial making aspect. I really got a kick out watching it come together and seeing departments collaborate to make something happen.

I will cover the last few gags in the next post, tongues and giant antlers. Who’d have thought? It’ll be out within a week.  I am writing between sculpts and makeup tests so I am keeping my teeth sharp!

Please do leave a comment below, as I always enjoy hearing your feedback!

Stuart

Posted in Behind The Scenes, Moulding, Sculpting, Tutorial | 7 Comments

Sculpting Prosthetics: Reptile Skin Textures

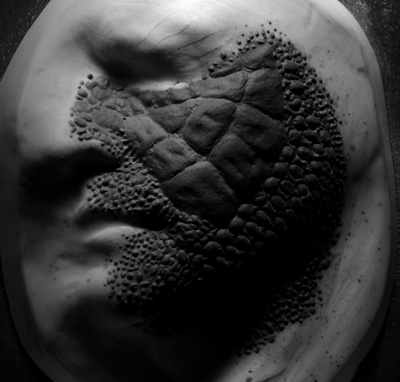
SculptScaly reptilian skin is a fertile area to draw inspiration from, and can be used in a lot of ways.

This blog post takes a look at the basic kinds and how you can create them.

Continue reading

Posted in Uncategorized | 12 Comments

Sculpting Prosthetics: Skin Textures

Texture smallThis video covers the first in a series of texturing for prosthetic sculpts, and in this one we’ll take a look at creating natural skin textures.

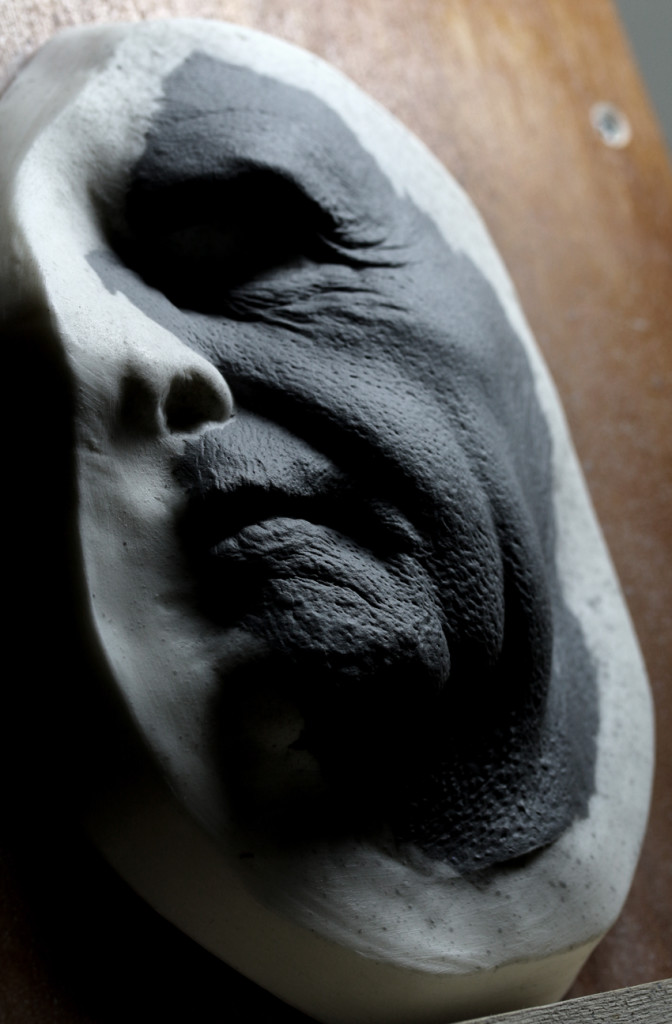
I have tried to cram in as many of the commonly needed skin textures in this sculpt which are pores, wrinkles and folds and raised goosebumps.

These textures could of course be amplified or reduced by using a heavier or lighter touch depending on the effect you need.

It’s worth pointing out that texturing needs to happen after the form is there. You can’t texture your way to a good form, if the shapes aren’t right then change them until they work.

Think of textures like a wallpaper. You need put it up onto good, flat walls.  If the walls aren’t flat, straight and level then neither will your expensive lovely wallpaper.

As such I want to start of by quickly showing you how I block out the form onto the core. I am sculpting onto a urethane resin cast of part of a face (FC52 from Mouldlife in this case).

The lifecast was cleaned up, smoothed out and modified to get rid rid of as many undercuts as possible, such as the join between the lips, nostrils and the eyelids, which often have little overhangs due to the weight of the materials on the face during lifecasting. If you want to know more about how to make cores, check out my video on making them here.

Blocked out form

You have to start with the right shapes before you begin adding texture. It’s like trying to wallpaper a wall which is still being built otherwise.

I start by adding small blobs of plastiline.  I like rolling each one into a kind of sausage shape, and pressing this in place, plattening as I go.  This gradually builds up into the rough shapes I want, and then I blend the blobs together with sculpting tools, usually a flat wooden tool and a twisted metal loop.

This makes those individual blobs blend out into a new shape, and you see it as a single, complete shape.  The texture of the tool marks can be smoothed with a finer tool like a guitar string loop, however as you will see as the texture starts to go in, it really doesn’t need to be perfectly smooth before texturing begins. If you want to know how to make your own loop tools, check out my old tutorial on that here.

It’s worth just pointing out that texturing can look just plain wrong when you start, as your smooth blank surface starts having little dents or scoops put into it and it just can look like you are ruining a nice smooth surface. I know that feeling!

Starting Texture1I call this the ‘blank canvas syndrome’, where it just looks like isolated dents in an otherwise perfect surface.  Have faith and keep at it, because soon, there will be lots of little dents, and the more area you cover, the more they will look like they are supposed to be there!

Anyway, check out video to see how different kinds of pores, wrinkles, folds and goosebumps can be created on the surface with just a few simple bits of kit. 

We also cover a method of creating ‘texture stamps’, where you harvest existing textures from objects (stone, leather, fruit skins etc.) which can also be used on appliance sculpts.

Remember, if you have any questions about makeup FX and want to see a blog post dedicated to your question, email us at stuartandtodd@gmail.com.

Thanks for watching
Stuart & Todd

Posted in Uncategorized | 7 Comments

Lifecasting Tips & Tricks

Lifecasting is a basic, essential skill in creating custom fitted prosthetics.

Often it’s the first process before work begins in earnest, so it’s really a good idea to do it well. Errors made at this stage get passed on throughout each process.

Scroll down to the bottom to hear the latest podcast on this.

We had a couple of questions regarding lifecasting, and seeing as there are as many techniques and variations as there are people taking lifecasts that it would be cool to bring together some of the best tips and tricks picked up from working with others.

This won’t be an exhaustive tutorial on lifecasting, as this has been covered so well by others in great detail.  A great example is Lifecasting with Silicones and Alginates by Neill Gorton, available as a DVD and stream which pretty much covers everything in great detail! Rather than reinvent the wheel, we thought sharing our tips and tricks to build on the information available would be beneficial to you life casters at large!

If you want to check out a little lifecasting to whet your appetite, take a look at some videos of a face and hand cast I made with artist and well known makeup tutorial YouTuber, Klaire De Lys a while back:

What is a lifecast and why do you need one
Lifecasting is making a three dimensional duplicate of a real body part, usually a face or head, of a live person. Usually you do this because you need a copy of the performer in order to make a custom fitting prosthetic which needs to fit them exactly. It can also be used to make bodies or body parts which are accurate to the performer without sculpting it from scratch.

This severed head was for a TV production of Dracula, for Kristyan Mallet.. The original headcast was done by Kristyan, who then filled the alginate cast with melted plastiline. I simply cleaned up the cast, opened the eyes and added some gory neck stump textures to create the severed head.

This is often the case for severed heads etc. where it would be a lot more effort to sculpt a lifelike portrait when an accurate lifecast can be made in twenty minutes.  By melting plastiline and pouring this inside the negative mould taken from the person, a positive version can be made which can easily be sculpted and modified once the plastiline has cooled and returned to a solid state.

Digital Alternatives
An alternative to lifecasting is to take an accurate 3D scan. There are different ways of doing this with hand-held scanners to booths in which a subject sits or stands in either a static chair or a turntable.

There is also software such as 123 Catch from Autodesk and Photomodeller by Eos Systems Inc. which can stitch a series of images together and creates a 3D virtual model which can then be modified and output to a 3D printer or cutting machine.

This interesting video shows how a simple idea can be turned into an incredible effect – just imagine how this could be used in makeup effects: http://vimeo.com/43442146#

Polystyrene machined tool of body scan

Polystyrene machined tool of body scan used by Millennium FX for Dr Who.

Digital scans are already sometimes used instead of conventional body casts.  Due to the size, it is machined out of a lightweight material like polystyrene by companies like Bakers Patterns, so the fine detail isn’t available in the cast but for large body suits this detail isn’t necessary anyway.

However, lower resolution detail is compensated for with the accuracy scans can have, as the pose isn’t required to be held for long periods as with conventional casting.

There is no distortion or discomfort due to casting material weight, and modifications can be made to the virtual model before being machined, such as elongation of limbs to offset the effect of shrinkage in foam latex.  The lightweight styrene parts can then be finished and remoulded as usual to create master moulds yielding multiple casts in whatever materials you need for the job.

It is also possible to scan a performer in one country and send the data to another for production.  This is useful if an actor is located far from where the suit is being made and can remove the need for flying a performer in for a lifecast or transporting a lifecasting crew with a heavy or awkward mould.

Other industries are using technology like this all the time, so just like you learn to mix alginate and use plaster bandage, it makes sense to get familiar with the emerging technologies.

Safety!

  • Lifecasting should not be attempted without supervision when you start out. There is scope for error when doing this – it’s not terribly difficult to do a lifecast. Nor is it difficult to do it badly, so make sure you know what is involved before you start.  Get supervision and training first.
  • Make sure the subject is well and safe enough to take part.  Conditions and illnesses which could put them at risk are not worth taking a chance on just for a lifecast!
  • Don’t use straws up the nose!  It may seem like a good idea, but not only does it mean the cast will be a distorted one with straws stretching the nostrils out, but if they get knocked accidentally then it could cut into their nasal passage. Yikes!
  • Setting up the lifecasting room and getting everything you need beforehand is very important.  Make sure you have help, so the person in the cast is never left alone if you need to leave the room.
  • Make sure you have sufficient protection for the floor, tables or working surfaces and clothes!  Plastic sheeting on carpet is essential – although better to try to not work on carpet!
  • Make sure any plastic is taped down securely and pulled tight so you don’t trip up over wrinkles or folds in it.
  • Think not only about the room you are working in, but the route you will need to take to get to sinks/toilets/outside etc.  Plastery footprints trailing through hallways are a nightmare to clean up!
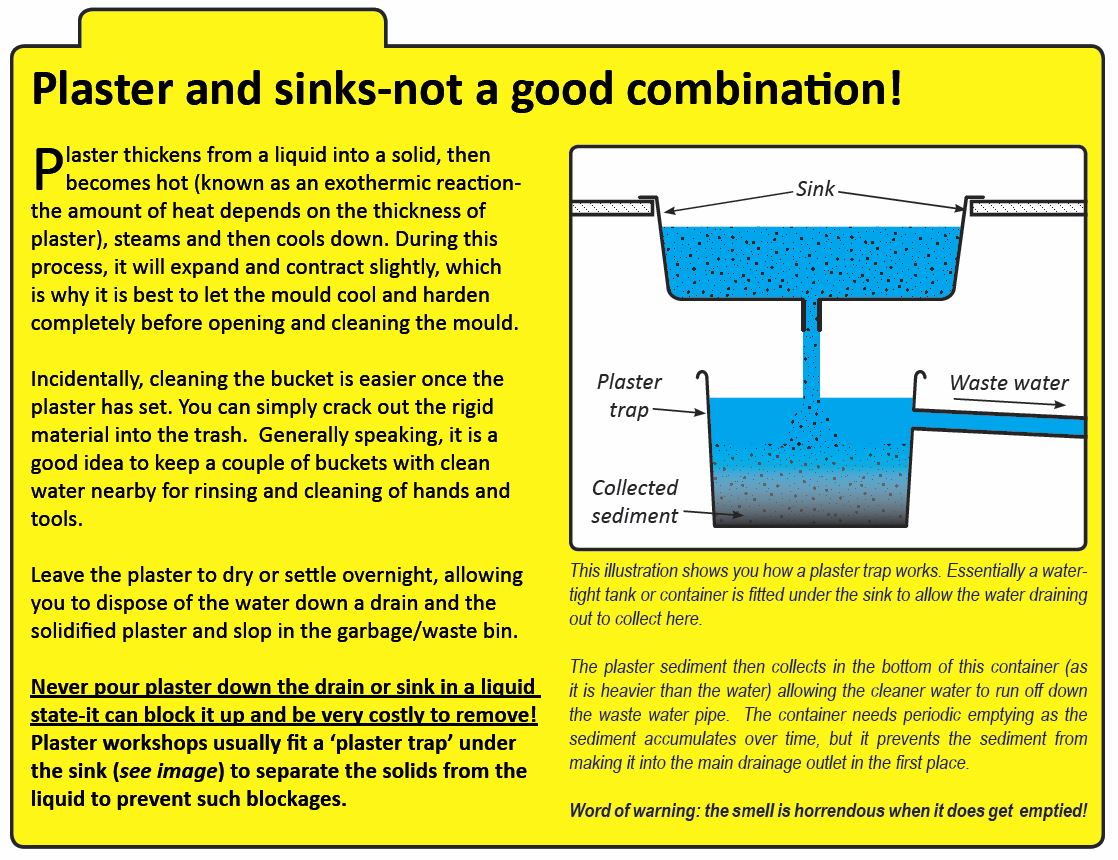
  • Do not pour any plaster or plaster-water into the sink or drains as it can set in the pipes and cause a very expensive blockage!  Fit a plaster trap if possible, or allow the plaster residue to settle overnight in the buckets so the water can be poured off safely the next day whilst the remaining sludge can be scooped out and put into the trash or waste collection.  It’s worth getting extra buckets so you can get fresh water if needed without emptying the dirty water first!

This little excerpt from my Awesome Latex Ecourse shows how a simple plastic tub hooked up to the waste pipe under the sink can help stop the drains from getting blocked with sediment from plaster, clay and general mould-making mess.

Alginate or Silicone?

Alginate
Dental alginates have been used for years to make lifecasts, and it works well.  The main benefits of alginate are they are quicker and cheaper than silicones, but the trade off is that you can really only get one cast out of it.  This isn’t a problem as you usually clean up the original cast and make a master mould in a silicone afterwards.

H0wever, if you are only intending to make one anyway – or don’t have the time or materials to make a master mould which can produce multiple copies later – then you need not waste the extra on using silicone.

Alginates are usually a powder, mixed in a bucket with water by hand or using a mixer attachment in an electric drill.  It is often quite quick setting, although you can get slower setting alginates for body casting large areas.

By adding a small amount of a slower setting alginate to standard set alginate, you can increase the working time more gradually, although emphasis on the subjects comfort mean quicker is usually better.  A full head should really be covered in alginate within two minutes, so a working time of more than five is excessive for most purposes.

Once alginate has set up, fresh alginate does not usually stick to it, so any areas which need additional coats will need an alginate bonder.  It is therefore desirable to get the cast done in a a single mix.  To be more clear on working times, it makes sense to do a test mix of the material and time the setting with a timer or stopwatch so you and the subject both know how long you have before it sets.

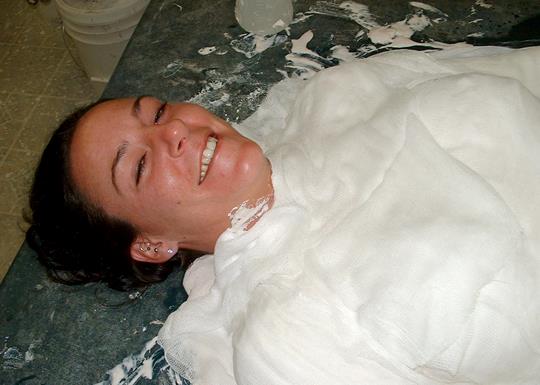
As alginate remains flexible once set, it needs a rigid jacket applied to the outside to support it and retain the correct shape.  If you peeled it off now, it would just be a big flexible face-shaped bowl and would distort, making it impossible to fill with plaster.

Once set, alginate quickly dries as the water content begins to evaporate and can shrink, so it needs filling with plaster quickly to retain accuracy. If you are unable to fill the cast immediately, you can keep the alginate damp with wet tissues and sealing in a plastic bag to keep air out.

Plaster bandage is used to keep the soft alginate steady so when plaster is added, it stays the same shape and creates an accurate cast.

This will be ok for a day or so, but it will eventually become mouldy and unusable, so fill it as soon as possible. Alginate can tear easily so be careful when handling, however it can be repaired with superglue for a quick fix.

Silicone

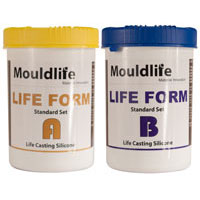
There are a number of makes, most notable Smooth-On’s Body Double, and Mouldlife’s Life Form.  Essentially the process is the same – two parts are mixed together (usually in equal amounts) to create a pate which is then applied to skin before setting.

Mould Life make Life Form, a great life casting silicone which releases beautifully from hair!

Silicone can be built up in multiple layers, as unlike alginate, it sticks to itself well.  This means any thinner areas can be reinforced easily, and missed spots or holes are easily repaired with additional mixes added.

Because of this, it can take a little longer to do a cast which isn’t ideal if the subject is nervous, although with experience you can take casts using silicone just as quickly by working efficiently and applying it well.

Once the silicone has set, it still needs a rigid jacket to keep the shape and usually this is still done with plaster bandage.  As there is no water  involved in mixing silicone, it doesn’t shrink and there is no need for immediate filling unlike alginate – handy if you are travelling with casts.

The final mould is reusable, and much more durable, yielding many casts from it.  Although this is handy, if you have not done a great job of applying it, each cast from the mould will naturally have the same air bubbles, defects and distortions.  You may still therefore need to make a master mould anyway.  The benefit however is several people can get plaster casts and go to work on sculpting whilst the master mould is being made.  Silicone is more expensive than alginate, but the extra costs is worth it if you intend to reuse moulds and make multiple casts.

Accuracy
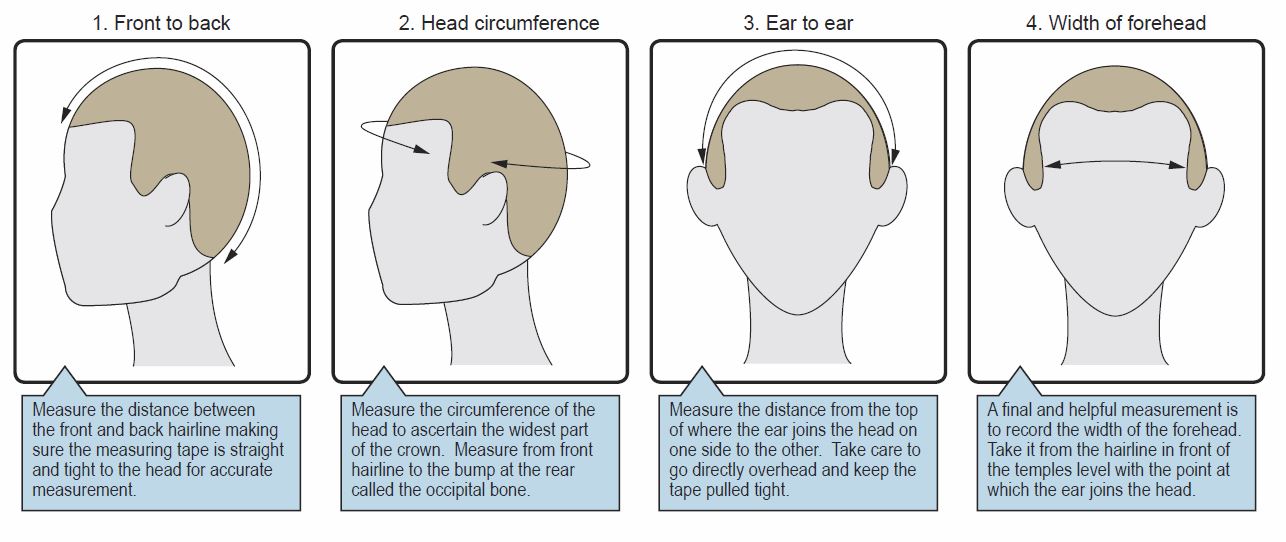
With any lifecast, it is advisable to take photos from all angles, and take head measurements with a tailors tape so you can refer back after the cast and check accuracy.  After all, the idea is to get as accurate a duplicate of the person as possible, so taking time to make sure you have a record of the real thing is helpful once they have left the studio and you are wondering if the lumps and bumps on the cast are down to your technique or their diet!

Measuring the head circumference and marking the hairline will enable you to check that the final plaster cast is indeed accurate, and any mass created by hair under the baldcap is accounted for and shaved down.

Uneven shoulder shoulders, twisted noses or eyes at different levels may not be noticed in the flesh but may be apparent in the plaster cast later so verify with the reference to be sure.  Usually casts need to be made in a neutral position, so care must be taken to avoid slouching, head tilted to one side etc. unless this is needed in the final cast.

This image, courtesy of Todd shows a bodycast taking place. Picture courtesy of Todd Debreceni.

If the purpose of taking a cast is to make a corpse lying on a floor, it makes sense to cast them lying in the correct pose.

If you take a cast of a person standing up, and lay a copy of it on the floor, it won’t look like it is lying down at all! The way the body flattens out and limbs sit when relaxed is completely different to when the body is standing up and defying gravity!

The cast, being taken whilst lying down, is an accurate version of the body in repose, with the skin and limbs flattening and spreading naturally as they would in that position. Picture courtesy of Todd Debreceni.

Face casts for prosthetics are normally taken sitting upright, as this is the position the face is likely to be when the appliances are worn. Having a face cast done lying down or at an angle may make the face distort slightly, especially once the additional weight of the casting material is applied to skin.

Check out our lifecasting podcast to stream or download here:

And remember, if you have an FX makeup question, sling it our way so we can get busy! Email us at stuartandtodd@gmail.com!

Stuart & Todd


Posted in Life Casting, Tutorial | 5 Comments

Sticky Situations – The Zen Of Prosthetic Adhesives & Removers

Welcome to the first of these tag-team posts with Todd and myself.

We will be kicking off with a great question from Stuart Webb about adhesives & removers. 

We have a free podcast and a PDF download for you on this too – scroll down to the bottom of this post for the links!

He asks “What I would like to know is what you both use to remove various prosthetic glues. I used Pros aide to glue some bondo transfers I had made & tried Telesis Super Solv to try & get them off. It took AGES! Would I have been better off using something else?”

There are a number of adhesives and removers designed applying prosthetics to skin, and it can seem confusing when you start looking.

They have different names, ingredients and come in varying quantities making the possible combinations of what to buy overwhelming.

Although they are more readily available, it is worth pointing out that Spirit Gum (in it’s standard form) and Liquid Latex are not serious contenders where prosthetics are involved.
These old-school adhesives are okay for some things, but they are they often irritate skin the most, and have relatively weak sticking power so for the purposes of this blog post, we won’t include these.  Check this video on doing a simple cut effect using wax with spirit gum to see it in action – it’s about the only thing I would use it for.

So lets start settling the mind by establishing a basic point – there are essentially two types of glue used with prosthetics.  These are:

Water based acrylic emulsion adhesives: These are great for sticking latex, foam latex, gelatine and silicone appliances which have a cap plastic barrier.   They tend to be less expensive so are great for when you are starting out – although they are still great professional adhesives.

Solvent based silicone adhesives: These cost more, but stick pretty much anything.

Glues: Water based acrylic emulsion adhesives
Pros Aide (The Origianl)
Pros Aide 2 (The Sequel)
Telesis Beta Bond
Aqua Fix
Kryolan Prosthetic Adhesive
Ben Nye Prosthetic Adhesive
Technovent ProBond Adhesive G609
Graftobian Theatrical Pro Adhesive
Glues: Solvent based silicone adhesives
Telesis 5
Telesis 7
Snappy G
Kryolan Medical Spirit Gum
Bluebird Silicone adhesive
Removers
Isopropyl myristate (often an ingredient in many removers)
Super Solv, Super Solv Gel
Pros Aide Remover
Mavidon Body Makeup Remover
Ben Nye Remove It All
Ben Nye Bond Off
Kryolan Medical Adhesive Remover
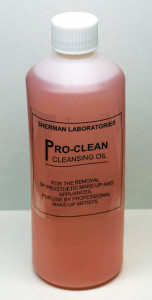
Pro Clean
Mouldlife Life Wipes


  • Good Points for Water based acrylic emulsion adhesives:
  • Sticky and flexible; relatively inexpensive
  • Bad Points for Water based acrylic emulsion adhesives:
    Sweat; can’t use with silicone
  • Good Points for Solvent based silicone adhesives:
    REALLY strong
  • Bad Points for Solvent based silicone adhesives:
    Very pricey.  That’s about it for bad points…
Telesis 5

Telesis 5. The newer formulas have bigger numbers.

Proas Aide 2_128x192

Pros Aide – the classic!

Telesis Beta Bond Plus_128x192

The very lovely Beta Bond.

Aqua Fix_346x585

Mouldlife’s Aqua Fix is pretty darn good!


Application Technique
To apply the adhesive, some people like brushes, other like cotton swabs(Q-Tips, Cotton Buds etc.), other like to use sponges.  A lot of it is personal preference, although for large areas sponges work great.

Cotton swabs work well for small pieces as they can easily be disposed of, and remove the need for brush cleaning and solvents.  For larger pieces, I use a large paintbrush in the main, and switch to cotton swabs for the edges.

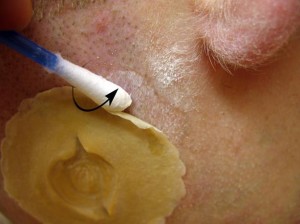
Rolling bud_614x460

Twirling the swab around allows you to lift and glue the edge in the same smooth motion!

Swabs are great for edges, as they can be used in a rolling action, allowing edges to be lifted up by the rotation of the swab.  Also, you can use swabs with solvent to dissolve the edges of the cap plastic barrier.

Often a little alcohol on a swab allows you to temporarily reactivate the glue so you can reposition a folded edge.  The alcohol evaporates, and the edge remains in position, held by the glue which returns to it’s dried state.

Some people prefer to apply glue to the skin only, others to the appliance, some do both.  Just don’t ever drop an appliance which is covered in glue!  When starting out, I suggest you apply to the skin only, just make sure you don’t add too much -this stuff aint cheap, so you don’t need a thick layer at all!

If you slap a piece of rubber over wet glue, the air can’t get to it so it can’t dry properly and it won’t stick.  This is something a lot of newbies get wrong because it seems so counter intuitive.

Let the glue dry before applying?  Sounds like madness!

Pros Aide is white when wet and clear when dry.  It remains shiny and sticky.

Pros Aide is white when wet and clear when dry.
It remains shiny and sticky.

These glues do not stick when they are still wet.  Pros Aide, for example, is very tacky and shiny when dry, and this one of it’s great features.

Telesis 5 feels dry to the touch but ‘grippy’ once the solvents have evaporated.

However if you press a clean appliance onto it, it sticks.  The firmer you press, the better it sticks, and after the piece has been worn for a while, the bond increases slightly as the body heat warms the glue.

Other reasons to allow the glue to dry first include:

  • Bubbles of white Pros Aide can be seen through translucent appliances like silicone.
  • Wet Pros Aide has water in it, so applying gelatine over Pros Aide that is still white means water is in contact with gelatine – another no-no!
  • If you put silicone over wet silicone adhesives, the liquid solvent can’t evaporate and is held against the skin, not drying.

Let it dry off, and you will get better adhesion.

Contact
For areas which get a lot of stretch, wear, movement and maybe moisture such as the mouth, silicone glues are more durable.  If the character is shouting a lot, drinking or getting blood everywhere, then anticipating the extra hold required is a wise move. For areas like these, often glue is applied to both skin and appliance and allowed to dry before applying.  This method is known as a contact, and can be done with both silicone and water based acrylic glues such as Pros Aide.

This can be a tricky manoeuvre because once the surfaces touch, they stick very well straight away.  It will need careful unsticking with a solvent such as 99& alcohol should you accidentally place the piece incorrectly.  If you were to apply Telesis 5 or Snappy G to two surfaces and leave them for a week, they would still stick amazingly well once pressed together.

To paraphrase Lance the drug dealer in Pulp Fiction, “That stuff costs more, but when you use it, you will know where that money went!

Pros Aide & Pro Bondo Transfer Appliances
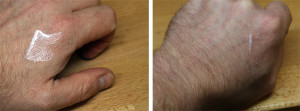
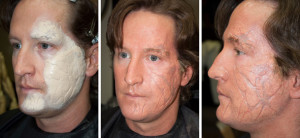
There are a lot more flat moulds and transfer pieces being used nowadays which use a thickened Pros Aide mixture for the actual appliance material instead of silicone or latex.

Bondo pics

Todds application of a bondo transfer.
They stick mighty well!

This material works incredibly well for small appliances, and sticks especially well because it is made of the very material which is used as a glue. If you have ever used it, you may have seen just how tenacious it is, bonding very well to clean skin.

Glue removers which work well with Pros Aide will work best on ‘bondo’ transfers.

Surfaces & Why They Matter As Much As The Glue Itself
It is worth pointing out that the surface to which the adhesives are applied counts as much as the glues themselves.  Pros Aide sticks great to normal skin, but skin ideally needs to be clean, and free of oil, makeup or dirt etc. so they glue can do it’s job properly.

Also check and clean appliances to ensure there is no  residue of release agents, powder or talc used in the casting and demoulding process.

Silicone appliances which have a cap plastic barrier can usually be applied using both types of glue, as the material in contact with the cap plastic surface rather than the silicone gel behind it.

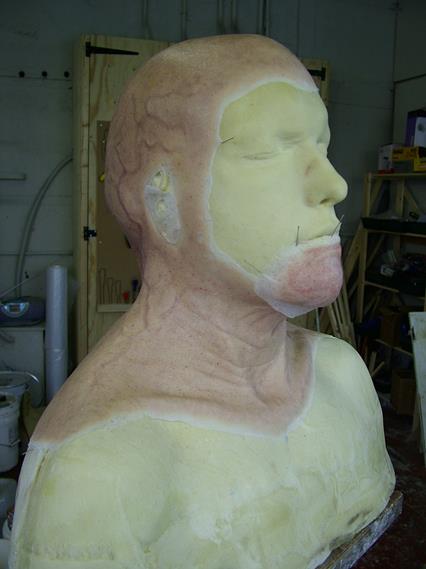
This cowl appliance has a Plat Sil Gel 10 skin, not a cap plastic skin!  This means I had to use Telesis to stick it rather than Pros Aide.  Using an A&B skin meant the appliance was reusable, so this huge chunk of silicone didn't need to be remade for every application.  It instead had fresh, small appliances on the face which overlapped the edges on this one.

This cowl appliance has a Plat Sil Gel 10 skin, not a cap plastic skin! This means I had to use Telesis to stick it rather than Pros Aide.
Using an A andB skin meant the appliance was reusable, so this huge chunk of silicone didn’t need to be remade for every application.
It instead had fresh, small appliances on the face which overlapped the edges on this one.

You can also choose to use a silicone adhesive instead with cap plastic coated appliances if you wish – it sticks very well.  However if you are using an appliance which doesn’t have a cap plastic barrier (something like a large overhead cowl appliance for example – see picture) then you HAVE to use a silicone adhesive.

If you think about it, silicone appliances are made out of….silicone.  Remember moulds get made out of silicone because of it’s amazing release qualities where not much sticks to it.  That is a bit of a problem when appliances are concerned, so using a silicone based adhesive designed for the purpose fixes that.

These silicone/solvent glues tend to cost more, as the hoops that manufacturers have to jump through to get a skin-safe material out to market mean a lot of extra work.


Sweat
Heat and moisture build up behind an appliance can reduce the effectiveness of a glue.  Pros Aide can kind of melt away if there is enough sweat, and I have mopped up many bubbles of milky perspiration from bubbles forming under appliances.

This was less of an issue with foam latex as foam can absorb and ‘wick’ out perspiration to some degree, whereas silicone is not absorbant in the slightest.  You can also use a glue primer on the skin such as Top Guard which is sprayed or brushed on to provide a perspiration resistant surface which also sticks better to the adhesive.

Try to minimise perspiration by keeping the performer as cool as possible and hydrated.  Usually this isn’t something you have a whole lot of control over, as heavy costumes, lights and physically active performances are all contributing to the heat build up.

Also a trick I learned was to dilute some Telesis 5 with 99% alcohol to make a primer which improves the strength of the glue.

Repairing Lifted Edges
Appliances which become loose or unstuck can be repaired quicker with silicone/solvent glues.  If you can, clean the exposed area under the appliance with an astringent like Seabreeze to get the sweat and oils off, dry it and reapply silicone adhesive.

Often edges in a certain area will continually pop up no matter what you do.  In this case you should be able to restick the edge down without more glue being added.  There comes a point when simply adding more and more glue will not help the situation, and it could turn into a gummy mess.  Silicone glues usually can be restuck just with pressure.

Hair
If applying over hair, it may need flattening down first.  Arm hair for example is usually thin enough to stay down with the glue used to apply the appliance, but eyebrows may need gluing down flat first.

If gluing into and over hair on the head which often happens when forehead pieces creep over the hairline, it may need sticking down with something like Gafquat first so the volume of hair is pressed and held down as flat to the skin as possible before applying the glue and the piece over the top of it.

This also helps removal, as the layer of glue is actually on the Gafquat rather than the hair itself, and Gafquat can be washed out with water. http://fx.wikia.com/wiki/Gafquat

Problems With Glues & Removers
It is important to check that the adhesives you intend to use are suitable for the person wearing them.  So long as you use products intended for skin use from an approved manufacturer (you may not use paint stripper or turpentine from a hardware store!), there is unlikely to be any serious problems, but it makes sense to check.

Most performers will be aware if they react badly to something and may tell you, but ideally you would do a patch test at least a day or two before the application is required.  By placing a small amount of the glues and removers on the skin for a short time and seeing if any reaction develops over the next 24 hours, you can be more certain of success.

Don’t do the patch tests on the face, as if there is any reaction you don’t want it to be something that will make them feel self conscious.  Usually the back of the neck and inside arm is a good place to test.

Skin reactions and allergies are not the same thing.  The skin can react to a material, or more likely it often appears red after the continued rubbing and wiping action.  Mild skin reddening after removal is quite common and usually fades after a short time.  Irritation which is persisting is different, and you should discontinue use of the materials if his is the case.

Allergies involve the immune system, and are much more serious.  I have not had  anyone truly allergic to the materials used when wearing prosthetic makeups, only irritated with some adhesives requiring us to change products.

Allergies need treatment, so be sure to supply all packaging and ingredients to medical personnel.  It makes sense to have MSDS (Material Safety Data Sheets) available for any materials in direct contact with the performers skin for the same reasons.  Most suppliers and manufacturers will have them available online.

Patch testing small amounts in advance can help flag these issues up before you start slapping it all over, giving you time to modify your approach and keep everyone happier.

Dry Skin
It is not uncommon for people with dry to skin to find that the glues tend to stick better to them than most which can make removal more time consuming and uncomfortable. Depending on how dry, it may be helpful for them to moisturise before application.

Also, thinning the adhesives down so the bond strength is appropriately reduced is helpful.  In the case of water based acrylic adhesives, a 10-50% solution of water will do it.

Silicone adhesives should have their own suitable thinners or solvent available from the glue supplier.  By adding a thinner to the glue, you again reduce the strength of the bond to suit.  You may need to do some tests to determine how much dilution is required, but by testing small amounts you will save a lot of time later, especially if large appliances are being used.

Oily Skin
Skin usually secrets natural oils to protect it, so cleaning the skin with a toner or mild astringent will help the glues do their job.  Silicone adhesives may be a better option in this case, and even using a primer like Top Guard for more severe case.

Removal

When it is time to remove the appliance, you need to get the remover on the glue.  It sounds like an obvious thing, but I have seen people futilely brushing remover on the outside of the appliance, hoping it would just soak through and magically fall off.  Mrs Doubtfire has a lot to answer for – it doesn’t just fall off.  If it did, it may do that halfway through a take, so these glues are designed to keep that sucker on there!

Super Solv in a Gel form

Super Solv in a Gel form

Pro Clean_363x715

In the UK, Sherman Labs ‘Pro Clean’ is big.

Ben Nye Bond Off_128x192

Todds personal favourite & remover of choice.


This is often an issue in makeup schools where appliances may only be worn for a short time before being removed.  The glues are at full strength, having not been perspired into by a sweaty stunt performer for eighteen hours.

First, make sure you have covered costume or clothing with towels, cape or paper roll of some type.  This is usually then end of a long day, so removal is happening when you may be at your most tired and ready to get to bed.  Make sure the sloppiness and spills are protected against before you start.

If your edges are still blended in well, you may need to encourage them up by wiping remover over them using a cotton-wool pad.  These work well at gripping the edges, allowing you to then work into the piece with a dedicated brush.

Work remover into the skin, getting under the piece and lifting the appliance off as you go.  Try to not ‘pull’ the piece off  – you may get a performer who like to tear it off heroically at the end of the day.  Well, the glue is still there, so no real time has been saved.

Saline rinse_77x90

Saline ampoules for easy eye rinsing.

Take care near the eyes – I think it is a good idea to keep tissues and eyewash on standby should some remover accidentally get into the eye.

I think the quicker the better so if you can get help during removal then do so. For big appliances get as many involved as can comfortably fit around them if you can.

Also, if your performer is happy to the have them hold a cup of remover for you near the appliance. They probably want out more than you do, and it saves you from moving back and forth constantly to dip your brushes.  Plus it  reduces the chance of knocking the cup over too.

Removed silicone_729x547

You will almost certainly destroy those beautifully thin edges of the appliance during removal.
This is just a consequence of thin edges being stuck to skin, and can’t be avoided. I mean look at this…once a feather thin edge appliance and now after removal it looks like bacon.

Foam latex may absorb remover, so be sure to apply it onto where the skin is attached to the appliance, as the foam may soak it up instead.

Foam has a tendency to swell and distort with removers too, so often it helps to tear off large unattached sections especially if they flop about and get in the way.

With cap plastic encapsulated appliances, it is not uncommon to find that the cap plastic peels away from the silicone.

Essentially, the plastic may just be bonding better to the skin that the silicone. Because cap plastic is so thin and clear, it may not be obvious so ensure the remover gets under the appliance and onto the skin where the remover can work on the glue to unstick it.

Hot Towels
After the bulk of the piece is off, hot face cloths work wonders to loosen remaining glue and feels fantastic after a day under makeup.  Hot water can be used to soak the face cloth first, and then be twisted to dry.

However, heating a damp cloth in the microwave works wonders too.  Just be sure to check the towel isn’t so hot that it can cause burns – wave it around and allow it to cool to a sensible temperature.  If it is too hot on your hands, their face is probably going to feel the same!

To Finish
A good skin cleanser and moisturiser work well as a final flourish to help skin recover from a days prosthetic makeup wear. Most prosthetic glue removers have some kind of oil content, and this greasy film can be removed afterwards using a cleanser or from simply washing the skin as normal.

If the makeup has to be applied many times in a row, you need to take care to reduce irritation as much as possible.  This may mean taking rest days, thinning the glue down and using good moisturising and face creams.  Most appliance makeups are wanted once or twice, but regularly appearing characters may well need to have rest days from prosthetics as part of their routine.


We also did a free podcast and notes on this blog post.  Click on the links to download and save these, and please do comment below so we can get feedback and do this better.


Remember, if you have a question you want to see made up into a post then be sure to get in touch: stuartbray@yahoo.com is my email or ask below in the comment box!


Posted in Uncategorized | 47 Comments

How Can We Help You?

Todd Application against BluescreenHow Can We Help You?

In this blog so far I have posted things in order to try and address areas are useful when doing my job.

Thing is, makeup effects and prosthetics covers a huge range of stuff, so there are going to be things you would want to see covered which I might not think of.

What I want therefore is for YOU to get in touch and tell me what you want to see covered.

Todd & Stu workingI want hear your story, what you have done so far and what has gotten you stuck or confused.  Maybe there is a weird, technical issue you have or maybe you don’t know exactly what the right question is!

If YOU have that issue, chances are there are travellers on the same road who would love to know the answer too.

And I’m not doing this alone!

Todd & BookTo help me, I am enlisting the help of a friend to help give a different perspective on the same issue.

I’ll be working with none other than Todd Debreceni, makeup effects artist and author of Special Makeup Effects For Stage And Screen: Making and Applying Prosthetics.

To that end, here is what I propose to do. 

  • Get in touch through email and tell me what you want to see covered, what you think is missing.
  • We will go through the responses, and each month choose two that I hope will cover the most bases.
  • I will then get back in touch, and we can chat about it and see how best to help out.  I am even happy to call you up on Skype or the phone so we can speak one to one and get something rolling on it.
  • Then Todd and I will work on it and create two posts a month here which address these issues with pictures, illustrations, video and podcasts.

Request letter pic.So drop me line, and we’ll get stuck into it and see what we can come up with.

We want to post regular and relevant to you, and we can do this better with your questions!

-Stuart (and Todd)
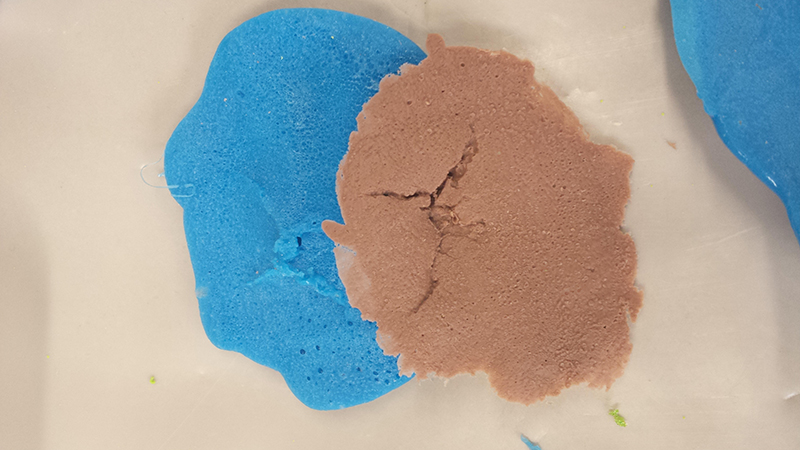
email me: stuartbray@yahoo.com

Posted in Uncategorized | 5 Comments

Split Tongue Effects – Video Tutorials

Split Tongue 1_640x427Having made a fake tongue for a show last year, I figured it would make a fun tutorial.

So here it is.

Creating a split tongue that is worn is different in that you can’t really glue it like you would a nose or a chin – at best maybe using a denture fixative but I tried that once with some creature teeth, and it really isn’t pleasant to use.

For these tutorials, I made two different tongues – one is a diseased, fungal-infection thing and the other a split/lacerated tongue.  Starting by making a basic, natural looking tongue, it is then pretty straightforward to modify it and create all manner of mouth-related maladies.

I broke it down into two videos, plus did a quicker shortened overview video for those of you in a hurry.  If you want to know more then check out video 1 and video 2 (to be uploaded Wed 20th Nov).

The two longer videos also have a downloadable workbook with pics and info for you to follow along later if you want to have a go yourself. 

Click on the pictures below to get your copy.

Tongue Trauma Cover Pic large

Click here to download Part 1 workbook

Tongue Trauma Cover Pic 2 small

Click here to download Part 2 workbook


Please do let me know what you think by dropping a comment below!

The shortened video:

======================================

Full video part 1:

Video Part 1 workbook download here

======================================

Full video part 2:

Video Part 2 workbook download here

======================================

If you have been following the blog, you will know there has been quite a long time between posts.  This has largely been due to working on the new season of Game Of Thrones, and whilst I do love to be working on big, exciting jobs, it does mean the blog (and you) were sadly left neglected.

So, to remedy this I will be announcing some exciting developments which is going to turn that around – and I will want you to be involved!

Plus there is a time-limited offer on the Awesome Latex eCourse – just use the coupon code torntongue to save money – valid until Monday Nov 25th!

torn tongue coupon pic


Stuart
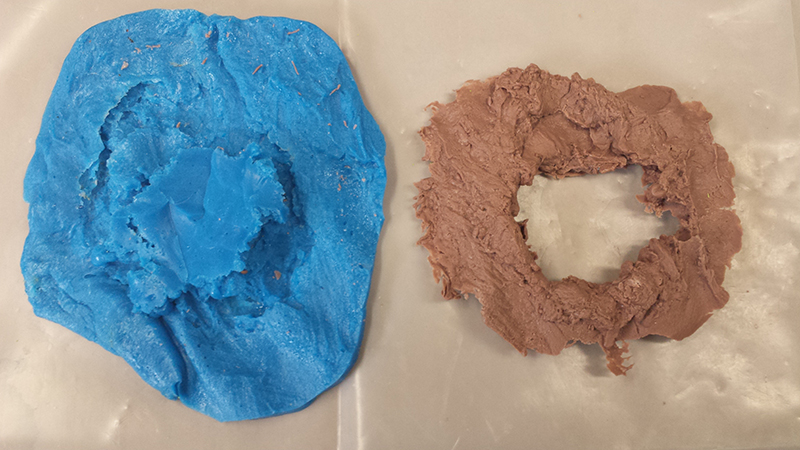
Incidentally, if you never signed up for the free 7-part mini ecourse then you can get it here.  It is a no-hassle and one-click unsubscribe if you want out too – no spam from me!  It is from my older site originally, but don’t worry – the stuff still gets to you!


Get your free 7 part

prosthetic mini-ecourse!


Posted in Uncategorized | 13 Comments