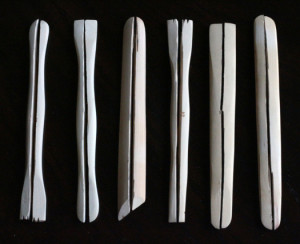
Making Tools

Triptych

Snickety snick – making wooden tools is a cinch when you know how!

Making your own tools is fun (if you like that sort of thing, which I do) but also jolly handy when you see the state of most wooden tools available in art supply stores.  It’s like knowing how to make bread or fix a bicycle, sorta.

In August I was in Texas, and did a sculpting workshop (post on that soon!) over at Brick In The Yard and we started with making the tools we would use.  Why would we do that? 

  • Well, sometimes great tools are harder to find than you think.
  • Making them and customising just the way you want is awesome.
  • If one breaks, you know what to do.
  • It’s cheaper (certainly if you want a load of tools, which once you start you realise that you do!)
  • It is a lot of fun.

[stextbox id=”alert” bgcolor=”21ddd2″]Let me just say, there are some great tool suppliers out there – Alec Tiranti & Potterycrafts in the UK, PS Composites stock Ken’s Tools (which are beee-you-ti-full – I have many in my kit).  In the US, Kens Banks’ own ‘Ken’s Tools’,  The Compleat Sculptor in NY (their spelling, not mine) and Sculpture House stock all the goodies. [/stextbox]

Anyhow, lets take a look at the making of great wooden tools.  I have covered tool types in a previous post (click here to see it) and did an article on making wire loops (get that free here).

Step 1. Buy some cheap pottery tools.
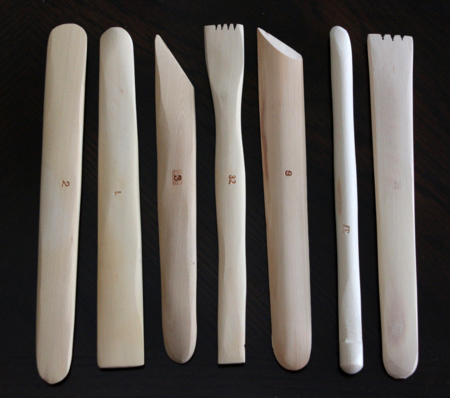
Tool making (11)I bought a box of thirty cheap wooden pottery tools from an online supplier.  These hardwood tools are the right material but the wrong shape, so buying these is easier than getting raw wood.

You can of course buy hardwood pieces and do all these steps with them, but it saves time doing it this way.

Pottery usually doesn’t require the same finesse as prosthetic sculpting, so you will usually find these more readily.  They are bare wood, dry and too big for most appliance stuff so are an excellent starting point.


Step 2. Cut them in half to double your wood. (Oo-er)

By cutting them down the middle, you get twice as many tools.  This works better for wider, flatter tools.  If there are thinner tools
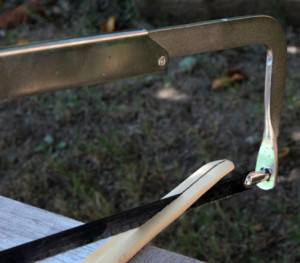
Tool making (15)Tool making (19)If you have access to a band saw then by all means slice away (mind your fingers!) but I do not so I went about it with a hacksaw, as the thin blade makes a nicer cut for the relatively small pieces of wood.


Step 3. Soak them in linseed oil.
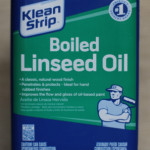
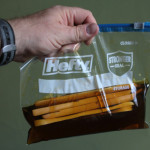
Tool making (23)Tool making (6)Tool making (10)I used boiled linseed oil, and poured some into a Hefty/Ziploc type plastic bag.

Soak the wood in there for a day or two – at least overnight.  You get this usually in the paint department of a hardware store.

The wood is dry and are, and soaking it in linseed oil means that a wood-friendly oil will creep into the fibres and help protect the tools. It takes a while to get into the fibres so leave them to soak a day or two if you can.  (Obviously doing a bunch at once for future use makes sense).

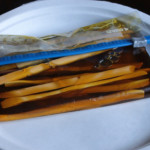
Once they are fully soaked, take them out and wipe them all dry, allowing the surface dry and harden up for a few days.  Putting them on a paper plate or some kitchen paper towel will prevent staining of any surfaces.


Step 4. Shaping the wood.

Below are the tools which I like to use for shaping the tool.  Now, you are probably thinking “But Stuart, surely if I need to buy all these tools then it negates any savings I would make buy actually manufacturing my own tools”.
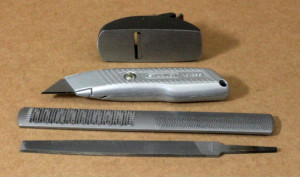
Tool making (14)You may have a point, but to be honest I used the Stanley craft knife and some sandpaper the most, and I think that is all you really need to do this.

Here is just an ideal selection as I am a real kit-freak.
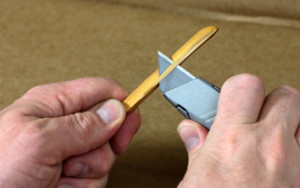
 

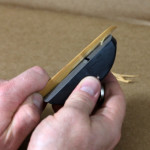
Tool making (18)The knife is great as it can easily slice thin sections off quickly.  Ideally we want tapered ends with a thicker handle in the middle so I work from the middle outwards bit by bit.

Take care not to remove too much at any one time.  If you have a plane or a coarse file then get shaving down with those – but the knife is easily the quickest way of showing that bit of wood who is boss.  Occasionally you catch a bit of grain which ends making you take a huge chunk off unintentionally – that is another good reason to prep a load of tools at once.  Hmm….really selling it to you, aren’t I?
Tool making (22)

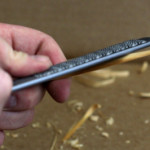
Using a little block plane makes me feel like Gepetto making my very own wooden boy!

Tool making (5)

A coarse file is also a nice tool for rounding down shapes quickly without taking huge chunks off in one go.

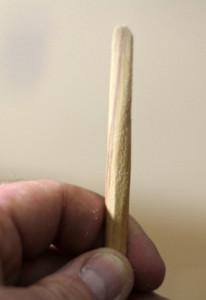
The trick is to take off a little at a time.  I like to make one end thinner than the other, so the one tool will have different uses.

For narrow, hard to reach areas a more delicate, thin end is ideal .

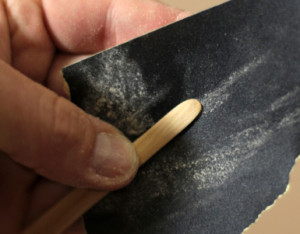
Sandpaper or ‘Wet’n’Dry’ abrasive paper is great for this.  Sanding papers are also usually in the decorating area of hardware stores, and a mix pack of coars, medium and fine papers will allow you to get smoother finishes, as you work through them.  I started with a ‘120’ grit, and then finished with a ‘400 grit’ – the bigger the number, the finer the finish.

Go too fine though and it’ll feel like wiping a plain piece of paper over it with no appreciable difference.  That would be just too fine – seriously, don’t get something like 1600 grit unless you are prepping a Ferrari for a respray.

Tool making (25)

The rounder end made with the file and sandpaper.

Tool making (4)

Sandpaper or wet’n’dry paper works well.
I used it dry, incidentally!


Step 5. Finishing.

Tool making (8)

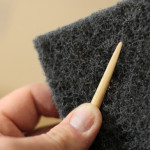
Synthetic wire wool. Great for sanding down for a final finish.
You can use fine grit papers instead, but anything higher than ‘400 grit’ is probably not necessary on wood like this.
Tool making (12)

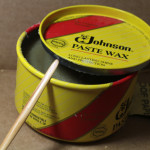
A nice bit of wax such as beeswax or this stuff is good to finish. The oil in the wood is still there, and this wax just gives the surface a shiny gleam which delights the sense of touch more than the eyes.

I buffed the tool surface up using a coarse synthetic ‘wire wool’ (although you could use actual wire wool).  This kind of gave it a final pass of sanding which leaves no visible lines or scratches.

A final polish with a wax such as beeswax, Johnson pate wax or even just a good furniture polish will work wonders.  I just whacked a load on there, let it dry for an hour, then buffed it like shine-junkie. Whatever that is.

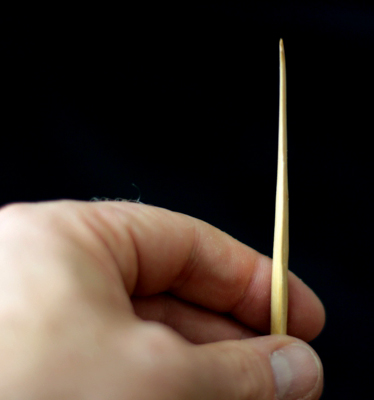
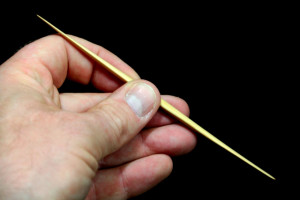
Below, the finished tool.  It feels smooth and shiny, gliding over the plastiline surface like a golden skipping stone.  The wood, having been soaked in oil and polished to Billy-O and back is now not absorbent, so doesn’t grip the sculpting surface like bare wood does, nor does it absorb any of the oils in plastiline and discolour.

I still have tools 15+ years old which are going strong because of this treatment!

Tool making (9)Tool making (20)


…and, because someone on my YouTube channel pointed it out – yes, I know ‘it didn’t look this hard on Face-Off‘.

As always, I would love to hear your thoughts and comments, please jump at the keyboard and spit me some feedback!  The next post will be looking at the sculpting workshop we did at BITY which was a lot of fun.

Til next time!

Stuart

Posted in Uncategorized | Leave a comment

London IMATS 2013

IMATS 2013 was a blast!

I had a lot of fun doing demos on the Mouldlife stand, but especially enjoyed my first talk at the International Makeup Artists Trade Show. 

There are always lots of great demos at IMATS, and I wanted to do something different but also something which pretty much anyone can try.  After all, it is great to show someone what a month of working in a fully kitted out workshop can achieve when you know the ropes, but often that ends up being just eye candy and FX voyeurism if you can’t then put any of that into action.

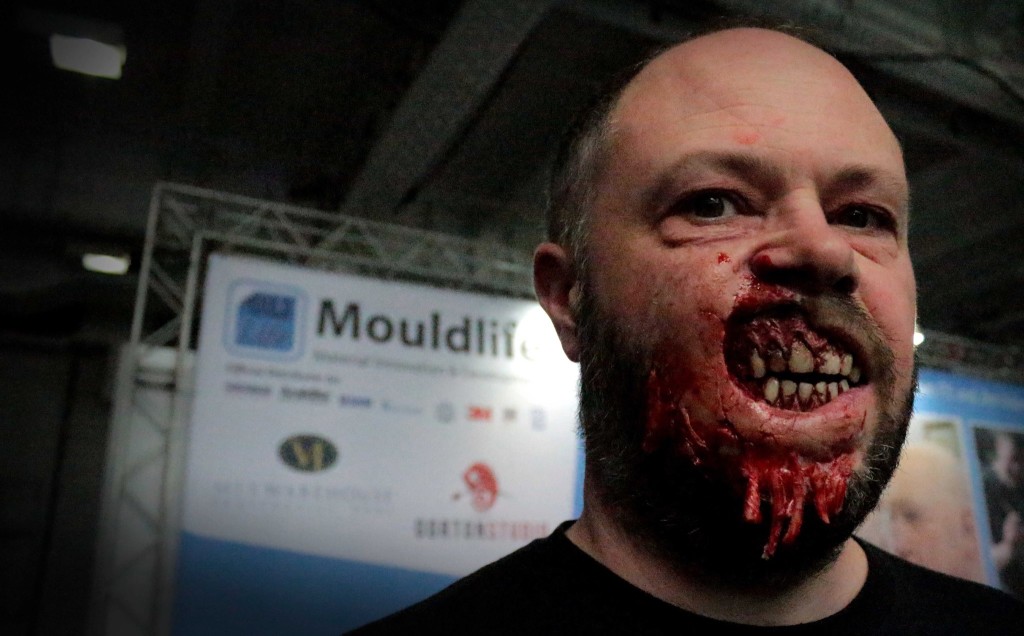
Darren with a rather messy face!

The very patient Darren Grassby made these excellent dentures and I stuck one of the pieces made using the techniques used in the presentation.
The piece was made with Plat Sil Gel 10, deadened to 150%. I used Baldies as the barrier, and applied it with Snappy G silicone adhesive.
It was coloured using the Bluebird palettes.

So, I decided to put together a presentation showing how you can create some cool shapes and textures using processes rather than skills.  In the presentation, I demonstrated how many textures can be created or harvested from things which are easily obtained.  Then, by moulding and casting them with a little creativity, you can take aspects of them and turn them into interesting appliances.

Incidentally, this doesn’t involve throwing a bag of clay down the stairs and hoping it will arrive at the bottom as the perfect head-sculpt.  No, skill is never wasted and I am not trying to pretend otherwise.  If you can sculpt, then you can certainly modify and add to these.

Even if you have never picked up a loop tool in your life, it is nice to know you can still create some interesting textures quite easily. 

Besides, if you need to create a cracked skin effect all over the body, a healed burn covering an entire back or a body smothered with smallpox – it is kind of nice to know you could get something on set for tomorrow if you know how.

Adding a little randomness, and allowing happy accidents to occur can create some interesting shapes.  I know it feels good to be ‘responsible’ for every single mark, line and facet of the surface but just allowing some random elements can remove the unintentional patterns or regularities which people can put into their otherwise natural effects.

Sometimes, you can get in the way of what you are trying to create.  At the very least, causing shapes to occur, and then examining them at leisure can give you some good insight into how they were created.

These techniques are just a few of the ideas I had, and once you have see how it works, you’ll no doubt be getting ideas for all kinds of things which can be used to create new appliance ideas.

If you do, be sure to send me a picture of what you do.  I have already heard from several people who are looking at Savoy Cabbages with their veiny leaves in ways that they didn’t previously.

Thanks for checking, and please be sure to comment or ask questions if your interest is piqued!

Stuart

——————————-

Oh, and until Friday 28th June, there will be a discount coupon for the Awesome Latex Ecourse

To use it, just scroll to the bottom of the Ecourse Homepage and enter the code IMATS2013 to get a the ecourse for just £20.13 (normally £45).

3Dbox

Posted in Uncategorized | 1 Comment

Thanks, Mr Freeborn.

Freeborn_Dummies_01With the recent passing of the rightly revered Stuart Freeborn, I was put into a saddened and reflective mood.  Stuart was one of the original pioneers in makeup, and is mostly known for his creature work in 2001 and Star Wars.
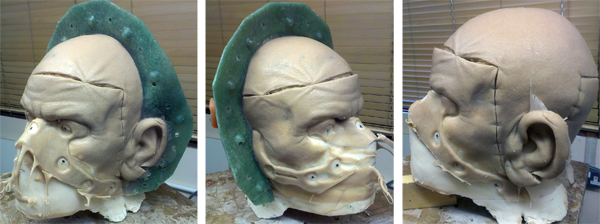
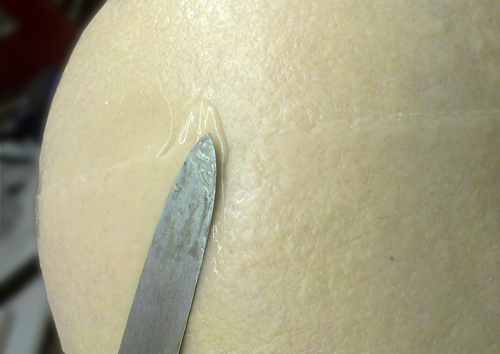
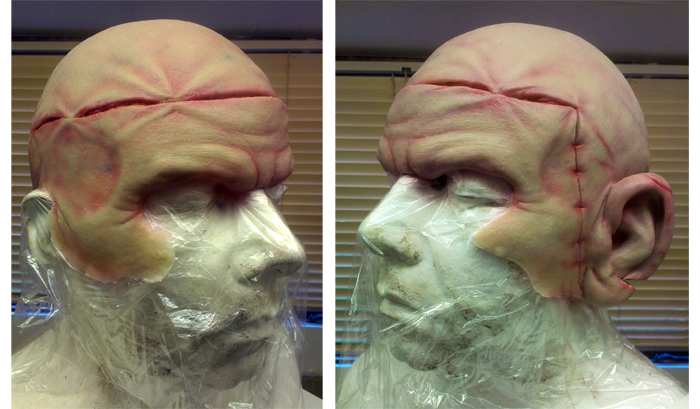
However, looking at his entry in IMDb, and you can see he has credits stretching back to the late 1930’s.  He was a master at his craft – the real stuff, not just the ground breaking monster suits and masks which made him popular among the FX community and fans.

I met him only once, back at an early IMATS in London, where both he and Dick Smith were in attendance.  It was spectacular, and he spoke candidly and with great energy, even for a man near 90 years of age. (Click here to see a cool little documentary about Stuart Freeborn on William Forsche’s YouTube channel).

I have been lucky enough to have worked for Nick Dudman, who was an apprentice with Mr Freeborn during the original Star Wars trilogy.  This leads me to the point of this post, which is the lineage of knowledge, and how this FX stuff gets passed on.

Now, Nick was the first person I ever met who actually did prosthetic makeup for a living.  I met him at my college (Wimbledon School of Art) in 1993, not long after the first Tim Burton Batman movie had come out.  Nick had of course done Jack Nicholsons’ Joker makeup, and being the nerd I was (and still am) you can imagine my excitement when I learned he would be taking us for our prosthetics module of our course.

To this day I am eternally grateful for this encounter.  He had come in a few days before to prep, and I waited around until he was done, and asked him if I could bug him with a few questions.

Bearing in mind:

  • I was 19
  • this was pre-Google
  • I had come from a small town where nobody cared about makeup and I had thus far gotten all my information from Gorezone, Fangoria and Baygans book.

I had so many questions, and so far nobody had understood what I was talking about, let alone offer solutions.  Well, Nick heard my questions, and answered each one thus putting out a thousand little fires which had burned away in my head for years.

I wanted to know what a cutting edge was, what plaster did he use, where to get foam latex, what was mould ‘rocking’, what to sculpt with etc, on and on.  All the material names and brands I had read about were American, and either had different names or were not easily available here in the UK then.

I left the room feeling so elated, I can’t even begin to describe it.  I still get that feeling on occasion when I overcome a long worked obstacle, and it has been my ambition to make other people feel that way when I get a question that I can answer the hell out of.

I know what it is like to want to know and do something, and if I can pass it on then I do.  I don’t place myself at the top of the tree by saying this – I know people whose work makes me want to cut my hands off and many of them are friends (which doesn’t help the envy).  I simply love what I do, am lucky enough to have worked a lot over the years and I love talking with others who care about it too.

I am also aware that much of what I know was learned from and influenced by the people I have met who shared (either directly or indirectly) their skills and approaches. I realised that there were key people and lessons that I learned working in the industry, and I thought it would be good to share some of these with you.  So, below are a few of the people to whom I owe a debt of gratitude, and the lessons I learned from them.

Geoff Portass
Geoff Portass & Bob Keen were behind Image Animation, probably the biggest FX company after Hensons in the UK at the time.  Responsible for the Hellraiser movies and Nightbreed, the rollcall of FX artists which started there reads like a Who’s Who of makeup FX.

I wrote to Image several times to get opinions of foam latex I had ran (I actually stapled samples to the letter!), pictures of my makeup efforts and advice on getting into the industry and each time, it was Geoff who wrote back.  Bearing in mind, this was before email, he actually read my letters and wrote back with advice each time to this annoying kid.  How cool is that?

I have actually had the chance to work with Geoff since, and told him about it – I still have the letters now.  He is a singularly lovely man that taught me about the power of helping people out if you can, and how much it matters to those who take the trouble to ask the right questions the right way.

Nick Dudman
As mentioned before, Nick was instrumental in helping me at a crucial point.  I knew what I wanted to do, and I had technical questions.  Nick had answers and I learned, as with Geoff, that a little generosity goes a long way.

I also recall later, working on The Mummy & Potter films, how he managed a large crew – a skill I will never have.  Knowing the work from the ground up meant that Nick was a great makeup artist, but had gone to another level by now being able to mastermind an entire department.  Not just the makeup FX but animatronics, large scale stuff and working with CG etc.

Looking back I am so impressed with how he did it all, and I am grateful for the opportunity to have worked alongside the best people on some of the biggest films this country has seen.

Daniel Parker
Animated Extras (Daniel, Nick Williams and Pauline Fowler) gave me my first break in 1994, and Daniel looked through my portfolio at the interview.  Still terrifying to this day, anyone with a portfolio of work knows that those pictures usually bare your soul and people looking always makes you a bit nervous.

When working, although not usually directly with Daniel, I did pick up lots of tips and advice.  I watched him do a Richard III makeup test on Ian McKellan which – if you haven’t seen it – is a master work of subtlety.  He made me understand how to add as much as necessary but as little as possible.  Even today, I tell people when painting pieces to match the piece to the skin because the skin is already the right colour – a mindset I attribute to Daniel directly.

The year before, Daniel and the team had done Frankenstein which was nominated for an Academy Award (losing out to Rick Baker for Ed Wood – no small competition!) and there were still lots f De Niro pieces about the workshop.  Needles to say I was gratefully examining everything and trying to understand how everything was made.

Daniel made me realise that the makeup isn’t about you and your makeup – it’s about the character and that you do what you need to, and know when to let the character take over.  He also taught me that it is better to do what you can with colour, and use appliances as a last resort.  Despite making a living by making appliances, I couldn’t agree more.

Watching Pauline sculpt realistic animals and heads was an education, and I saw incredible work by Julian Murray, painting by Marion Appleton and animatronic mechs by Nick Williams and his team.  The whole three months was a crash course education in makeup effects for which I got paid and it turned my life around.

Neill Gorton
I first worked for Neill on a creature movie filmed in The Isle of Man (Breeders, 1996).  Neill also has Mortal Combat 2 at the same time, and we also made some armour for that.  Then came Saving Private Ryan, and others and I worked for Neill on and off as a freelancer for the next twelve years.

Neill was (and remains) fearless so far as I could tell.  I remember him experimenting with various materials for moulds and appliances way back, and he always looked at why things went wrong and never seemed to get rattled like I did by them.  He would remain ‘bigger than the problem’, figure it out and try again.

I also learned about how important it is to be creative to a point, and then break it down into tasks and then just do it.  Often in makeup FX, it feels like you should agonise continually about something but if you do, it becomes about how you feel rather than the job.  And it is a job!  So be creative, figure it out and then get on and do it.  That is what I learned.

Neill is an amazing sculptor, but he is also incredibly quick.  I watched him work, and I came to a conclusion as to how one can become better and quicker – hard work and practice. Knowing him over the years, there is obviously interest and talent, but largely it is about sustained graft and that sets him above most.

To make an analogy, when you learn to speak, you learn first how to make sounds, then you learn words.  Gradually you then string sentences together, eventually speaking fluently.  You then reach a point when you cease to think about how to speak and focus instead on what you want to say.

This is so with sculpting, painting and other commercial crafts.  Being utterly fluent in the hand/eye coordination and how to lay down colours and shapes is crucial and only comes with continued practice.  Once you have them down reasonably well, then you can apply it to a brief much more efficiently.  As Freeborn would say, ‘Max Factor versus Time Factor’.

David White
David has an impressive range of credits, and heads increasingly large productions, including Captain America, and Thor: The Dark World.  He has been working in the industry from the early 80’s (Krull, Lifeforce) and has a great design ethic.  What impresses me about David, and which I really enjoy, is that he thinks about the character and effect before thinking about makeup.

There is beautiful mix of logic and creativity, and neither prevents the other from making improvements.  I remember making miniscule changes to sculpts at his request, and at the time thinking how unnecessary they were only to realise later how right he was.

He also taught me about how to get value from an effect – that is if you are going to the trouble of sticking a piece of rubber on someone, make it worthwhile.  That doesn’t mean make it huge or obvious – but squeeze every last bit of value out of the piece.  Really think about what you are adding, and why.  That way, you can be certain that everything you have done is truly the best you can do and that little voice whispers away every time I pick up a tool or brush.

———————————————–

So, there is a potted history of my prosthetic lineage.  There are others, too many to list here.  Martin Rezard sculpts in a way that makes me stare in amazement, the animatronics of Gustav Hoegen and Chris Clarke make me want to buy a lathe.  The paint work of Henrik Svensson is incredible and Brian Best has the most incredible mould-making mind I have ever seen.

All of these people are motivated, hard working and damn good at what they do.  When I get a chance to find out something new from them, I get that floaty feeling again and I know something good just happened.

So, in conclusion I think it’s great to be interested and inspired but you only get better by doing, failing occasionally, doing again.

If you have any cool stories or recollections about influences, please share them in the comments below or drop me an email.  I would love hear what got you fired up.

Stuart

———————————————–

Thanks, Mr Freeborn for the inspiration.  The things you made then made me want to make too, and when I got there I met others who were also inspired by you.  Rest in peace.

There is a radio documentary ‘Stuart: A Face Backwards‘ available on BBC iPlayer at the time of writing. http://www.bbc.co.uk/programmes/b01k2df5

Posted in Uncategorized | 2 Comments

Frankie 2 paintin’ and putting on hair

The last post finished with the silicone poured up.  Happily the first one out was okay.  A few air bubbles but nothing so bad.

Incidentally, the silicone I used here was Pro gel silicone.  I hadn’t used this before, but did an application job for Kristyan Mallet which used appliances made from it just before Christmas. 

That was hardly a coincidence, as Kristyan is part of a new materials company called PS Composites, so naturally he used his own material.  I decided that I would give it a try on my next project, as it worked great on the shoot we did.

Silicone head in mould

The front half of the mould removed, you can see the silicone filled the mould nicely.

The release I used for the mould was a couple of coats of washing-up liquid and water (about 1:1 ratio), allowing each to dry by leaving the moulds in front of a desk fan.  This worked really well, but if it was a little sticky, it’s nice to immerse the whole mould in water.  This would reactivate the washing up detergent, making it slip out more easily.  This is then easily cleaned up with just water.  Love it!

The silicone is nice – needs less deadener (I didn’t use any, and it was plenty soft) but most importantly it is thinner, kind of like cream in consistency.  It fills up in the mould quickly because it is more fluid, and had less air bubbles as a result.

Silicone once out of the mould, but before removal from the core.

Silicone once out of the mould, but before removal from the core.

Once the mould was off, a quick assessment is made to see if there is any damage, air bubbles and the seam is okay.  The seam was fab, so no great work in filling that.  There was a big air pocket on the back, a touch down where the brown Lycra touched the mould surface (as it was  thinner in the sculpt at that point).

There was also the nub where the injection point was.  All these three things were on the back, two of them would be under hair, and all of it is easily fixed.  I clean the whole head up with acetone to make sure the surface is ready to accept new silicone.  Without this step, it may be that any silicone added could peel away later as residual release from the mould could still be on here.

Seaming

Thickening a little of the silicone with a silicone ‘thixotropic’ meant I could make a paste of the same silicone to fill any bubbles and seams.

I kept a little of the silicone back after they were poured for just this purpose.

By adding some silicone thickener (or ‘thixo’) I can create a thickened paster version of the same colour silicone to fill the holes.

I used a flat bladed spatula to fill the seam after snipping the excess away with little curved nail scissors.  By slightly snipping too much away. you can fill the tiny trough left, and create a smooth finish.  Once the seam is filled, another pass over the top stippled on to put some texture back can really help hide the join.

Once the filled areas have set it is time for paint. I must acknowledge Waldo Mason as the main source of my silicone painting knowledge, as he has been incredibly generous with his time explaining things to me in the past.

I used flowable silicone compound from RS as a base, mixed with naphtha.  I found this in the form of car panel wipe, a solvent considerably less expensive than buying cigarette lighter fluid.  That can then be tinted with oil paints to create washes of colour airbrushed or painted on, building up layers gradually.

First pass was a red, then blue, a little blood red and bruising in places, followed by a matte layer of the silicone mixed with Cab-O-Sil.  Obviously, when using solvents and especially when using an airbrush, make sure that you work smart and wear a suitable respirator!

Paint pass 1

Leaving the paint to dry for an hour or so, I pick apart a cheap wig to attach to the head.  I bought a really cheap wig from a party store which essentially was wefts (lengths) of artificial hair stitched onto a fabric cap shape.  By snipping the wefts away from the cap, I can attach lengths onto the head where I want them, using the silicone compound as the glue.

Finished stack

I build up several layers of hair, each overlapping the last and pin them in place allowing them to set up.  I really don’t ‘do’ hair as you can see, but it was fun having a go. I had the hair finish suddenly where the different skin was (as the head is supposed to made up of two different men).  The other skin of the head was made to look shaved, as well as having a distinctly different skin tone.

To create the shaved head look, I mixed a little blue/green and black silicone paint and stippled it on with a sponge.  This left a pleasing ‘5 o’clock shadow effect.

Once all the painting was tweaked, and the hair trimmed to shape, the head is nearly ready to use.

I paint some eyebrows on to help give him that mean, glowering look without having any real hairs get in the way.

One finishing touch was to have some blood coloured silicone smeared and dripping down the hair – partly to keep it in place and partly as it looks utterly disgusting to have those wounds weeping down.  The silicone dries shiny, so it looks nice a wet even though it is quite dry to the touch.

I made two heads, one as a spare or to allow alternating nights giving more time to repair and touch up any damage done from performance to performance.

There were little wound appliances which can be applied over the cheek edges fresh on each night.  I designed the makeup so that these were the only real edges to see.

I should get some pics from the set soon, and will get some decent pics of this thing on for next time!  Any comments or questions are always welcome – please drop me a line below!

-Stuart


Posted in Uncategorized | Leave a comment

Frankie 2 preppin’ & pourin’

Fibreglassing done.  Did I green trim it…ummmm.  Nope.

Fool that I am, I missed my green trim window so I let the fellas set up overnight, and took a hacksaw to the edges. 

It took about twenty minutes with a new blade (one with 21 teeth per inch, so not too fine) and a lit of sandpaper and we are ready to pop this baby open…once the 6mm bolt holes are drilled, of course.

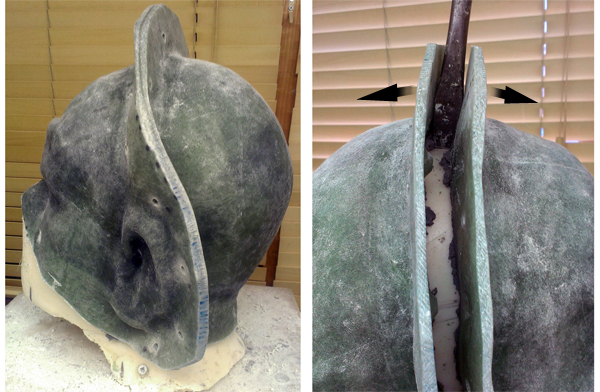
Glass opening

The finished mould, left, after trimming, drilling and a wee bit of sanding.
Then, gently prying the mould apart with the mahoosive screwdriver.

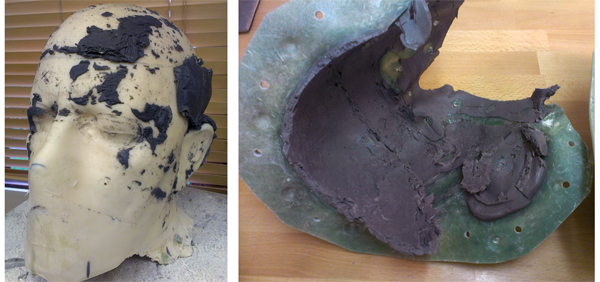
Using my massive screwdriver I keep for just such occasions, I pry the two halves apart easily.  The plastiline sticks mainly to the mould, making it quite easy to scrape and clean up the core.

Plasteline in glass mould

The core and the front half after opening.
You can see how the plastiline has favoured the mould, and almost come away clean from the core.

The plastiline which easily pulls out of the fibreglass is kept and can be reused.  For now I keep it somewhere close by as I need to use this volume to estimate the amount of silicone I will need to fill this mould up later.

The plastiline left behind is carefully scraped out using a wooden tool, and then I use panel wipe (naphtha) to dissolve and scrub out the residue.  All in all it tool about 45 mins to clean this mould out.

I also need to put an injection point in the mould.  The core is too thick and difficult to get into so I opt to have the injection point in the back of the head where I intend to have hair.  I make a plunger and tube sing resin and some waste water pipe from a plumber supplies.  (For details on making syringes, check this post with video here).

Head prepped for pour

With Lycra cap, this gangsta is ready to be poured up.
You can see there is plenty of clearance between the core and the mould.

I think it is a good idea to reinforce the silicone on the inside, to help it keep it’s shape and durability as this appliance will be used more than once.  I have only got a dark brown Lycra fabric in the workshop, and time/budgets being what they are, that is what I am going to use.

I stipple a layer of the silicone on, and then use a sponge to smear more on the outside.  The Lycra, although stretchy, does want to buckle and create bumps in places where it can’t bend around the curves.  I trim little darts into it with scissors hear and there to help it sit better.  It isn’t perfect, but it will hopefully do the trick.

You can see in the pic above that there is a decent clearance between the real head and the mould.  That is naturally the void left from where the sculpt was, and being thick makes it easy to accommodate any Lycra underneath.  If it did touch down on the mould surface anywhere, then you would see a dark patch on the appliance.  Lets hope that doesn’t happen.

Poured head

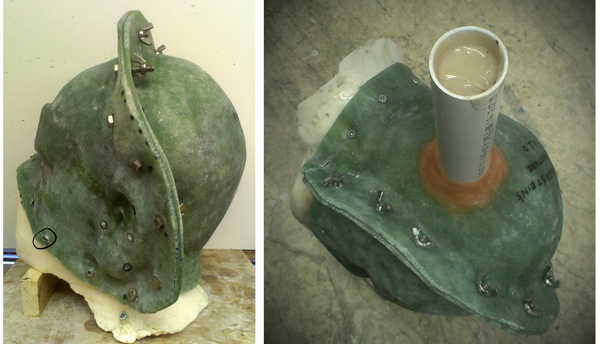
The mould is assembled, ready to pour. The mould is attached to the core using small posidrive/crosshead screws rather than bolts which is usual.
The final poured head…now we wait!

Once the Lycra is secured and the silicone has set up, I assemble the mould and screw the glass mould to the resin core.  Usually I use bolts here, but because the core was made without any filler in the resin, it is too thick in some places for the bolts to come through.

The mould is then bolted and tightened around the edges, and the pour tube is placed.  I mix up 1200g of silicone, which looks about the right volume with enough to spare for leaks/spills and pour tube.  I will have a better idea after this as to how much I need – better to mix a bit more than you need than to have a bit less.

The silicone finds it’s way everywhere without the need for the plunger, so I sit this fella to one side and leave it for a couple of hours to check the result.  I will update you as soon as possible!

Regards
Stuart


Posted in Uncategorized | Leave a comment

Frankie 2 Prosthetic Mould

Starting cutting edgeReady to start making the mould.

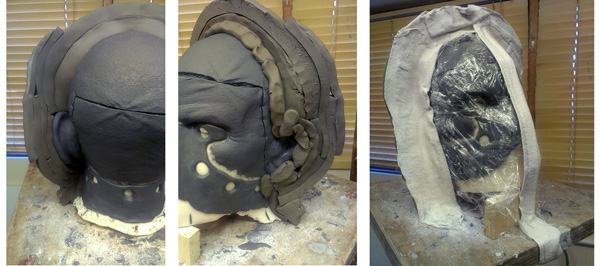
Now the sculpt is done, I am making the mould in fibreglass.  This will be in two pieces, so I need to pop a clay wall on the head to make the two halves.

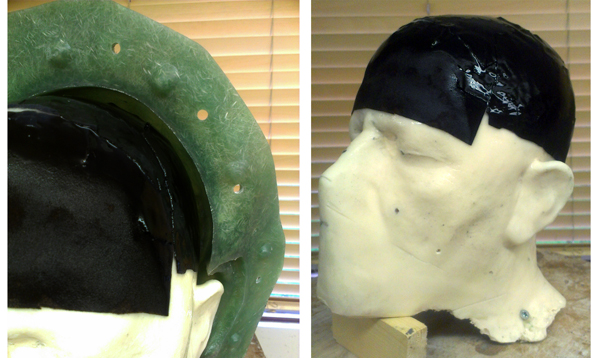
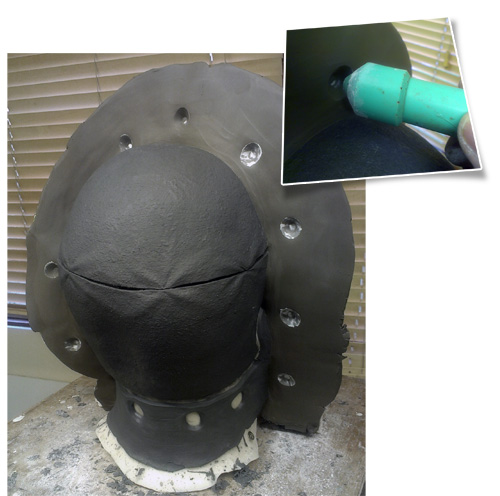
First though I need to make the cutting edge around the appliance, to make the mould touch down onto the core around the edge of the piece.  This makes the mould that will sit on here very tight on that edge, so we (hopefully) get a better thin edge.

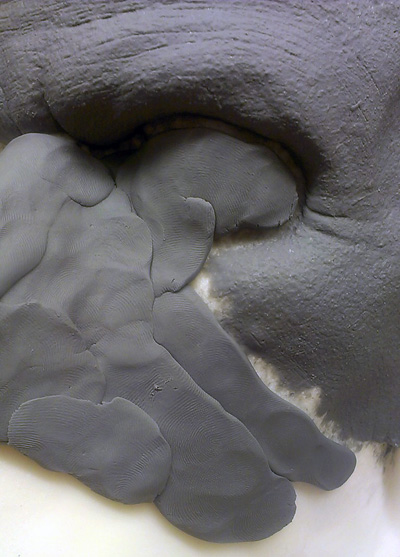
I am using plastiline to make the edge, and the technique I prefer is to have the plasteline sitting on a warm heater for a few hours so it is soft – not molten, but soft like clay.  That way it is easy to roll into sausages and pop around the edge, extending out a couple of inches back from the appliance edge.  It takes me about half an hour to roll out the sausages, push them flat and blend them with a tool to create a smooth plastiline-blanket of even thickness (about 2-3mm).  This will act as an ‘overflow’, so excess material can escape when we fill this mould later.

(if this is confounding, check an old post on a makeup using similar techniques for an IMATS demo last year!)

This will stop the mould from touching the core except around this edge and the touch-down keys which I add next.  These are just little holes about 12mm/½” which will be evenly spaced around the overflow.  I will add screws or bolts through these to attach the mould later.

Clay wall

Then there is the business of adding the clay wall.  I want to quickly do this, and usually I have a clay cutter to slice the clay…but in my haste I can’t be bothered to hunt it down so I instead roll out a clay sausage and flatten it out.  Then, slicing it neatly to make a long rectangle with straight sides, I can lay then carefully onto the head to create the wall, building them up in layers.  This is a technique I believe I use since I saw an amazing mould maker called Brian Best.

[stextbox id=”black”]To see Brian’s  incredible stuff, do check out his Facebook page Advanced Mould Making Design & Casting techniques.  It is a real treat for mould nerds.  I have known Brian for years, and we have made many, many moulds together.

A consummate professional and incredibly nice guy. [/stextbox]

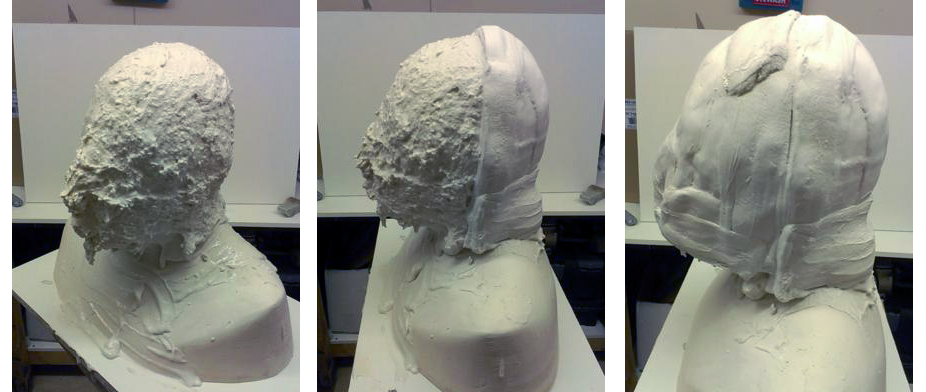
Once the clay is on, I cover the front in cling-film and add plaster bandage to support the walls.  The cling film allows me to pop all this off later, hopefully leaving an unscathed sculpt underneath.  When the bandage has fully set, I can press against the clay to flatten it smooth with a tool.

Why not make the wall in one piece of bigger clay, I hear you ask?  Well, thinner strips bend more easily around curves, and once the bandage has set up, it actually takes little more than ten minutes for me to smooth the joins out to make a smooth clay surface.

I usually do the back half first, as my habit is to get warmed up on the back, the side usually least seen, and then you can in theory lay the head on it’s back to do the front with greater ease.  In this case, I don’t actually do this – as I glass the front with it still upright.  But that is the habit I have and it works out for me.

Keys

To make the two halves of the mould sit tight, I put keys around the clay at regular intervals.  I use talc to stop the key tool from sticking to the damp clay, as suction can cause the clay to come away with the tool.

This tool is a resin cast of an aluminium tool turned up a while ago – I can’t recall who made the original but I’ll bet there are hundreds of these rolling around tool boxes in the industry.  It’s often happens with left over materials.

Then I wax this fella up using a liquid wax I have.  You can of course use an aersol/spray wax but guess what I don’t have?  So, being a budget job, I rustle up something from the depths of a store cupboard, and wax this bad boy up with two coats.

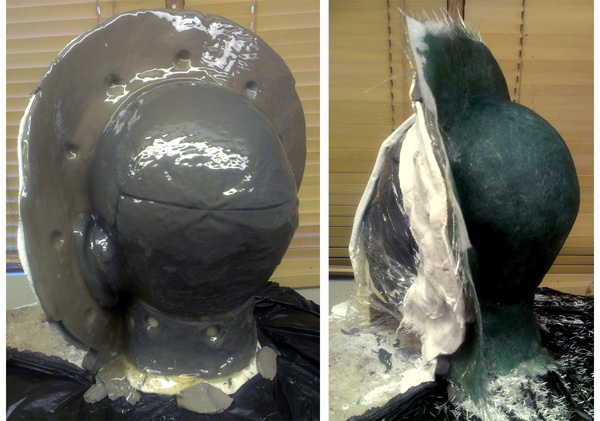
Glassed head

That is the back half glassed up, gelcoat…left for 30 mins, and then backed up with two layers all over, an extra on the flange and tissue it for good measure.  Now, just gotta go do the front.  Which reminds me, the gelcoat will have set …

Like NOW, Scoob.

See you tomorrow!

-Stuart

Posted in Moulding | Leave a comment

Frankie 2 Prosthetic Sculpt

Sculpt closeupThe Frankie 2 sculpt was finished today.
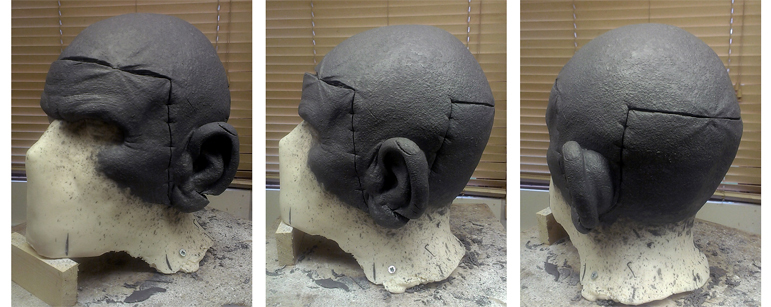
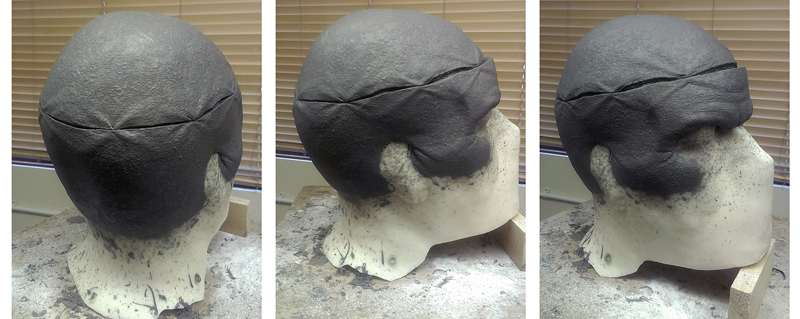
It was a real quickie – I don’t have many hours to spare for this project, so there has only been about six hours sculpting time on this. 

The lifecast was done, cleaned up and recast in alginate and resin during the day (this Tuesday – see last post for more on that) and that totalled about six working hours…so this is about twelve frantic hours work to this point.

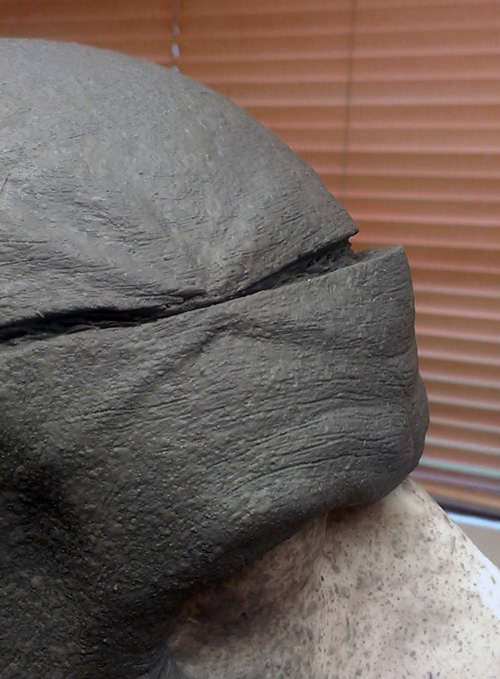
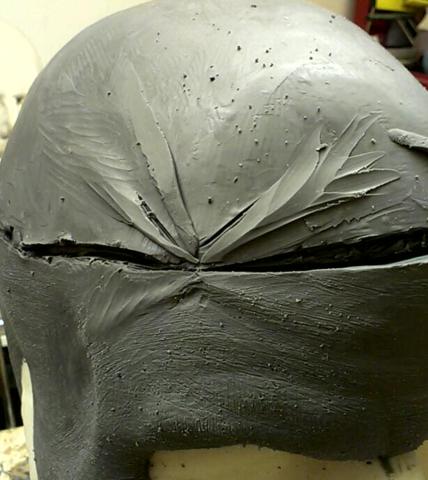
The whole top of the head is supposed to be like a cap where the brain was popped in, and there will be stitches around it to give the appearance the whole thing has been sewn in place rather hastily.  This means the tension lines in the sculpt are added now, so when I add the thread or staples later, the skin will appear to be pulled tight by them.

Three views of the head prosthetic sculpt

The ear which remains will be part of that top cap, just because I thought it looked more gross – no other reason.  I want it to look sore, so have a chunk of ear missing and a few sloppy  scalpel cuts around there, where presumably Victor was a little jumpy with the blade while getting closer to completing his creation.

Three more views of the head sculpt

The texture was very quickly done by smoothing it all out with a plastic wire brush, and using talc with a rake tool to quickly drag out multitudes of lines all over.  That technique is from Neill Gorton, and I must have saved hours over the years using it as a quick and convincing skin texture for large areas.  It stops it looking so fussy and contrived, and allows you to reduce form quickly to make it look much more natural.

Over the top of this is flicked a slip of plasteline mixed with lighter fuel.  That gives it a slight goose-bumpy texture when it is dry.  That’s all I have time for, so that is the sculpt finished.  I will also make a couple of small blender pieces for the cheeks which can be replaced after each use.  That way, the main edges on the face will always be hidden as much as possible.

I will probably make a mould in two halves in fibreglass, for speed and ease of use.  That will be covered in the next post!

-Stuart

Posted in Sculpting | 1 Comment

Frankenstein’s Creature – Take 2

Frankenstein’s Creature – Take 2

Plaster castA few years back, I had a lot of fun making a Frankenstein’s Creature for Jai Sepple, who was starring as the tortured soul in a stage production (check out my old blog series on it here if you haven’t seen it).

Well, three years on and they want to stage it again.  This time, however there is less time and they have their own theatre…and the action happens right up close to the audience so edges are more of an issue than the previous version.

So I figured make it in silicone, so the colour and translucency is there…maybe add some hair this time to help the back out a bit, and make some blender pieces to hide the edges of a big appliance which will get used more than once.

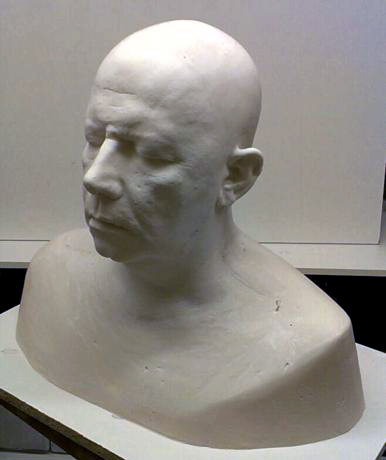
I started as before with a lifecast.  We had the previous cast but I wanted to make an up to date one, and as Jai is still bald, we got a great copy of his actual head rather than a shaved-down baldcap which is what usually happens.

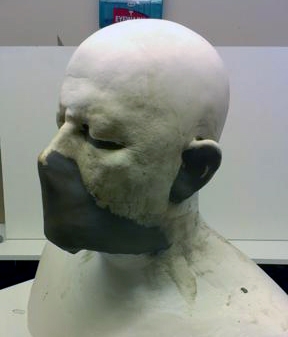
Clay modifiedI didn’t have time to make a lovely silicone mould so I instead opted to make a quick urethane resin core from an alginate.  So, first up I clay out the undercuts on the face  all those areas where the appliance will not be on the face, and where there are pesky folds of skin such as lips, ears and nostrils.

By claying these out so the details here is minimised, the resulting core will be smooth in these areas where I can put keys/bolts etc.

I used alginate because it is relatively cheap and very quick.  Alginate rips easily, which is another reason to take out the unnecessary details now in clay so the face is a smoother shape, so it pops out more like a wet pebble instead of a dry hedgehog.  I don’t need the details here as I have decided the appliance will be a head appliance like a cap.

Once the alginate has set, I put a two piece plaster bandage case on and allow it to firm up while I brew some awesome coffee.  Two cups later, and I need to split the alginate to get it off the head. The least damaging place to put that split is up the back, and it all seems to come away nicely with minimal damage to the delicate alginate.  Popping the alginate back into the bandage jacket, I can now start to make the core.

Alginating core

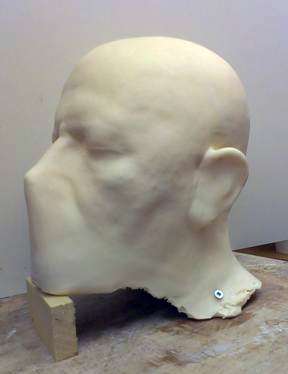
I want a quick core, so I opt for fast setting urethane or ‘fastcast’ as it is commonly known.  This resin is a two part liquid, which when mixed together sets rapidly to a rigid, white finish.  It is notoriously averse to moisture howver, and guess what half the alginate is made up of….you mix it with water!

To offset any issues (this is a one hit wonder), I dry the alginate interior by swilling it with acetone to pick up any remaining water drops and it then evaporates quickly with a hairdryer.  I then mix the first coat of resin and wait for it to get really warm, so it is closer to actually setting, before pouring and swilling into the alginate.  That way, it is in there as a liquid for less time.  Two minutes of swilling later, and it has set solid.

Fastcast coreAnother eight coats, and we are ready to leave it overnight and see what the deal is.  Thankfully, there were no issues and we have a grand looking core, with the main undercuts taken care of, making it much nicer to be getting moulds off later.
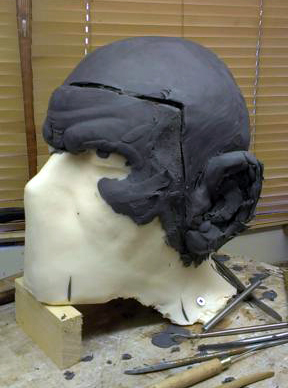
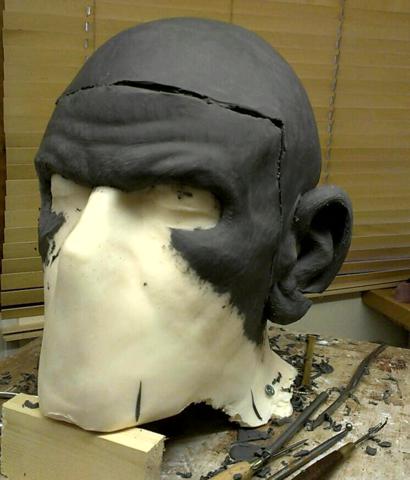
I screw it down onto the sculpting stand so it sits at a good angle and won’t shift whilst working.  You can see now how the clay has made the face a much nicer shape to be making moulds upon.  The mouth area is not having any appliances (they will be singing a loooot, so I don’t want to mess with the mouth area).

Next job is to start blocking out the sculpt.  As before, I like to melt the plasteline down in a pan and paint the first coat on, slapping on the soft oil based clay until it gradually cools and solidifies into a rough shape which can be carved back.

Sculpt 1

The blocked out sculpt is nice to carve into.

The head was deliberately asymmetrical last time, and as a device it worked quite well.  I wanted something that was clearly visible from a distance, and the combination of corpses that went into making the creature could justify two skin tones on the stitched-together parts.

To that end, I repeated the gag of having one ear larger than the other, as this is part of another head which has been used to repair the damaged noggin of the doomed beasty.

By having the head like a cap, I could have horizontal seam running across the head above the brow, so there could be a little nod of the Jack Pierce ‘flat-top’ look that Karloff has without actually giving it a flattened top.  There are no bolts either!  After a while, I realise that the ear on one side is not needed, so I take a hammer and chisel to it, and chip off the unnecessary lump, filing it smooth and repairing the sculpt around it.

Sculpt 0

As edges are always an issue when sticking bits of rubber onto a face which sweats, sings and eats greasy food, I decide to finish the piece in places where it will be easier to hide them (in theory).

The back of the head will be haired, but even so the sculpt finishes high up, at the point where the skin folds when he look up.

The brow is slightly lower, and returns slightly so it finishes as a harsh line rather than a blended one.

The side with the ear has an edge underneath the lobe, so I make it a bit ‘stitchy’ there so redness will be able to help (did I mention I have a ten minute makeup time?). The side without the ear follows the line where his ear meets his head, so hopefully that won’t be obvious.  Where the appliance is finishing on the cheeks, I will make small flat blender appliances which can replaced each time. This will have a pure silicone surface which is more durable, and the blenders will have Super Baldies cap plastic barrier, so they can be cleaned off after each performance and replaced.

Sculpt 2

At this moment in time, I have just started the folds of skin caused by hasty stitching, and this is where I stop work for the day.  I have made a short video (below – shot on my ‘phone so apologies for quality) which gives you a 360 degree view on the turntable, and I will post more tomorrow night!

I basically have to finish this by the weekend, so will post as it happens. (I tweet pics as it is fast to do when sculpting so check out my twitter account for live updates).
——————————————————-

Thanks for checking it out – will keep you posted!

-Stuart

Posted in Uncategorized | 3 Comments

Using Fibreglass-Part 3

Fibreglassing video part 3 is up and running at last!

My apologies for the loooong delay between parts 2 and 3.  It has been a busy year – as you may know I still work as a makeup effects bod, fitting the blog and videos into any (ahem!) ‘spare’ time. 

Well, there has been precious little of that – for ‘spare time’, read ‘even less sleep than usual’.  Sob sob, break out the mini violins. 

Anyhow, the video is up, there is a bumper edition of notes to go along with this video as usual which are free to download right now!

So please watch the video, and if you have any questions then as always, drop me a comment below, or email me direct at mail@learnprostheticmakeup.com.

Don’t forget – your part 3 workbook is here to download now.

Workshop news – there are a couple of new workshops coming up at Charles Fox in Covent Garden, London.  News and dates announced soon!

Thanks!

PS.  I had such a high spam volume (I deleted over 1000 messages of indecipherable nonsense about Ugg boots, mesh implants, Viagra and iPads) that I have set the comments to registered users only. 

So, if you are keen on leaving comments, I’m afraid I must steal a few seconds of your life while you fill out the fields to register.

Stuart

All material, images and text © Stuart Bray 2012 unless otherwise stated

Posted in Uncategorized | 6 Comments

Using Fibreglass-Part 2

Silicone jacket moulds a go-go!

Doing silicone jacket moulds (sometimes called Matrix moulds, although that makes them sound like they are made up of binary code and can transform into any shape by thoughts) kind of fell out of favour owing to more ‘butter on’ type moulds. 

Brushing silicone onto a form and then building up layers works well, but I find the amount of accelerators and thickeners etc. added to make the layers all have a detrimental effect of the silicone whether it be shrinking or just falls apart after a few years.  If you only need a quick mould then they work OK -I know have mad a number over the years.

However, I really like taking the time in the front end to make a nice clay shape to be silicone later, which is what this video is all about.  Also, I use steel shim to create a dividing wall instead of clay.  Like last time, I am aware that I gabble like a tired drug mule in front of a sharp customs officer at an airport, so I once again have supplied you with a workbook to download.

Click on the pic or here to get it for free right now!

Comments and questions as always welcome!  Feel free to pump fresh blood, pus and whatever other gory mess through the blog and keep me on my toes.

Thanks!

Stuart

All material, images and text © Stuart Bray 2012 unless otherwise stated

Posted in Uncategorized | 2 Comments