Using Fibreglass-Part 1

It stinks, it’s toxic, it uses a corrosive catalyst and it isn’t nice to use, but fibreglass is a workshop staple.

I have spent a fair bit of time behind a respirator patting down millions of pieces of fibreglass but this is the first time I have ever covered it in a blog. 

Naturally I figured video would be the best way of showing y’all so please mosey on down to the clip below and take a look at how this whiffy wonder will be a key player in making my Vampire come to life!

As always, I motor through a fair bit of stuff so I have put together a little companion reference download for those of you who want to look a bit closer at the whole fibreglassing thing.

To get it, just click here or the pic to the left.

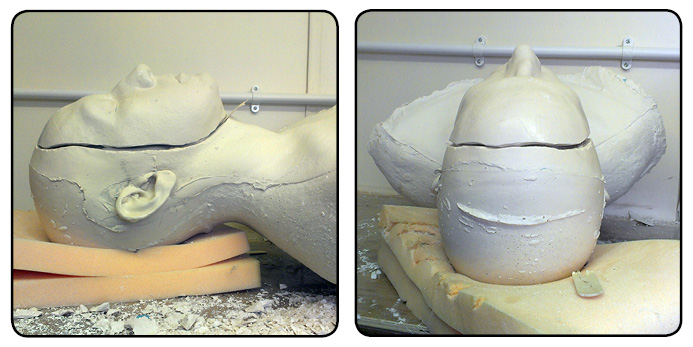
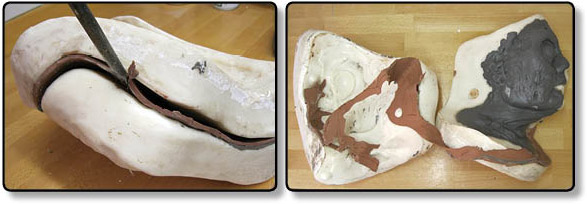
Many people are curious to see how it works without having to endure the smell and this vid will take you through the process of creating a partition wall in clay, and using gel coat resin and then the laminated layers of glass fibre mat.

Some people call it GRP – it’s probably the correct title – but in a workshop here in the UK we almost always call it ‘fibreglassing’.  Sometimes ‘lamming’ (from laminating).  Anyhoo – please do check the video and if you like it, then please like it!

Comments and questions as always welcome pump fresh blood through the blog and keep me on my toes.

Thanks for stopping by!

Stuart

All material, images and text © Stuart Bray 2012 unless otherwise stated

Posted in Uncategorized | 6 Comments

Bending the faces of Vampires part 3

Following on from the last post, I had just replaced the new face on the head cast – so now we have a corrected face on there.  There is still a massive line all the way around and
that needs to be dealt with – along with a few other issues.

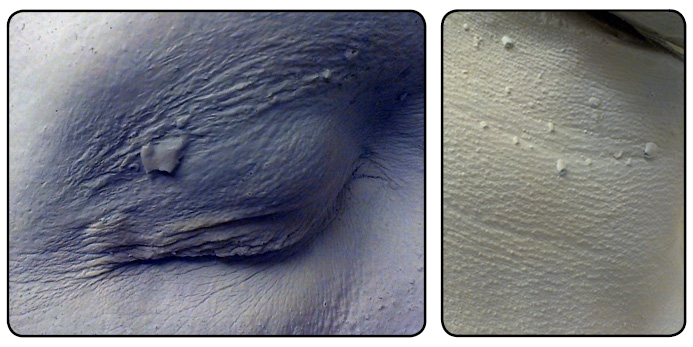
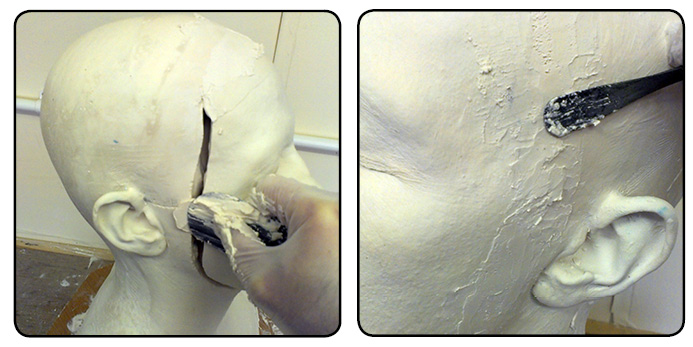
If you look close, you will see all manner of little artifacts on the plaster which need to be sanded or scraped carefully off to create a neat cast.  Little bubbles of air in the alginate appear in the plaster positive as raised lumps which need to be removed.

Here you can see some air bubbles on the eyebrow and the neck. These air bubbles are trapped between the alginate and the skin when the alginate is applied, and increases in incidence when the alginate is mixed thicker.

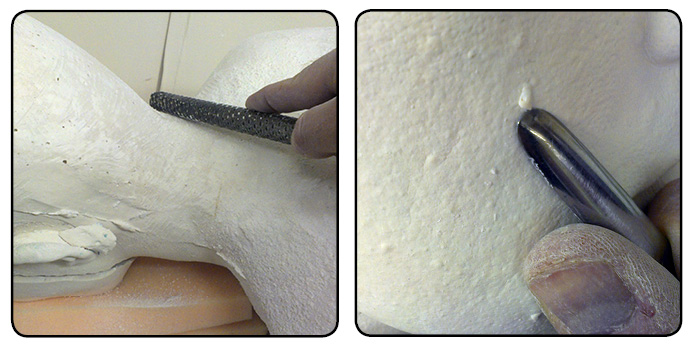
This is easily done using steel sculpting or dental tools.  For the larger ones, I use a little file or riffler which shaves and sands down specific areas without damaging the good areas which don’t need to be touched.

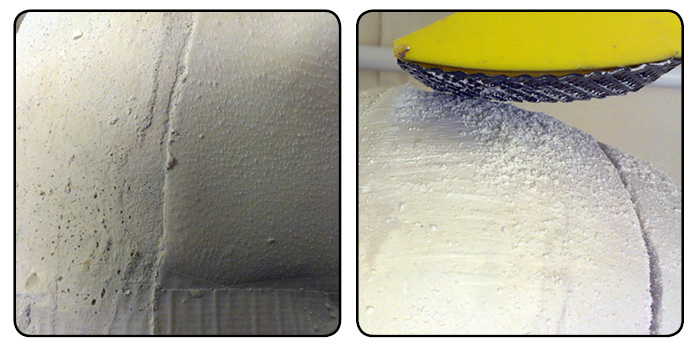
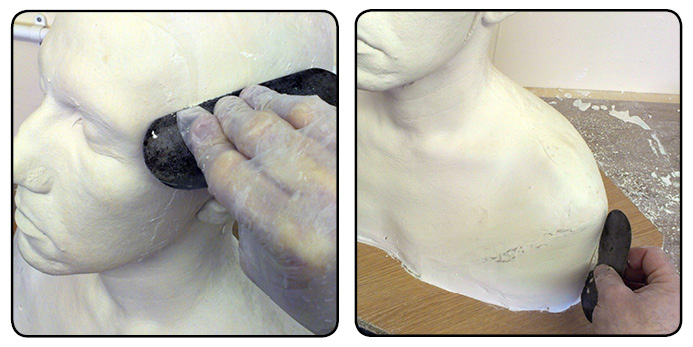
Next I need to shave down any seam lines and larger areas such as where the plaster crept over the edge of the shoulders etc.  These areas need to be shaved down using a more aggressive tool such as the surform (the yellow tool seen here) which is kind of like a curved cheese grater on a handle.

I also have a round tube-like surform which is great for curves such as the back of the neck.  Here the mass of where the hair was under the bald cap needs shaving down.  The  bulk caused by the hair elastic used to hold the hair in a ponytail is here now in plaster.  It has created a lump which is not part of the real head so needs to be shaved down.

Small air bubbles such as this one on the cheek can be flaked off by using a small steel sculpting tool and applying gentle pressure underneath until it pings off.  Care needs to be taken to not damage the normal parts….just need to take away that which is not really part of the actual face and no more.

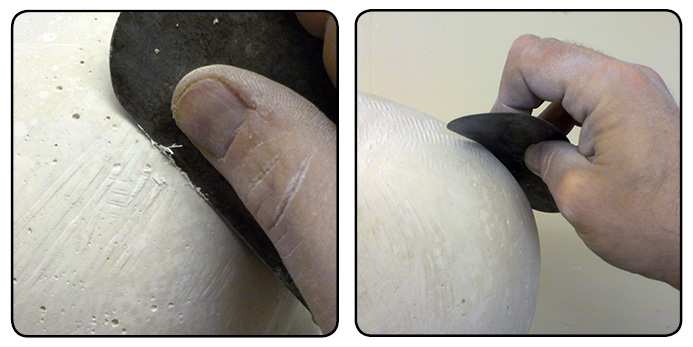
When all the rough stuff is done, I can begin shaving down to a smooth finish.  The surform is great but leaves little tell-tale lines or shallow grooves.  These can be refined by scraping a steel kidney over them to create a smooth finish.

When the surface is scraped and as smooth as it can be then we need to fix this head securely to a baseboard.  I need to make a silicone master mould of this head, so making it fixed to a board is crucial.

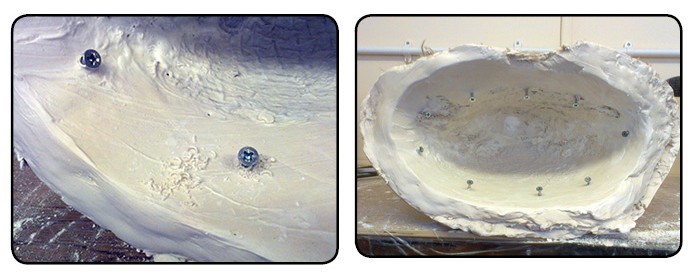
I start by putting a series of small wood screws into the underside, one every couple of inches.  This will allow me to attach some plaster and scrim to the inside and create a mechanical bond.  Fresh plaster doesn’t always stick well to old plaster so a mechanical fix like this will ensure a more positive attachment.

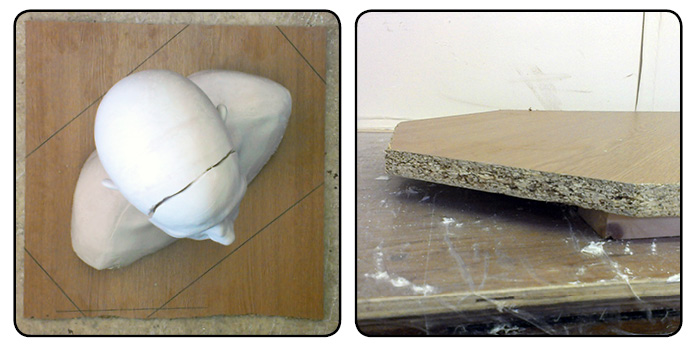
I pop the head on a board and mark out where I can cut it.  I need to cut the board smaller for practical reasons, so I can manoeuvre it more easily and so it doesn’t take up more space than necessary.  Placing the head on the board, I measure out from the base of the cast to give me a couple of inches to work with.  I placed the head on the board I have diagonally to give me enough room, and mark out where I intend to cut it.

I cut the board and also screw some strips of wood underneath so the board sits off from the table just enough for me to get my fingers underneath so I can lift it and move it around.  A simple thing like this will make life so much easier later.

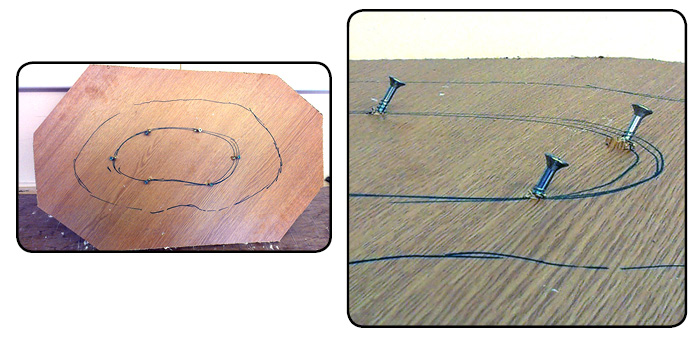
On the board, I use a Sharpie to trace out the ‘footprint’ of the cast.  This marks the boundary of the cast itself, and then I make a smaller line inside that.  Along this line I attach another row of screws every couple of inches along the line.  These will be used for the same reason, so the plaster-soaked scrim material can physically be bonded to the board to create a secure attachment.

Below, you can see that when the head is placed on the board, the screws do not interfere with the head – the are all within the space left inside the plaster head.

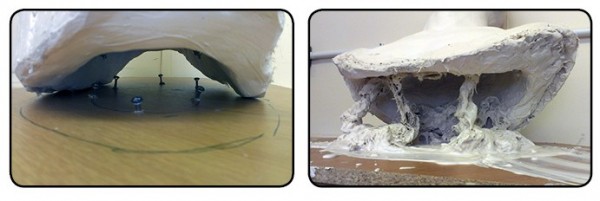
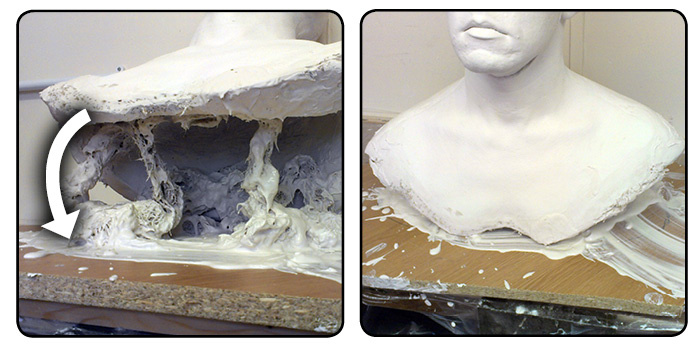
Once I am happy the head can sit correctly on the board, I cut some lengths of scrim and mix up some plaster to create the ‘ropes’ that will connect the board and the head.

Immersing the scrim into plaster, I wrap one end around the screws inside the head, and the other around the screws in the board.  They are a little long, so I can tilt the head back in order to get in there.

Once they are all connected, I gently lower the head down and allow the plaster on the ropes to set.  Once they have, the head is stuck permanently on this board – you’ll have to break it to get it off.

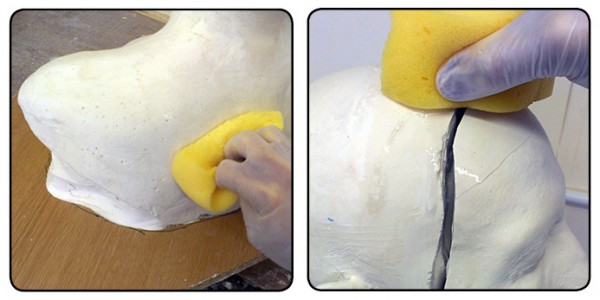
Next I need to square off the shoulders and fill any bubbles which were in the plaster, as well as the seam line on the new face.  This plaster is dry so needs soaking with wet sponges so the new stuff I am about to add doesn’t have all it’s moisture sucked out.

I mix up another batch of plaster and fill the missing  shoulders.  This is a thick mix, so it stays quite well and I roughly place it in the right areas before it starts to set up. 

I use the same mix to quickly fill the gap around the face.  I use a small, flat bladed plaster working tool to neaten it up.

Then, as it starts to set I use a kidney and plenty of water to smooth and smarten the surface.  There is a 5 minute workking time window with this plaster in this cheesy state so I need to work pretty quickly.  If it were to set before I were finished, then it can be neatened up with another  small batch.

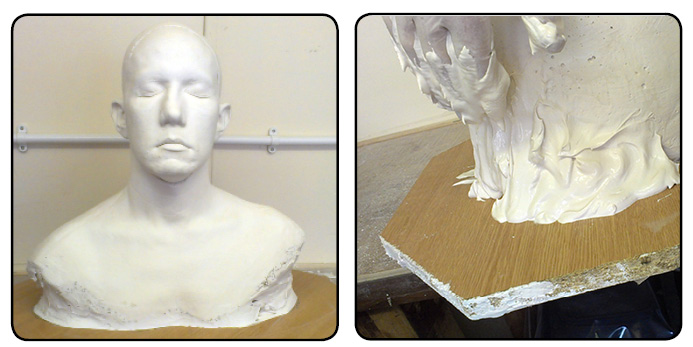
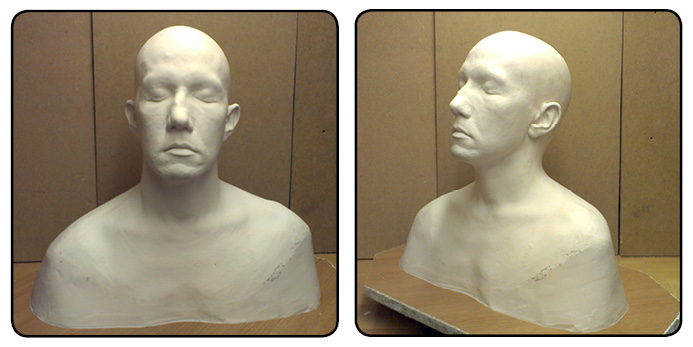
Once that is all done, the plaster head with the new face is now neatly mounted on it’s board and ready to mould.  You’d never know there had been a problem.  Yay!

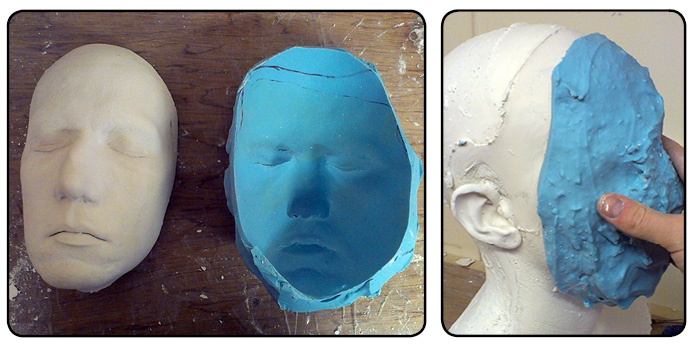
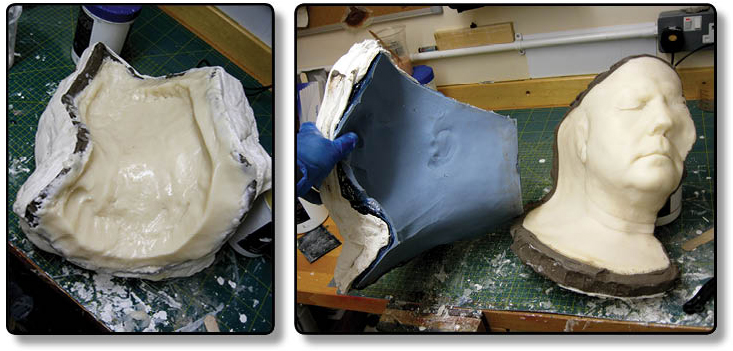
Next I will show you making the master mould, where I create a silicone and fibreglass mould of this head so I can make as many heads of Dave as necessary for the various cores needed for this Vampire!

Happy life casting!

-Stuart

(By the way, new workshops coming up this month….
check them out here!)

 All material, images and text © Stuart Bray 2012 unless otherwise stated
Posted in Uncategorized | Leave a comment

Bending the faces of Vampires part 2

Fitting a new plaster face is easier than it sounds.  Just needs a bit of patience.

I won’t bother you with details of the new life cast itself – it was just a cast of the face done with alginate, just as before.  This time I was more careful when blocking the nostrils after removal.

This plaster was perfect, and I carefully removed and kept the alginate.  I then trimmed the alginate edge with a sharp craft knife, and popped the plaster face back in again, marking the plaster along this neat trimmed edge using the knife again.

I then took the entire alginate and placed it onto the head cast with the distorted lip area, and once the alginate was sitting just right, I also marked the alginate edge on here with the knife too.  With very little discrepancy, I can be pretty certain that both plaster faces are now marked in the same place all around the face.

A plaster cast of the face was made, and the alginate carefully taken off in one piece. The outer edge of the alginate is trimmed neatly with a craft knife to give a definite edge where the cast stops. This is then transferred onto the plaster head with the distorted lip by placing the alginate on there.

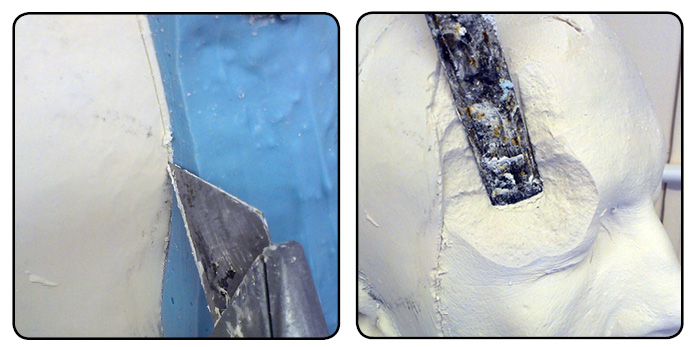
Then it is time to use a hammer and chisel to take the face off the head cast, carefully following the marked line.  This took about an hour, as plaster is quite soft for a chisel but you need to take care to not accidentally cut away part of the head you intend to keep.

Using a craft knife, I mark the boundary where the alginate stops on both the face and the distorted face of the full head. Once this is made more positive with deeper scoring, I can start to chip the face off the head cast using a hammer and chisel. And goggles.

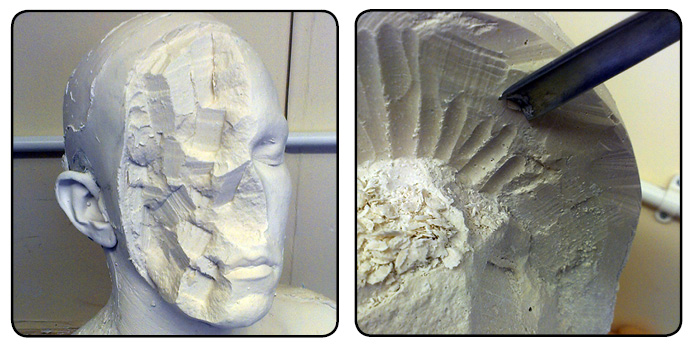
I use light strokes with the hammer at first to establish a neat edge, then got heavier as I got further away from it.  It looks kind of scary, but is incredibly satisfying, and the pieces flake off easily under the might of a 16 ounce claw hammer.  Huzzah!

For the sake of a better join, I carve neater areas out using various plaster–working tools I have, such as the rounded chisel (below) which cuts nice grooves easily.  The inside of the new face was made thin and hollow, so it should fit over the lump of plaster I intend to leave in the middle here…no need to cut it flat all the way across.  I want something to stick out so I can more easily join the new face on with plaster.

Careful chiselling and cutting back with plaster working tools create a neat edge for the face to butt up against for a reasonable close fit.

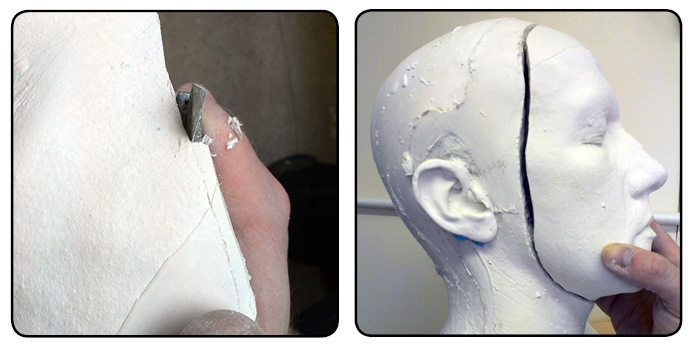
Using a knife to trim the new face back to the line, I carefully place the face on to check fit.  There are a few places which need trimming back with the chisel on the head ‘stump’, but in a few minutes all is well and the face can sit in the correct place.  The lines of the neck and face etc seem to align correctly.

Trimming the new face edge back to the line is easily done with a strong craft knife. The face sits in the right place, and although there is some filling, it really aint a bad fit.

Just need to join these two halves now to keep it there.  I soak the face and the head for a minute, to ensure the plaster is not too dry.  As I am using plaster to attach this face, I don’t want the existing dry plaster to suck water from  the batch I am about to add.  It would weaken the mix and may cause the face to fall off during moulding later which I don’t want.

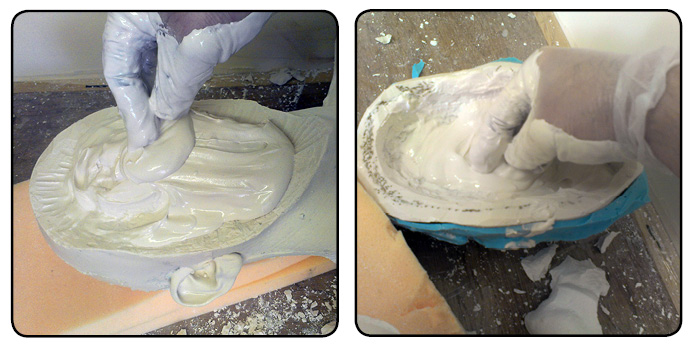
Plaster placed on the face 'stump' and inside the new face. That way I know there is plaster in contact with both surfaces for a better bond. Hopefully.

Then, I place plaster on the face ‘stump’ and inside the new face, and carefully position it in place, wiggling it into what looks like the right position from both sides and from above.  Obviously, this is best done with the head lying on it’s back so gravity works with me here.  I use wooden tongue sticks to pack out the face to sit in the right position until it has set up.

The face transplant awaits the new plaster to set. Hurrah for that!

Once this plaster has hardened overnight, I pop the head upright and it does indeed stay firmly in place.  I do try to pull it away and it’s having none of it, so I dance the jig of merry-mould making and get ready to fit this onto a baseboard.  I will show that on the next post.

Happy life casting!

-Stuart

 All material, images and text © Stuart Bray 2012 unless otherwise stated
Posted in Uncategorized | Leave a comment

Bending the faces of Vampires part 1

I don’t usually screw up a life cast, but when it does happen, it’s only fair to share.

I want to do a series of posts on a project I am doing based on a vampire design a good friend of mine supplied me with. 

Now, I am not a fan of vampires who cry about stuff, mope about looking miserable and look like they won’t tidy their bedroom.  I want my vampires to look like they take your blood cos they CAN.  So I am going to make one that looks like that.  And Dave is the man to be such a vampire.
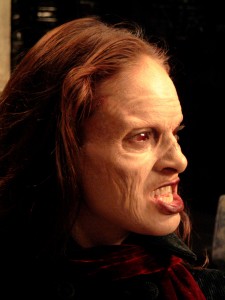
Mina Harker makeup for LXG. This was for Neill Gorton and I was helped in this speedy application in Prague by none other than Mark Coulier who - even though it wasn't his job - was happy to help me meet the crazy deadline.

I have only done one vampire in my life for actual an actual jobs – Mina Harker from LXG  which was fun….but I want to do something utterly disgusting and frightening.

So I chose Dave.  Sorry – not because he is utterly disgusting and frightening….no no no….but he has an expressive face and he is incredibly patient.

So naturally, I wanted a cast of a full head and shoulders which we duly did – the very capable Patt Foad and I set about baldcapping and bandaging the head as the pictures show.

I often use just bandage on the back of the head for a few reasons:

  1. There is no detail on there except wrinkled bald cap, so no need to waste extra alginate getting the detail of that only to shave it down later.
  2. It means the face is covered for less time, which generally is more comfortable for the subject, as they can see and speak while the back is done.
  3. It is easier to get off the head, as the two halves simply part easily.  Much less chance of splitting the alginate.

It does mean there is a thin seam around the head but this is easily removed once the plaster is made, so that doesn’t present too much of an issue.
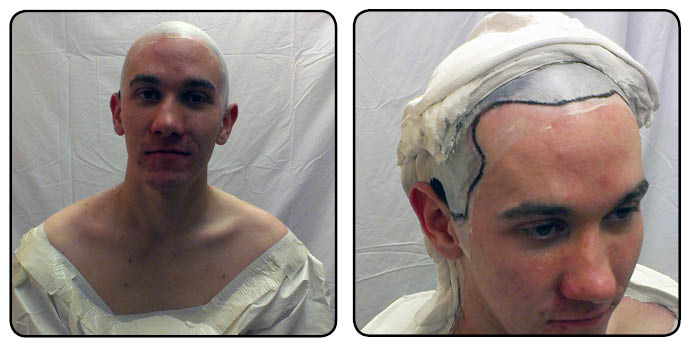
The front edge of the bandage is made into a nice chunky wall to keep it strong, and making it neat means the alginate we use on the face will butt up against it rather nicely.  I use Nivea face cream on there as a release rather than Vaseline as it is much nicer to remove, and less greasy.

It is important to not make the bandage too thick, as it gets warm when it sets (after about 5 minutes or so).  Making it four layers thick with a thicker rope or ‘rib’ around the edge keeps it strong while not being too thick everywhere.  That black line you can see is Dave’s hairline marked with an eyebrow pencil.  It will transfer onto the mould and onto the cast so we can mark the hairline for reference.
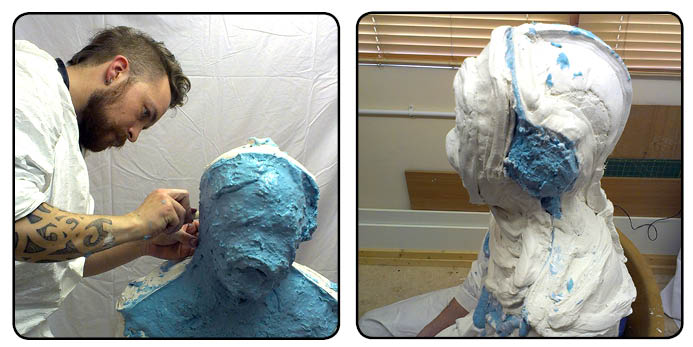
Patt goes to work cleaning back the alginate/bandage border. Note the ears are left uncovered by bandage, to help facilitate the removal round those pesky ears. These will be backed up with bandage once we reassemble the head - before we fill it with plaster!

Once the bandage is setup and some Nivea brushed over the edge (to help release it) alginate goes on the face.  You may have heard of straws being used in the nostrils, but that is not something I would advise.  If the straw get knocked, you’ll carve a groove into the nasal passage.  It distorts the natural nostril shape and if it became dislodged during the cast, it would be uncomfortable….no…don’t do it!

Much safer to do the nostrils first while they can still see and swear at you, and then proceed to do the rest of the face in alginate, safe in the knowledge the nostrils and all their glorious detail have already been taken care of.  Just have someone watching the nostrils the whole time that the alginate is still moving (in this case only about 3 minutes), and you should get a great cast of the nose and you won’t hurt your performer.  Bonus.

Incidentally, I also do the bandage around the nostrils first too – that way they are the hardest part.  When the front half of the mould goes down on a desk, it’ll most likely be the nose that hits it first so doing this ensure it it stronger than doing it last.

As soon as the bandage is set up (the last piece applied is allowed a few minutes to harden up just enough) we pop the head cast off.  The back comes off easily first, and as this was done first, is also the hardest part and pretty stable.  The front comes away okay, and I go to work filling the nostrils from the outside of the cast with abit of alginate.  This is to ensure that the plaster we are about to pop in the head doesn’t leak out of the nose.

It is also the point at which I unwittingly ballsed it up, as you will see.

When putting the head cast halves together, you need to make sure they join up correctly, and that the two halves are secured using more plaster bandage to keep them there.
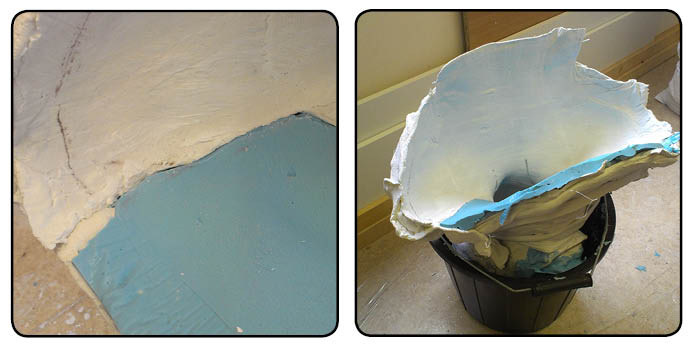
The pic to the left shows the nice join between the two materials - the plaster bandage back and the aginate front. To the right, the joined halves are placed in a bucket upside down, ready to be filled with plaster.

I filled the head with a mixture of a soft and hard plaster (Crystacal R and Fine Casting Plaster) so it was strong enough to preserve thin areas – such as ears – without snapping but soft enough for me to easily shave down the seam and air bubbles etc.  I leave the head for four hours to harden up and then rush back to see how it went.
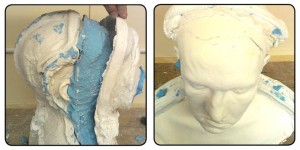
The head filled with plaster (left) opened up easily enough. Carefully removing the alginate from around the ears to ensure they don’t break. Ears are incredibly thin in places, and when made in plaster can break off if not careful. See how the nostrils and face has been pushed in and distorted on the left side as you look at the pic?

The ears are peeled off first carefully to make sure they don’t break…and if they did then at least keep the bits so they can be stuck back on again.  Upon removing the alginate from the face, it is obvious that the nose area has been distorted by me filling the nostrils badly.  Essentially, alginate crept in between the set alginate of the face and the bandage, causing it to lift away. D’OH!

I fume for a bit whilst checking everything else is okay.  Annoyingly it is, removing the justification for a whole other head cast.  I resolve to take another cast though, and because there is time to do it (and I don’t want to waste a lot of material) I think I will try and graft a new face cast onto the head rather than redo the whole thing.
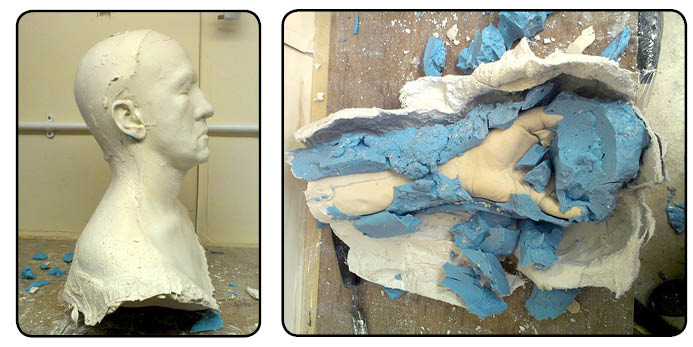
The minimal seam on the head was no problem. Just that sodding indented face. The hands came out fine...these were cast using a hard plaster to help the fingers not break off when taking the alginate off afterwards....a common occurrence when using a soft plaster. They can be reglued on, but who needs the hassle?

I will cover how this went in another post soon.  I am still working on it, and will show you the whole process – good and bad.

Happy life casting!

-Stuart

 All material, images and text © Stuart Bray 2012 unless otherwise stated
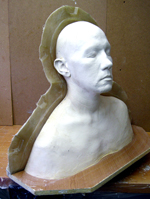
Posted in Uncategorized | 3 Comments

Bloated Corpse Prosthetic Sculpt

Bloated Corpse?  Next week you say?  Ok, I’ll get cracking then…

A few years back I made a prosthetic for a TV show and I documented the making of it with the intention of one day being able to edit it into something.  So here it is.

I was ably assisted in the final makeup and making by Edmund Woodward who is an exceptional talent, so when I refer to ‘we’, it is Ed to whom I am referring.  Thanks also to Waldo Mason who wafted the job my way.

Because I don’t have a radio voice, I have put togther a transcript with images to help anyone who wants to review it in more detail.  Download the transcript here (1mb)

Happy sculpting!

-Stuart


All material, images and text © Stuart Bray 2012 unless otherwise stated

Posted in Uncategorized | 1 Comment

IMATs 2012 makeup applied

SNOW.

That’s what most people will remeber most from the UK IMATS 2012.

But, I still had a fantastic time.  Despite getting stuck with no transport, sleeping on a grotty hotel room floor, shivering under a towel for a blanket in my clothes….

Paul gets his own back after sitting still for two hours...pic by Cerina Knott!

Paul gets his own back after sitting still for two hours...pic by Cerina Knott!

Seriously though, it was a blast.  The silicone bulgey-eye makeup went on well, and from other peoples videos I have seen on YouTube, Paul did a grand job of working the room with it.  It’s an odd thing, but you work hard to get a thing made, and then once you apply it, you are now out of the equation…your work is essentially done.  It’s now up to whoever is wearing it to do their thing and Paul doesn’t slack off in that department!  Apologies if you got chased.

I also did some Sculpt Gel demonstrations on the Mouldlife stand which was fun to do, and my thanks to everyone who stopped by to say hello.  I am always happy to chat and answer questions, and it was fun to speak with people from all over the world who had taken the trouble to travel over and say hi – a big thank you for coming.

Thanks too to Peter Tindall & Cerina Knott for these photos.  As usual I was too sticky, bloody and chatty to actually take any of my own and so relied on everyone else to be snapping away!  Cheers, guys!

Steve Adams during makeup application.  You can't actually see it 'cos it's on the other side of his face, so essentially what you have here is two grinning bald blokes.

Steve Adams during makeup application. You can't actually see it 'cos it's on the other side of his face, so essentially what you have here is two grinning bald blokes. Pic Pete Tindall.

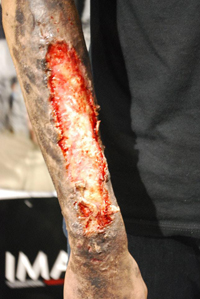
Steve with a 'Bond Villain' burn scar. Pic Pete Tindall.

Steve with a 'Bond Villain' burn scar. Pic Pete Tindall.

Mouldlife's Terry gets a scorched arm from a pot of Sculpt Gel! Get that in cold water, stat!


For those who couldn’t make it, I hope to see you at another show soon.  Incidentally, If anyone is near Düsseldorf, I will be speaking at the Makeup Artist Design Show on Saturday 10th March.

As usual, I will have a trusty pencil and pad with me ready to sketch out answers to any tech questions so feel free to get in touch.

-Stuart


All material, images and text © Stuart Bray 2012unless otherwise stated

Posted in Uncategorized | 1 Comment

IMATs 2012 makeup part 4

Huzzah!  First one out was a winner!

Well, after opening the mould this morning and finding that all went well, I am pleased to have got a successful piece out first time to use on Saturday!

I ripped off the bandage and clay from yesterday like a kid on Christmas morning, and washed the mould down before opening.  This ensures that no clay and plaster mess gets into the plastiline which I will scoop out and reuse another time.

Using a big screwdriver, I carefully levered the mould apart and hey-presto!

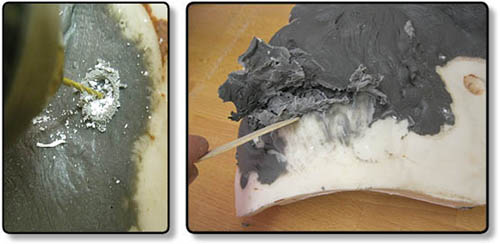
On thing that does need to be done before I clean the mould out is to drill the air-risers or bleeder holes for later (below left).  I use a 2mm drill bit for this, and drill all the way through the core.  Where it is too thick for that, I use a piece of hard piano wire which drills through this nicely.  These need to be set back from the edge so I do them now rather than when the mould is clean, when the edge of the sculpt is no longer visible.

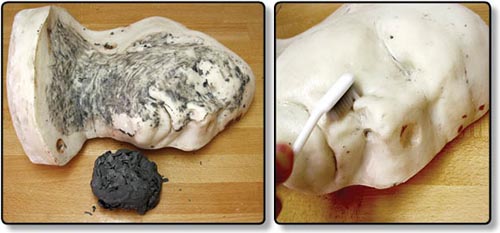
I use a wooden tool to scrape the plastiline off the core and out of the mould and then keep it all.  Once the bits scooped out are bundled into a ball like this (below left), it is much easier to estimate the volume of silicone I will need to fill this mould.

I clean the residue off using a cheap toothbrush and some lighter fluid (naphtha).  You could use a paint thinner such as turpentine substitute or white spirit but this is nice and quick, and easy to get hold of.

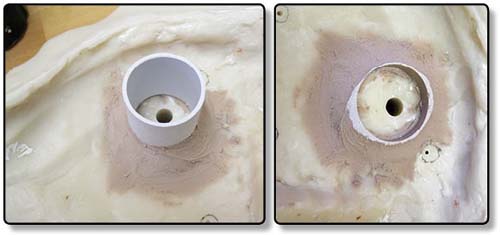
Once the mould is clean, I need to drill the injection hole in the core in order to get the silicone into the mould.  The ‘nipple’ left behind will be on the back rather than the front of the piece.  I will need a tube to come out the back of the mould too which will hold the silicone and act as a syringe.

Rather than have a permanent syringe sticking out the back, I make a little socket using car body filler to accommodate the tube.  This way I can add and remove the syringe when needed and it makes storage etc much easier.  Below you can see the socket with and without the tube.

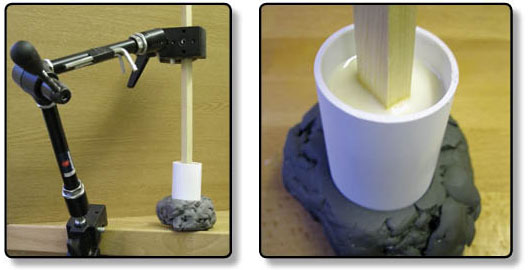
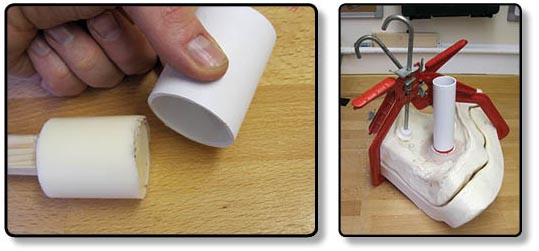
I also may need a plunger to force the silicone through and the easiest way to do that is to position a piece of wood in a small piece of tubing which has been waxed, and pour resin into it.  This will now be exactly the same bore as the tubing and using the ‘Magic Arm’ clamp, I can have a cup of tea while I wait for it to set.

(to see more on how I make a syringe like this, check out this video)

Below left you can see the small piece of tubing I used to make the plunger being removed.  I neaten up the end with a file so it is smoother and that puppy is ready for action!  The next pic is the mould assembled with tube and clamps all in place to check the fit and make sure nothing gets in the way – it’s looking promising.  It is important that none of the air-riser holes are blocked by the clamps.

I then add release to the mould using a mixture of water and washing-up liquid detergent and dry it using a hairdryer.  Then a good spray of Epoxy Parfilm release over this.  The silicone should peel away from the mould relatively easily with this lot.

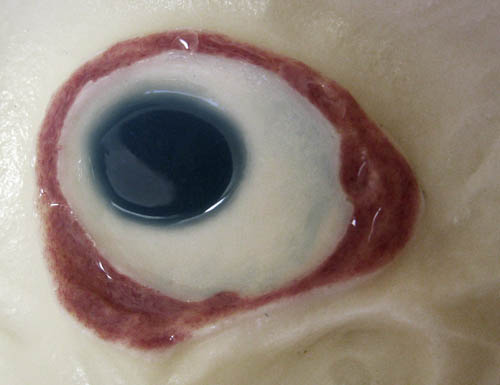
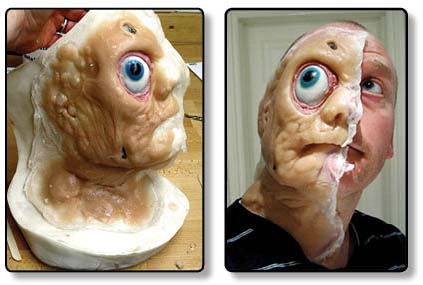
I mix colour into the silicone components I need (Part A, Part B and the Deadener) – I estimate I will require a 400g mix deadened to about 160% so it will be nice and squishy on the neck but I mix up enough for two runs in case the first one goes wrong!  Then I painted layers of coloured silicone into the eye from the back so it should come out nearly fully coloured (below).

You have to work in reverse so first the black pupil, then the blue cornea, then the pink eyelid and then the white of the eye last of all – allowing each layer to set before adding the next so they don’t smudge.  Then I use Platsil Gel 10 A&B to stipple a skin on the surfaces of both moulds and let them almost set before clamping the mould up tight.  There is no going back now.

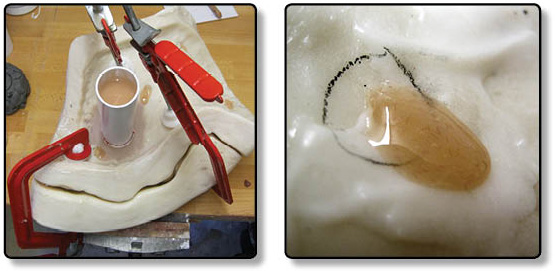
Below left is the assembled mould filled with silicone poured in right to the top of the tube.  The silicone should start to creep down as the cavity gradually fills (which it does, thankfully).  If it doesn’t flow fast enough, it could set before the mould has fully filled which is why I made a plunger, so I can speed things along if gravity alone isn’t up to the job!

Below right shows the risers bleeding silicone.  That means the silicone made it all the way to the edge.  I let them bleed for a few minutes and then block them with plastiline, and allow the silicone to cure for an hour.

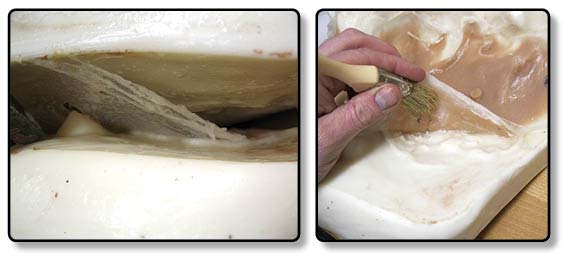
Using a screwdriver, I lever the mould open carefully using water to help reactivate the layer of washing-up liquid applied earlier to the mould halves.  Below left you can see the A&B skin coming away from the moulds nicely.  Then, I can carefully peel the piece out and hope for a good one.  You can make out the ‘nipple’ where the silicone went into the back on the pic below right – that little circle to the right in the middle.

…and it is grand!  There are a few little air bubbles but nothing major, and the eye has come out a treat.  I could have just painted everything in makeup when applying but it is nice to have the base colours in the silicone to start, and also the colours cannot rub off as they are part of the silicone and not applied to the surface.  I had to try it on, I’m afraid…

————————————————————-

I will be applying this to Paul on Saturday all being well.  If you are coming to IMATs then do pop over to the Mouldlife stand and say Hi, and get a pic for me working – I never get shots of me working as I am too busy getting covered it mess and trying to not screw things up!

Happy sticking!

-Stuart


All material, images and text © Stuart Bray 2012

Posted in Uncategorized | 14 Comments

IMATs 2012 makeup part 3

 Mould Time!  (or Mold Time if you are in the U.S.)

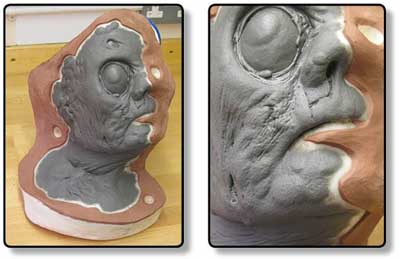
After the rapid sculpting days, last night I edged up the cutting edge and over flow as seen below.  I used Chavant Le Beu Touche as it is quite a bit softer than the plastiline I used to sculpt in and it means I could crank this out a bit quicker.  It took about an hour and a half to edge this fella up.

Note the three keys (the white circles in the red clay around the edge) which I cut out n a countersink bit in a drill.  I tool a bit of time with a tool shaving o the edges of the keys to round them off and make sure there were no undercuts to stop the mould from coming apart…we’ll see tomorrow morning if this was indeed done correctly! Ahem.  The main areas that might cause issues are the nostril and the lip, but we’ll see.

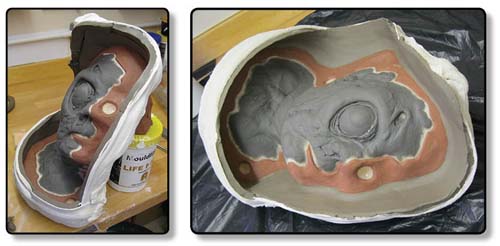
Then I made a clay wall around the edge to contain the resin while I swill the many layers that will make the mould strong enough.

The negative mould I used to make the core was kind of bowl shaped so quite easy to fill.  This on the other hand is a tad convex, so swilling is trickier.  It is a good idea to get some plastic on my nice workbench to stop the place from looking like the bottom of a birdcage.

Again, you can see the clay is supported by plaster bandage to keep it strong.  I will be rotating this mould a lot for an hour or more, so it needs to be strong enough.  Without the bandage, the clay would easily flop off and the resin would go everywhere.  Then I would cry the bitter tears of disappointment which I haven’t got time to do.


Then I give the mould a good spray with a mould wax to act as a release.  This will help ensure that the resin I swill in here doesn’t bond to the resin core which is exposed around the edge of the piece (that white coastline you can see there) and the drilled keys around the edge.

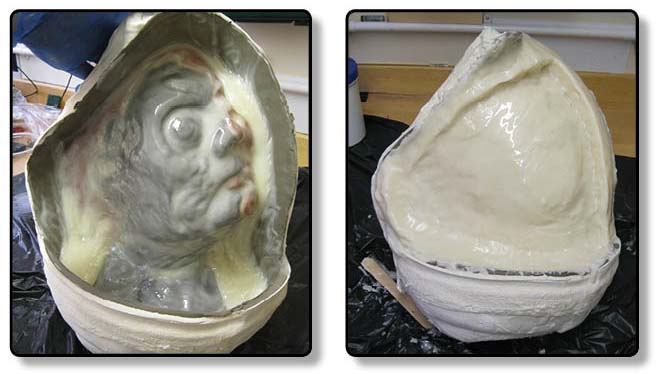
Once the wax has dried (the propellant and thinner used to enable a wax to get out of the can needs to have evaporated) then I mix up a mix of resin (about 300ml) and swill everywhere carefully trying to not trap air bubbles n the deep areas (below left).  Over about ten such layers, I build up a nice thickness.  I allow each to set before applying the next, and it takes about an hour and a half to do all this.

The resin gets warm as it sets so I need to allow this block of plastic to cool down for a few hours until I can open it.  I’m off out to watch The Iron Lady tonight and see Mark Coulier’s fab makeups in action on a big screen and I will open this mould first thing tomorrow and – fingers crossed – have some pics of a good, functioning mould to show you!

Thanks for your time!

-Stuart


All material, images and text © Stuart Bray 2012

Posted in Uncategorized | 8 Comments

IMATs makeup part 2

Sculpt done!

Today went really well. I had some great suggestions, and it was really nice getting feedback and hearing ideas so thanks for that.

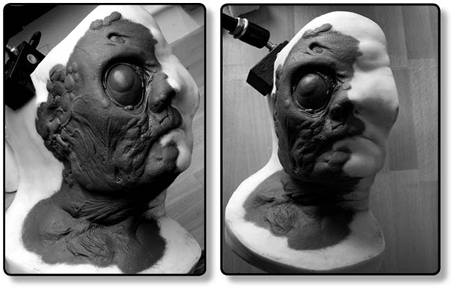
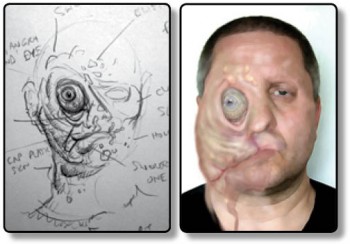
I decided to go for a more buggy-infected look so there will be an antennae thingey coming out the head, some cracked/splitting skin and there will be oozing from the eye and other areas, so thanks for that!

I decided to turn them B&W as I think it makes it easier to see the form rather than colour which can be distracting.
There will be oozing from that eye and the flabby neck should be nice and squishy.


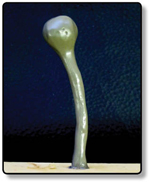
I think the quickest way for the antennae was to make a quick wire armature, and sculpt a snail-like eye on a stalk.  The plan is then to just coat this with a few layers of latex to make a hollow sock of latex which should sit nicely on a wire armature I will make.
This will just be some wire glued onto a plastic plate which I will then stick onto Paul’s head to support it. (If that’s okay Paul?)

Just need to do all the edging up tomorrow and make the mould.  I will let you know how it is progressing!

Thanks for looking!

-Stuart


All material, images and text © Stuart Bray 2012

Posted in Uncategorized | 3 Comments

IMATs 2012 makeup

Well, IMATs is nearly here again, and I do love a deadline!

Anyone who got in touch recently got a hasty ‘Can’t talk, I’m editing‘ response as I have been knee deep in fixing up the Spectacular Sculpt Gel DVD which I will go more into in another post. 

However, I bounced straight out of that deadline into another self-inflicted one.  I decided to crank out a quick makeup for the show (I’ll apply Saturday, all being well) and figured the best way to keep myself committed was to tell everyone about it so they could follow and remind me to focus if they see me on Facebook!

Anyhow, I will be sticking on a big bug-eye thing onto Paul Ewen who, patient as ever (he wore the Coraline makeup too) will be lurching around looking menacing.

I sketched out a rough idea and then did a quick Photoshop render just to see how it looks (left).
It is constantly changing as these things do, largely because I am just doing it for a bit of fun and also, there is no brief other than the first idea that popped into my head.

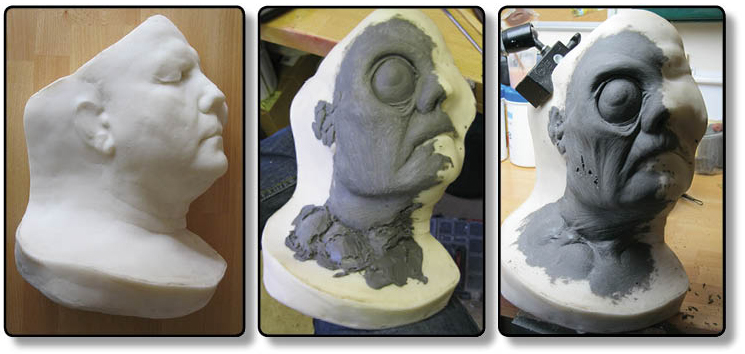
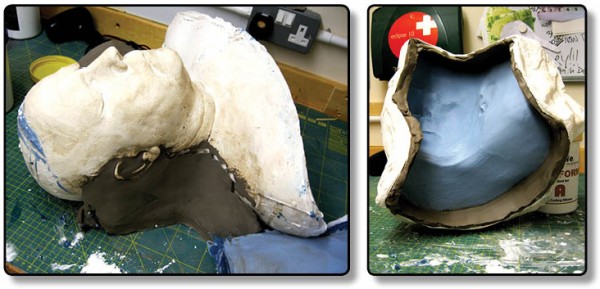
Pushed for time, I cranked out a core mould and made a quick core this weekend.  I had just enough lifecasting silicone, some plaster bandage and some urethane resin to make the core.  In the pics below, you can see the plaster head which has been modified to take out the undercuts around the ears and the other side of the nose.

I then made  a quick silicone mould and made a plaster bandage jacket to support it.  Then I made a clay wall around the edge of that so I could swill the urethane resin without it running over the sides, and support the clay with bandage too. This just makes it a stronger wall which I know will not break off or leak while I concentrate of filling the mould.


It took about an hour and a half to make the core mould, and then about an hour to swill the silicone with about seven mixes of urethane. I also used a filler to bulk out the last few layers so it became like a paste and I could model the back into a strong shape.  The core is about 25mm/1″ thick with chunky edges.  If I drop this, it will break the floor.

You can see on the pic below right that the clay came off and stayed with the resin core, but peels off easy and I rinse this baby in water to get the fella clean and baptised, ready for sculpting!

And so onto sculpting.  Today I roughed out the shapes and started refining but I noticed it is a good deal leaner than the Photoshop design, and I kind of like the bulginess of it.  I may have to change it tomorrow…and tomorrow is all I got as it needs to be moulded on Wednesday and cast out on Thursday!!!

I am not sure what to think, but comments are welcome.  Let’s just recap – time spent so far…idea Friday night, core mould and core made over weekend – probably about three hours time total so far – and today (Monday, January 30th) I spent probably three hours sculpting.

I will post again tomorrow with updates and you will hopefully see a finished sculpt!  And very hopefully, you can come and see me at IMATs sticking the thing on.  Hopefully everything between now and then will work perfectly!

-Stuart


All material, images and text © Stuart Bray 2012

Posted in Uncategorized | 27 Comments