Huzzah! First one out was a winner!
Well, after opening the mould this morning and finding that all went well, I am pleased to have got a successful piece out first time to use on Saturday!
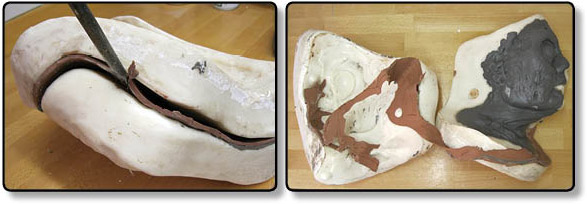
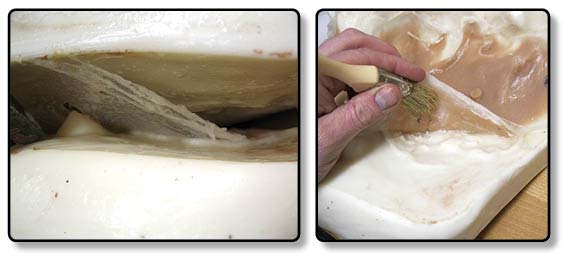
I ripped off the bandage and clay from yesterday like a kid on Christmas morning, and washed the mould down before opening. This ensures that no clay and plaster mess gets into the plastiline which I will scoop out and reuse another time.
Using a big screwdriver, I carefully levered the mould apart and hey-presto!
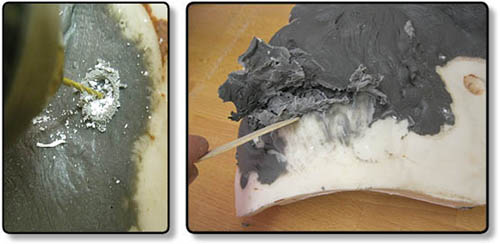
On thing that does need to be done before I clean the mould out is to drill the air-risers or bleeder holes for later (below left). I use a 2mm drill bit for this, and drill all the way through the core. Where it is too thick for that, I use a piece of hard piano wire which drills through this nicely. These need to be set back from the edge so I do them now rather than when the mould is clean, when the edge of the sculpt is no longer visible.
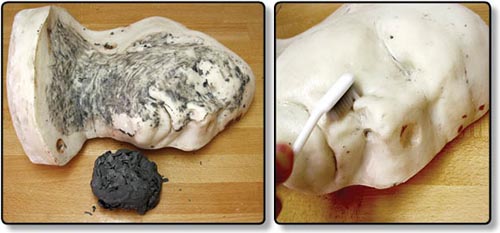
I use a wooden tool to scrape the plastiline off the core and out of the mould and then keep it all. Once the bits scooped out are bundled into a ball like this (below left), it is much easier to estimate the volume of silicone I will need to fill this mould.
I clean the residue off using a cheap toothbrush and some lighter fluid (naphtha). You could use a paint thinner such as turpentine substitute or white spirit but this is nice and quick, and easy to get hold of.
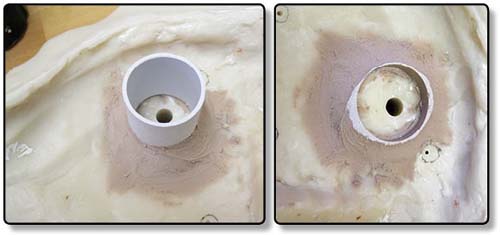
Once the mould is clean, I need to drill the injection hole in the core in order to get the silicone into the mould. The ‘nipple’ left behind will be on the back rather than the front of the piece. I will need a tube to come out the back of the mould too which will hold the silicone and act as a syringe.
Rather than have a permanent syringe sticking out the back, I make a little socket using car body filler to accommodate the tube. This way I can add and remove the syringe when needed and it makes storage etc much easier. Below you can see the socket with and without the tube.
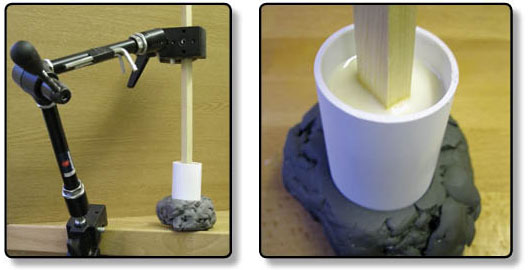
I also may need a plunger to force the silicone through and the easiest way to do that is to position a piece of wood in a small piece of tubing which has been waxed, and pour resin into it. This will now be exactly the same bore as the tubing and using the ‘Magic Arm’ clamp, I can have a cup of tea while I wait for it to set.
(to see more on how I make a syringe like this, check out this video)
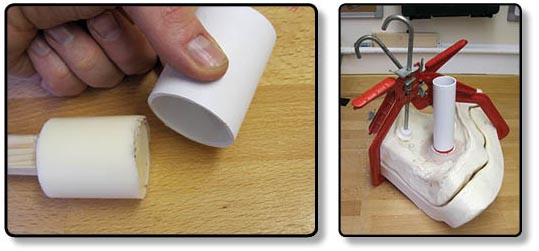
Below left you can see the small piece of tubing I used to make the plunger being removed. I neaten up the end with a file so it is smoother and that puppy is ready for action! The next pic is the mould assembled with tube and clamps all in place to check the fit and make sure nothing gets in the way – it’s looking promising. It is important that none of the air-riser holes are blocked by the clamps.
I then add release to the mould using a mixture of water and washing-up liquid detergent and dry it using a hairdryer. Then a good spray of Epoxy Parfilm release over this. The silicone should peel away from the mould relatively easily with this lot.
I mix colour into the silicone components I need (Part A, Part B and the Deadener) – I estimate I will require a 400g mix deadened to about 160% so it will be nice and squishy on the neck but I mix up enough for two runs in case the first one goes wrong! Then I painted layers of coloured silicone into the eye from the back so it should come out nearly fully coloured (below).
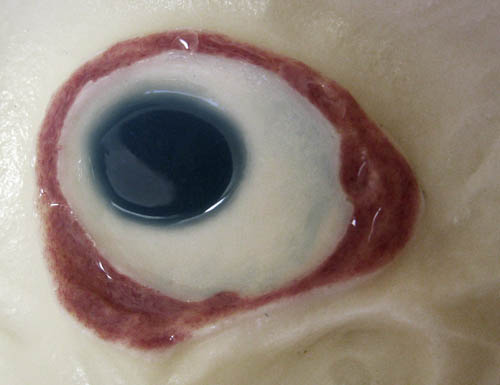 You have to work in reverse so first the black pupil, then the blue cornea, then the pink eyelid and then the white of the eye last of all – allowing each layer to set before adding the next so they don’t smudge. Then I use Platsil Gel 10 A&B to stipple a skin on the surfaces of both moulds and let them almost set before clamping the mould up tight. There is no going back now.
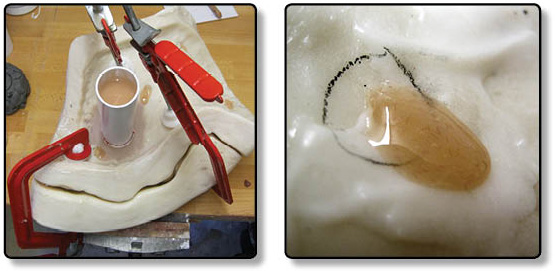
Below left is the assembled mould filled with silicone poured in right to the top of the tube. The silicone should start to creep down as the cavity gradually fills (which it does, thankfully). If it doesn’t flow fast enough, it could set before the mould has fully filled which is why I made a plunger, so I can speed things along if gravity alone isn’t up to the job!
Below right shows the risers bleeding silicone. That means the silicone made it all the way to the edge. I let them bleed for a few minutes and then block them with plastiline, and allow the silicone to cure for an hour.
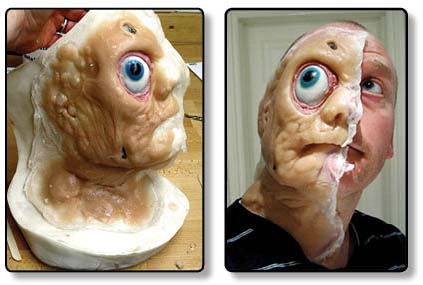
 Using a screwdriver, I lever the mould open carefully using water to help reactivate the layer of washing-up liquid applied earlier to the mould halves. Below left you can see the A&B skin coming away from the moulds nicely. Then, I can carefully peel the piece out and hope for a good one. You can make out the ‘nipple’ where the silicone went into the back on the pic below right – that little circle to the right in the middle.
 …and it is grand! There are a few little air bubbles but nothing major, and the eye has come out a treat. I could have just painted everything in makeup when applying but it is nice to have the base colours in the silicone to start, and also the colours cannot rub off as they are part of the silicone and not applied to the surface. I had to try it on, I’m afraid…
I will be applying this to Paul on Saturday all being well. If you are coming to IMATs then do pop over to the Mouldlife stand and say Hi, and get a pic for me working – I never get shots of me working as I am too busy getting covered it mess and trying to not screw things up!
Happy sticking!
-Stuart
All material, images and text © Stuart Bray 2012

Fantastic : )
Looks great, hope to see pic’s of you blending prosthetic piece to face.
As always, keep us up to date
Thank You
John in Northern, Ca.
That is cooler than beans, dude look forward to seeing in the flesh on Saturday.Wish I had time to of made somthing up for show and tell, but there is always next year.
You are greet ,I hoped you are win
Oh Stu! this is remarkable, I hope I could be at least know half of what you do in my career, astounding! it’s soo cool, and eerily adorable!
GOOD JOB!
nota 10 , muito bom fantástico….
Very nice!Sorry missing Imats.Looking forwards to se som fotos.Have a good time
This is fab im loving ur posts
Hi Stuart! That’s a cool prosthetic! I’ll be there on saturday! Thanks for sharing your work!!
I’m excited for this piece it looks great!!
fantastic
I cant wait to see you in action on saturday!!
Stooo! This is wicked! Thanks for putting it up. Am gutted to say I’m missing imats this year, will you be putting up pics of it applied?xx
But of course!